Luet oppimateriaalin englanninkielistä versiota. Mainitsit kuitenkin taustakyselyssä
osaavasi suomea. Siksi suosittelemme, että käytät suomenkielistä versiota, joka on
testatumpi ja hieman laajempi ja muutenkin mukava.
Suomenkielinen materiaali kyllä esittelee englanninkielisetkin termit.
Kieli vaihtuu A+:n sivujen yläreunan painikkeesta. Tai tästä: Vaihda suomeksi.
Scala Reference
After studying the actual chapters of O1’s ebook and then
turning to a programming problem, you may find yourself thinking “How was I supposed
to write that thing again?” When that happens, you may want to check this page.
The sections below summarize selected features of the Scala language and its standard
libraries. There are short, isolated examples of each feature.
The reference doesn’t cover the entire Scala language; it focuses on topics that are
covered in O1. In addition to standard Scala constructs, a few of the main tools in
O1’s own auxiliary library are included.
This appendix of the ebook is just a list of tools. It won’t teach you any principles,
or concepts, nor will it tell you what you may want to use all these constructs for;
those are the sorts of things that you can learn in the ebook proper. The ordering of
the sections on this page is not identical to the order in which the constructs appear
in the ebook chapters.
In the long run, you’ll probably want to learn to read Scala’s own
documentation, but some of
it is hard for a beginner programmer to make sense of.
If you wanted to find something on this page that isn’t here, you can
let us know through the feedback form at the bottom of the page or
directly via email to juha.sorva@aalto.fi.
You may mark a data type on the variable explicitly, as shown below, but due to Scala’s
type inference, you often don’t need to:
val anotherVariable: Int = 200anotherVariable: Int = 200
You can use a variable’s name as an expression. Such an expression can be part of a
longer expression:
myNumberres10: Int = 100
myNumber + anotherVariable + 1res11: Int = 301
You can use val or var to define a variable. The value of a val never changes, but
the value of a var may be assigned a new value, which replaces the old one:
var changeable = 100changeable: Int = 100
changeable = 150changeable: Int = 150
changeable = changeable + 1changeable: Int = 151
The command just above assigns the variable a new value that is obtained
from the variable’s old value with a simple computation. There is
a shorthand for such commands, which combines the assignment with the
arithmetic operator (Chapter 4.1):
changeablechangeable: Int = 151
changeable += 10changeable -= 100changeable *= 2changeablechangeable: Int = 122
Comments
Program code may contain comments, which don’t affect the program’s behavior
(Chapter 1.2).
// This is a single-line comment. It starts with a couple of slashes and runs until the end of the line.valmyVariable=100// You can follow a line of code with a comment./* A comment like this, which starts with a slash and an asterisk, may be split over multiple lines of code. The comment ends in the same characters in reverse order. */
An initial /** marks a documentation comment (Chapter 3.2):
/** This description of the variable below will appear in the documentation. */valmyText="I have been documented."
The Scaladoc tool extracts such comments from Scala code and uses them in the documents
that it creates.
Packages and Libraries
Using packages
When you want to use one of the tools (functions, classes, etc.) from Scala’s standard
library (Chapter 3.2) or from some other package, you can prefix the tool’s name
with the name of the package. Here, we access the abs function in package scala.math
to compute an absolute value:
scala.math.abs(-50)res12: Int = 50
Since the contents of the package scala are always available in all Scala programs,
we’re allowed to leave out the first bit and just refer to the subpackage math:
math.abs(-50)res13: Int = 50
The universal package scala contains basic data types such as Int and Double,
collection types such as Vector and List, and the output function println. You
can use these tools without specifying the package. For instance, even though you
could write scala.Int, you don’t have to.
To avoid having to write a package name repeatedly, you can import:
importing from a package
You can import the tools you need from a package (Chapter 1.6):
import scala.math.absabs(-50)res14: Int = 50
abs(100)res15: Int = 100
Now we don’t need the package name.
This gives us access to all the tools in the package:
import scala.math.*
It’s common to write import statements at the top of the code file, which makes the
imported tools available within the entire file. You can also import within a specific
context; for example, starting a function body with an import brings the imported tools
into that function only.
Defining a package
You can sort your own code in packages by marking the package at the top of each file
(Chapter 2.6). Here’s an example:
packagemystuff.subpackage.subsubpackage
You then need to store these files in nested folders so that the folder names match the
packages.
Commonly used functions from scala.math
A few frequently used functions from scala.math:
import scala.math.*val absoluteValue = abs(-50)absoluteValue: Int = 50
val power = pow(10, 3)power: Double = 1000.0
val squareRoot = sqrt(25)squareRoot: Double = 5.0
val sine = sin(1)sine: Double = 0.8414709848078965
val greaterNumber = max(2, 10)greaterNumber: Int = 10
val lesserNumber = min(2, 10)lesserNumber: Int = 2
In the same package, you’ll find other trigonometric functions (cos, atan, etc.),
cbrt (cubic root), hypot (hypotenuse of two given legs), floor (rounding down),
ceil (rounding up), round (rounding to nearest integer), log and log10 (logarithms).
The complete list is in Scala’s documentation.
The other sections on this page introduce contents from the Scala API’s other packages as
appropriate for each topic.
The text console: println, readLine
You can use println to generate a custom printout in the text console or the REPL:
println(100 + 1)101
println("llama")llama
Below are a few examples of reading keyboard input in the text console (Chapter 2.7).
These examples assume an earlier importscala.io.StdIn.*.
println("Please write something on the line below this prompt: ")valtextEnteredByUser=readLine()
If you don’t want a line break between the prompt and the input, you can use print instead:
print("Please write something after this prompt, on the same line: ")valtextEnteredByUser=readLine()
This does the same thing:
valtextEnteredByUser=readLine("Please write something after this prompt, on the same line: ")
readLine returns a String. You can also read an input and immediately interpret it as
a number:
valintInput=readInt()valdoubleInput=readDouble()
These two last commands cause a runtime error if the characters in the input don’t correspond
to a valid number.
The usual indentation is two spaces wide, as shown here, but the
main thing is to indent consistently.
The expression that is evaluated last determines the function’s
return value.
If the function is an effectful one, it’s customary to indent its
body in that fashion even if the body consists of just a single line; see
the style guide.
You’re free to write an end marker at the end of a multiline function:
In all of the examples above, we left the function’s return type implicit, which we can
do because of type inference. But we may choose to explicitly mark the return type
(Chapter 1.8), as shown here:
defaverage(first:Double,second:Double):Double=(first+second)/2defreturnStandardText:String="Calling returnStandardText always yields this string."
In certain contexts, an explicit return type annotation is mandatory. Primarily, this
happens when a function calls a function of the same name; that is, the function calls
either:
another function with the same name but different parameters
(when overloading a name; Chapter 4.1); or
It’s possible (but not usual in Scala) to explicitly instruct a function
to return a value. The return command (Chapter 9.1) interrupts the
function call and returns a value.
We follow the object keyword with a name that we’ve chosen for
our object, which is in turn followed by a colon. (No equals sign
here.)
Indentations mark which constructs are part of the object.
It’s often a good idea to conclude the definition with an end marker.
The end marker is not compulsory, but it serves to clarify code like
this, which contains blank lines in the middle (see style guide.
Variables store data associated with the object. Some of the
variables may be immutable (val) and others mutable (var).
Methods are functions that are attached to objects.
Each method definition starts with def.
The this keyword refers to the object itself: the object whose
method is being executed. For instance, the value of this.name
is the value of the object’s own name variable. (It’s not
strictly necessary to always include the word this in all such
expressions; see Chapter 2.2.)
employee.raiseSalary(1.1)employee.ageInYear(2024)res19: Int = 59
Package-like objects and import
It is possible to use a singleton object as a package-like container
from which you can import assorted tools such as functions, classes,
and other objects (Chapter 5.3). Here’s an example:
The functions are defined in an object named
experiment, which we intend to use as a
“package-like object”.
Here, we’ve defined experiment in the mystuff
package. In a sense, this turns experiment into
a subpackage of mystuff.
The above code needs to be stored within a folder named mystuff;
the file could be named experiment.scala, for instance. We can
now import the tools in our object:
import mystuff.experiment.*doubled(10)res20: Int = 20
tripled(10)res21: Int = 30
There’s nothing unusual about the experiment singlaton as such,
compared to other singleton objects. We simply decided to use it
much as we’d use a package and to import its contents.
Launching an Application
O1 introduces two different ways to define where a program run should begin: main
functions and app objects. The former is more versatile in certain ways and tends to
be recommended, but for our purposes both work well enough; we use app objects in some
programs and main functions in others.
Launching programs with a @main function
A main function (Chapter 2.7) is a function that
serves as an application’s entry point:
@maindeflaunchMyTestProgram()=println("These lines of code are executed when the application is launched.")println("This simple app does nothing more than print out these lines of text.")println("In a richer app, we could invoke other program components here.")
The @main annotation indicates that this otherwise ordinary
function is a main function.
You cannot annotate any old function with @main: the function needs to be defined
at the “top level” within a package, or it needs to be a method on a singleton object. (A
class’s method cannot be marked as @main because you need to create an instance of the
class before you can call such a method, and no instance is available at launch time.)
Launching programs with an App object
An app object (Chapter 2.7) is a singleton object that serves as an application’s entry
point:
objectMyTestProgramextendsApp:println("These lines of code are executed when the application is launched.")println("This simple app does nothing more than print out these lines of text.")println("In a richer app, we could invoke other program components here.")
extendsApp makes this an app object. (To be more precise, it
makes our object a special case of the App trait; see Traits,
further down.)
Classes (and more about objects)
Defining a class
Here is an example class from Chapter 2.4; it represents employees. Each instance of
this class is a distinct object of type Employee and has its own attributes:
classEmployee(nameParameter:String,yearParameter:Int,salaryParameter:Double):varname=nameParametervalyearOfBirth=yearParametervarmonthlySalary=salaryParametervarworkingTime=1.0defageInYear(year:Int)=year-this.yearOfBirth// Etc. Other methods go here.endEmployee
The keyword class precedes the class name. Class definitions,
just like singleton objects, feature a colon, indentations,
and an optional end marker.
Constructor parameters: when we instantiate this class, we need
to pass in a name, a year, and a salary.
The code located inside the class but outside the method
definitions serves as a constructor: it initializes each
new instance. Here, we assign values to the object’s
instance variables, taking most of those values from the
constructor parameters. However, we set the working time of
any new Employee object as 1.0, independently of any
parameters.
Method definitions in a class work just like they work in
singleton objects. In a class, too, this refers to the specific
object that runs the method. For instance, ageOfYear computes
an employee’s age from the yearOfBirth of whichever Employee
object we invoke ageOfYear on.
There is a more compact notation for class definitions (Chapter 2.4):
classEmployee(varname:String,valyearOfBirth:Int,varmonthlySalary:Double):varworkingTime=1.0defageInYear(year:Int)=year-this.yearOfBirth// Etc. Other methods go here.endEmployee
We’ve combined the definitions of three instance
variables and the three constructor parameters from
which the instance variables receive their values.
The fourth instance variable doesn’t receive a value
directly from a constructor parameter. We define it
separately, as before.
Creating and using instances
We can use the above Employee class as shown below (Chapter 2.3):
To instantiate the class, we write its name, followed by
values for the constructor parameters in round brackets.
(If the class takes no constructor parameters, write
an empty pair of brackets after the class name.)
The expression’s value is a reference to a new object:
an instance of the class.
We can store such a reference to a newly created object in a variable. Then we can use
the variable’s name to access the object:
classPerson(valname:String):defsay(sentence:String)=this.name+": "+sentencedefreactToKryptonite=this.say("What an odd mineral.")
A regular Person doesn’t know how to fly, but the following special person does.
Moreover, one of its methods works differently than the same method on other person
objects.
We define a singleton object as per usual, except that we mark
that this object is a specific sort of person. On the lines that
follow, we tailor this object’s behavior.
This special person has fly as an additional method.
The other object-specific method replaces the more generic
definition in the Person class, which we need to mark with
the override keyword.
Basic types such as Int, Double, and String are classes, too, and the operations
defined on them are methods (Chapter 5.2). For instance, when we use the + method
to add two numbers, it’s possible to use dot notation:
1.+(1)res24: Int = 2
The more familiar expression 1+1 also works: when a method takes exactly one parameter,
we can opt to use operator notation and omit the dot and the brackets. This also works on
methods that we wrote ourselves:
justHired ageInYear 2024res25: Int = 39
However, operator notation is generally best reserved for methods with symbolic names
(such as +).
Image Manipulation with O1Library
The IntelliJ module O1Library is a software library that has been designed for
O1 and that we use frequently. It contains an assortment of tools for graphical programming,
among other things.
The relevant contents of O1Library are introduced in various chapters of the ebook; you
can also look at the module’s documentation. What appears below is a short
summary of some of the features you’re most likely to need in O1:
Colors: o1.Color
The Color class represent colors (Chapter 1.3). The o1 package provides many specific
instances of this class as constants:
import o1.*Redres26: Color = Red
RoyalBlueres27: Color = RoyalBlue
You can also define a color as a combination of its RGB components (Chapter 5.4).
Each component is a number between 0 and 255, inclusive. Below, we create a fairly
bright color that is especially high in red and blue:
val preciselyTheColorWeWant = Color(220, 150, 220)preciselyTheColorWeWant: Color = Color(220, 150, 220)
You can access the color’s individual components:
preciselyTheColorWeWant.redres28: Int = 220
RoyalBlue.blueres29: Int = 225
In addition to their R, G, and B components, colors have an opacity value (sometimes
called the alpha channel):
Red.opacityres30: Int = 255
val translucentRed = Color(255, 0, 0, 100)translucentRed: Color = Color(255, 0, 0, opacity: 100)
A color with an opacity of only a hundred
is fairly translucent. An opacity of zero
would have made it completely transparent;
An opacity of 255 means the color is ompletely
opaque, which is the default.
Locations: o1.Pos
The class o1.Pos represents locations in a two-dimensional coordinate system
(Chapter 2.5).
val first = Pos(15.5, 10)first: Pos = (15.5,10.0)val second = Pos(0, 20)second: Pos = (0.0,20.0)
A Pos object is essentially a pair of coordinates,
each of which is a Double.
val distanceAlongX = second.xDiff(first)distanceAlongX: Double = 15.5
val distanceAlongY = second.yDiff(first)distanceAlongY: Double = -10.0
val distanceAsCrowFlies = first.distance(second)distanceAsCrowFlies: Double = 18.445866745696716
val aBitToTheRight = first.addX(1.5)aBitToTheRight: Pos = (17.0,10.0)
val adjustedBoth = aBitToTheRight.add(10, -5)adjustedBoth: Pos = (27.0,5.0)
None of the above methods changes the existing Pos objects; neither does any other
method. The add method, for example, doesn’t modify the existing Pos but generates
a new one. Pos objects are immutable.
You can load an image from a file or a network address (Chapter 1.3):
val loadedFromFileInModule = Pic("face.png")loadedFromFileInModule: Pic = face.png
val loadedFromAbsoluteFilePath = Pic("d:/kurssi/GoodStuff/face.png")loadedFromAbsoluteFilePath: Pic = d:/kurssi/GoodStuff/face.png
val loadedFromTheNet = Pic("https://en.wikipedia.org/static/images/project-logos/enwiki.png")loadedFromTheNet: Pic = https://en.wikipedia.org/static/images/project-logos/enwiki.png
The file you load may be within the same IntelliJ module
as the code, in the pics folder of the O1Library
module, or somewhere else in the program’s classpath.
To display an image, you can use o1.show or the method of the same name on Pic objects:
show(loadedFromTheNet)loadedFromTheNet.show()
There are several functions available that generate images of geometric shapes. Here are
a few examples:
val myCircle = circle(250, Blue)myCircle: Pic = circle-shape
val myRectangle = rectangle(200, 300, Green)myRectangle: Pic = rectangle-shape
val myIsoscelesTriangle = triangle(150, 200, Orange)myIsoscelesTriangle: Pic = triangle-shape
val myStar = star(100, Black)myStar: Pic = star-shape
val myEllipse = ellipse(200, 300, Pink)myEllipse: Pic = ellipse-shape
The Pic methods that combine images by placing them relative to each other (Chapter 2.3)
see a lot of use in O1. Here are some examples:
val circleBesideRect = myCircle.leftOf(myRectangle)circleBesideRect: Pic = combined pic
val circleBelowRect = myCircle.below(myRectangle)circleBelowRect: Pic = combined pic
val circleInFrontOfRect = myCircle.onto(myRectangle)circleInFrontOfRect = combined pic
The methods don’t modify any existing image; they create new Pic objects.
You can also place an image against a background image (Chapter 2.5):
val littlePic = rectangle(10, 20, Black)littlePic: Pic = rectangle-shape
val littlePicAgainstBg = myRectangle.place(littlePic, Pos(30, 80))littlePicAgainstBg: Pic = combined pic
val withAnAddedCircle = littlePicAgainstBg.place(myCircle, Pos(150, 150))withAnAddedCircle: Pic = combined pic
We must inform place where in the background image it should
place the front image. Here, we do that by passing in a pair of
coordinates (in which x grows rightwards and y downwards). The
front image’s middle will appear at those coordinates in the
combined image.
The largish circle doesn’t entirely fit against the background.
place discards the part that doesn’t fit from the result.
Here is a partial list of the methods available on Pic objects:
Placement on a single plane: above, below,
leftOf, rightOf (Chapter 2.3).
Placement in front of and behind: onto, against,
place (Chapters 2.3 and 2.5).
Placement using anchors (e.g., “Put the top-left corner of this
pic at the center of that pic’s top edge.”): see the end of
Chapter 2.5.
In addition to Color, Pos, and Pic, the o1 package contains other
tools that are useful for creating graphical programs. In particular:
The class view View provides a framework for writing GUIs.
See the section Graphical User Interfaces further down on this
page.
The class Direction represents (arbitrary) directions in a
two-dimensional, Pos-based coordinate system (see Chapters 3.6
and 4.4 and the docs).
The class Grid represents two-dimensional grids of elements
(Chapter 8.1; Scaladocs). It’s works in
combination with two additional classes:
class GridPos, which represents locations
on a grid (Chapters 6.3 and 8.1; Scaladocs); and
class CompassDir, which represents the main
compass directions in a grid-based coordinate
system (Chapter 6.3; Scaladocs).
The class Anchor represents “anchoring points” of images within
other images and can make it easier to lay out Pics relative
to each other (Chapter 2.5; Scaladocs).
Truth Values
The Boolean type
You can represent truth values with the Boolean data type (Chapter 3.3). There are
exactly two values of this type, true and false, each of which has its own Scala
literal.
The operators && and || are non-strict: if the subexpression on the left is enough
to determine the value of the entire logical expression, the subexpression on the right
isn’t evaluated at all:
The following example function has the return type Option[Int] (Chapter 4.3). The
function either divides two numbers and returns the result wrapped in a Some object,
or returns None in case the operation is impossible:
var test: Option[String] = Nonetest: Option[String] = None
test = Some("like it hot")test: Option[String] = Some(like it hot)
A variable of type Option[String] can refer either to
the singleton object None — in which case there is no
string there — or a Some object that contains a string.
In the square brackets we put a type parameter. This
type parameter indicates the type of the value that may
or may not be present in the Option wrapper.
If we were to omit the type annotation, the computer
wouldn’t be able to tell which sort of Option we’d like
as the type of test.
Scala makes it possible to use the null reference instead of Options. It is, however,
highly unadvisable that you do so (Chapter 4.3).
Methods on Option objects
The methods isDefined and isEmpty check whether an Option wrapper is full or empty:
getOrElse returns the value stored in an Option wrapper. When we call it, we need to
pass in a parameter expression that determines what the method should return in case the
wrapper is empty:
wrappedNumber.getOrElse(12345)res56: Int = 100
None.getOrElse(12345)res57: Int = 12345
The similar method orElse returns the Option object itself, in case it’s a Some,
and the value of the method parameter in case the Option is None. That is, the
difference to getOrElse is that orElse doesn’t unwrap the value:
The following are also useful for working with Options:
the selection command match, discussed soon below; and
various higher-order methods, which are discussed further
down on this page at Option as a collection.
Selection: if and match
Selecting with if
The if command (Chapter 3.4) evaluates a conditional expression that evaluates to
true or false, then selects one of two options on that basis:
val number = 100number: Int = 100
if number > 0 then number * 2 else 10res60: Int = 200
if number < 0 then number * 2 else 10res61: Int = 10
The conditional expression is written between two keywords: if
and then. You may use any Boolean expression as a condition.
You can use an if expression as you assign to variables or pass parameters to functions:
val selected = if number > 100 then 10 else 20selected: Int = 20
println(if number > 100 then 10 else 20)20
When a branch of an if contains multiple commands, you need to split the branch across
multiple lines and indent it appropriately (and it’s customary to do that anyway for
effectfulifs; see the style guide):
if number > 0 then
  println("The number is positive.")
  println("More specifically, it is: " + number)
else then
  println("The number is not positive.")The number is positive.
More specifically, it is: 100
When all you want to do is to cause an effect in case the condition is true — and
nothing otherwise — you can omit the else:
if number != 0 then
  println("The quotient is: " + 1000 / number)
println("The end")The quotient is: 10
The end.
The final println isn’t part of the if; it follows the if.
This is why the above program always finishes with "Theend",
no matter whether number holds zero or not. If number had been
zero, that would have been the program’s only output.
Combining ifs
One way to select among multiple alternatives is to put an if in another if’s
else branch:
val number = 100number: Int = 100
if number < 0 then "negative" else if number > 0 then "positive" else "zero"res62: String = positive
if number < 0 then
  println("The number is negative.")
else if number > 0 then
  println("The number is positive.")
else
  println("The number is zero.")The number is positive.
There are other ways to nest an if inside another, too:
if number > 0 then
  println("Positive.")
  if number > 1000 then
    println("More than a thousand.")
  else
    println("Positive but no more than a thousand.")
 Positive.
Positive but no more than a thousand.
In this example, the else is indented to the same depth as the
inner if and is thus associated with that if. That else
branch got executed because the outer condition was true but
the inner one wasn’t.
In this example, the outer if has no else branch at all. If
number hadn’t been positive, nothing would have been printed out.
The next example is differently indented. Here, the inner if has no else branch but
the outer one does:
if number > 0 then
  println("Positive.")
  if number > 1000 then
    println("More than a thousand.")
else
  println("Zero or negative.")Positive.
For a further discussion, see Chapter 3.4. The end of Chapter 3.5 lists some examples
of errors that you might make when you use an if to determine the function’s return
value.
End markers on ifs
If you want, you can write the end_marker endif on your multiline ifs. In some cases,
this may make the code easier to read, but such cases should be rare in well-written code
(see style guide).
An example with end markers:
ifnumber>0thenprintln("Positive.")ifnumber>1000thenprintln("More than a thousand.")endifelseprintln("Zero or negative.")endif
Selecting with match
The match command (Chapters 4.3 and 4.4) evaluates an expression and then checks
a list of possible matches for that value. It selects the first one that matches.
Here’s what the command looks like in general terms:
expression E match
case pattern A => code to run if E’s value matches pattern A
case pattern B => code to run if E’s value matches pattern B (but not A)
case pattern C => code to run if E’s value matches pattern C (but not A or B)And so on. (Usually, you’ll seek to cover all the possible cases.)end match
The value of the expression that precedes the match keyword
is compared to...
... so-called patterns, which describe different cases.
You may write an optional end marker at the end if you feel it
improves readability.
Here’s an example as concrete code:
valcubeText=number*number*numbermatchcase0=>"number is zero and so is its cube"case1000=>"ten to the third is a thousand"caseotherCube=>"number "+number+", whose cube is "+otherCube
We examine the value of the arithmetic expression in order to
select one of the cases.
match checks the patterns in order until it finds one that
matches the value of the expression. Here, we have a total of
three patterns.
Even a simple literal can be used as a pattern. Here, we’ve used
a couple of Int literals. The first case is a match if the cube
of number equals zero; the second matches if it equals one
thousand.
You can also enter a new variable name as a pattern; here, we’ve
picked the name otherCube. Such a pattern will match any value;
in this example, the third case will always be selected if the
cube wasn’t zero or one thousand.
Whenever such a pattern matches, we get a new local variable that
stores the actual value that matched the pattern. We can use the
variable name to access the value.
One use for match is to extract a value from an Option wrapper:
// We need this function for the example of match below.defdivide(dividend:Int,divisor:Int)=ifdivisor==0thenNoneelseSome(dividend/divisor)
divide(firstNumber,secondNumber)matchcaseSome(result)=>"The result is: "+resultcaseNone=>"No result."
The pattern defines the structure of the matched object:
a Some will have some value inside it. That value is
automatically extracted and stored in the variable result.
(However, for working with Options, higher-order methods are often even better than match;
see Chapter 8.3 and Option as a collection, below.)
Here’s one more example that demonstrates some more features of match. The example is
from Chapter 4.4, which you can visit for more optional material on this versatile command.
def experiment(someSortOfValue: Matchable) =
someSortOfValue match
case text: String => "it is the string " + text
case number: Intif number > 0 => "it is the positive integer " + number
case number: Int => "it is the non-positive integer " + number
case vector: Vector[?] => "it is a vector with " + vector.size + " elements"
case _ => "it is some other sort of value"
Our example function’s parameter has the type Matchable, which
means that we can pass more or less any value as a parameter.
(Anything that can be processed with match goes; this covers
nearly all Scala classes.)
The patterns have been annotated with data types. Each of these
patterns only matches values of a particular type.
The condition (pattern guard) narrows down the case: we select
this branch only if the value is greater than zero (and doesn’t
equal 1000, which we already covered in another case). Note that
we use the familiar if keyword, but this isn’t a standalone
if command.
The underscore pattern matches any value and is selected if
neither of the two preceding cases is. We could have written
the name of a variable here (as we did in the earlier example),
but if we have no use for the value of the variable, an
underscore will do.
Scopes and Access Modifiers
Program components — variables, functions, classes, and singleton objects — each have
a scope that depends on where that component is defined (Chapter 5.6). The programmer may
further adjust scope by adding access modifiers such as private (Chapter 3.2).
The scope of a public instance variable encompasses the entire class.
Moreover, the variable is accessible from outside the class, too, as
long as we have an instance of the class available: myObject.publicInstanceVariable.
Similarly, we can call a public method anywhere within the class or
outside of it. Instance variables and methods are public unless
otherwise specified.
The scope of a private instance variable or a private method is
limited to the enclosing class.
This class itself is public, so we’re free to use it anywhere in
the program.
Method implementations are always inaccessible from outside the
method.
The scope of local variables
Mouse over the boxes below to highlight the corresponding scope within the program.
A parameter variable such as param is defined throughout
the function’s body. It is accessible anywhere within that
scope.
The scope of a variable defined at the outermost level within
the function, such as local, runs until the end of the
function body.
The same goes for anotherLocal.
When an outer command contains a variable definition, the
variable’s scope extends only until the end of that command.
For instance, here we have a variable localToIf whose scope
is limited by the surrounding if.
You’ll find a few more complex examples in Chapter 5.6.
Local functions
As discussed in Chapter 7.1, you can also define functions as local to other
functions. Here’s a simple example:
inner is defined within the other function’s body and is meant
to be used only within the containing function.
The outer function (and only it) may call its auxiliary function.
In this example, that happens twice.
Companion objects
As an exception to the general rules outlined above, a class and its companion object
have access to each other’s private members. Here’s a summary of an example from
Chapter 5.3:
A companion object is a singleton object that has been given
precisely the same name as a class and that is defined in the
same file with that class.
You can use a companion object to store variables or methods
(such as this instance counter) that pertain to a class in
general rather its individual instances. Only a single copy of
createdInstanceCount exists in memory, since the customer
object is a singleton. This contrasts with the names and
numbers of the various Customer instances.
The Customer class and its companion object are “friends”
and have access to each other’s private members.
Pairs and Other Tuples
A tuple is an immutable structure that consists of two or more values that may or may
not have the same data type (Chapter 9.2). You can use round brackets and commas to
define a tuple:
val quartet = ("This tuple has four members of different types.", 100, 3.14159, false)quartet: (String, Int, Double, Boolean) = (This tuple has four members of different types.,100,3.14159,false)
quartet(0)res63: String = This tuple has four members of different types.
quartet(2)res64: Double = 3.14159
Each of this tuple’s members has a different type.
Pairs are tuples with two members. Both members of this pair are strings:
val pair = ("laama", "llama")pair: (String, String) = (laama,llama)
You can assign the members of a pair to multiple variables with a single command:
Instead of the brackets and the comma, you can define a pair like this:
val identicalPair = "laama" -> "llama"identicalPair: (String, String) = (laama,llama)
The latter notation is particularly popular when forming a Map from pairs of keys and
values; see Maps, below.
Another way to access tuples
There’s an alternative notation for accessing tuples, which you
may run into — and which was needed in earlier versions of
Scala. Note the underscores and the indexing, which starts at one.
val quartet = ("This tuple has four members of different types.", 100, 3.14159, false)quartet: (String, Int, Double, Boolean) = (This tuple has four members of different types.,100,3.14159,false)
quartet._1res65: String = This tuple has four members of different types.
quartet._3res66: Double = 3.14159
Tuples are special in that Scala will automatically construct them if you use “untupled”
values where a tuple is called for (Chapter 9.2):
def absDiff(pairOfNumbers: (Int, Int)) =
  (pairOfNumbers(0) - pairOfNumbers(1)).absdef absDiff(pairOfNumbers: (Int, Int)): Int
absDiff((-300, 100))res67: Int = 400
absDiff(-300, 100)res68: Int = 400
The function takes in a pair.
When you call it, you can pass in either a pair or two separate
values. In the latter case, Scala automatically constructs a pair
from those two values (which is known as auto-tupling).
There are two ways to check a string’s length (size):
val myString = "Olavi Eerikinpoika Stålarm"myString: String = Olavi Eerikinpoika Stålarm
myString.lengthres69: Int = 26
myString.sizeres70: Int = 26
Changing letter case:
val message = "five hours of Coding can save 15 minutes of Planning"message: String = five hours of Coding can save 15 minutes of Planning
message.toUpperCaseres71: String = FIVE HOURS OF CODING CAN SAVE 15 MINUTES OF PLANNING
message.toLowerCaseres72: String = five hours of coding can save 15 minutes of planning
message.capitalizeres73: String = Five hours of Coding can save 15 minutes of Planning
val myText = "   whitespace trimmed from around    the string but not the middle  "myText: String = "   whitespace trimmed from around    the string but not the middle  "
myText.trimres78: String = whitespace trimmed from around    the string but not the middle
Interpreting the characters in a string as a number:
"100".toIntres79: Int = 100
"100".toDoubleres80: Double = 100.0
"100.99".toDoubleres81: Double = 100.99
"one hundred".toIntjava.lang.NumberFormatException: For input string: "one hundred"..." 100".toIntjava.lang.NumberFormatException: For input string: " 100"..." 100".trim.toIntres82: Int = 100
You can do the above more safely with the Option-suffixed methods:
"abc" < "bcd"res86: Boolean = true
"abc" >= "bcd"res87: Boolean = false
"abc".compare("bcd")res88: Int = -1"bcd".compare("abc")res89: Int = 1"abc".compare("abc")res90: Int = 0"abc".compare("ABC")res91: Int = 32"abc".compareToIgnoreCase("ABC")res92: Int = 0
The sign indicates the result of the comparison.
Embedding values in a string
You can embed any expression’s value in a string (Chapter 1.4).
val number = 100number: Int = 100
val stringWithEmbeddedValues = s"The variable stores $number, which is slightly less than ${number + 1}."stringWithEmbeddedValues: String = The variable stores 100, which is slightly less than 101.
Note the leading s.
You can follow a dollar sign with a variable name. That variable’s
value is then embedded in the string.
Use curly brackets to delimit the embedded expression as needed.
You can use the plus operator to combine a string with values of different types, such
as Ints:
val theSameUsingPlus = "The variable stores " + number + ", which is slightly less than " + (number + 1) + "."theSameUsingPlus: String = The variable stores 100, which is slightly less than 101.
"the number is " + numberres93: String = the number is 100
"kit" + 10res94: String = kit10
Those examples appended values to the ends of strings. The other way around — with
the number before the plus — isn’t okay:
number + " is the number"number + " is the number" ^warning: method + in class Double is deprecated (since 2.13.0):Adding a number and a String is deprecated. Use the string interpolation `s"$num$str"`
Special characters in strings
A backslash character marks a special character within a string (Chapter 5.2):
val newline = "\n"newline: String =
"
"
println("first row\nsecond row")first row
second row
val tabulator = "first\tsecond\tthird"tabulator: String = first   second    third
"here's a double quotation mark \" and another \""res95: String = here's a double quotation mark " and another "
"here's a backslash \\ and another \\"res96: String = here's a backslash \ and another \
If you triple the double quotes around a string literal, you can write special characters
without “escaping” them with the backslash:
"""This string contains a quotation mark " and
a backslash \ on two separate rows."""res97: String =
This string contains a quotation mark " and
a backslash \ on two separate rows.
The toString method
All Scala objects have a parameterless method named toString. It returns a description
of the object as a string:
All custom classes and objects that you write have a toString method, too
(because they inherit it; see Inheritance below):
class MyClass(val variable: Int)// defined class MyClass
val myObj = MyClass(10)myObj: MyClass = MyClass@56181myObj.toStringres100: String = MyClass@56181myObjres101: MyClass = MyClass@56181
The default toString method generates strings that look like
this (Chapter 2.5)
The REPL uses toString as it describes objects. What you see
above is three outputs obtained by calling toString thrice.
You can override the default implementation of toString (see Chapter 2.5 and
Inheritance, below):
class Experiment(val value: Int):
  override def toString = "THE OBJECT'S VALUE IS " + this.value// defined class Experiment
val testObj = Experiment(11)testObj: Experiment = THE OBJECT'S VALUE IS 11
toString also gets called whenever we print out an object or combine an object with a
string:
println(testObj)THE OBJECT'S VALUE IS 11
testObj + "!!!"res102: String = THE OBJECT'S VALUE IS 11!!!
s"testObj's toString returns something that we embed here $testObj in the middle of this string."res103: String = testObj's toString returns something that we embed here THE OBJECT'S VALUE IS 11 in the middle of this string.
Collection Basics
Basic use of a buffer
Buffers are a type of collection (Chapters 1.5 and 4.2). The corresponding type Buffer
is in scala.collection.mutable:
import scala.collection.mutable.Buffer
Examples of creating a buffer:
Buffer("first", "second", "third", "and a fourth")res104: Buffer[String] = ArrayBuffer(first, second, third, and a fourth)
val numbers = Buffer(12, 2, 4, 7, 4, 4, 10, 3)numbers: Buffer[Int] = ArrayBuffer(12, 2, 4, 7, 4, 4, 10, 3)
A buffer may be empty:
val youCanAddNumbersHere = Buffer[Double]()youCanAddNumbersHere: Buffer[Double] = ArrayBuffer()
We use a type parameter to indicate the type of the elements that
the buffer may contain in the future (Chapter 1.5). An explicit
type parameter is needed when the element type can’t be inferred
from the context, like in this empty-buffer example.
A buffer contains zero or more elements, stored in order, each at its own index.
Indices run from zero(!) upwards.
Here’s how to look up a single element, given its index:
numbers(0)res105: Int = 12
numbers(3)res106: Int = 7
The above are actually shorthand expressions for calling the buffer’s apply method
(Chapter 5.3):
numbers.apply(0)res107: Int = 12
numbers.apply(3)res108: Int = 7
The lift method similarly accesses a buffer element. However, lift returns the
result in an Option and doesn’t crash at runtime if the index is invalid:
Collection types: buffers, vectors, lazy-lists, etc.
There are many types of collections. In O1, we first use mostly buffers, then
increasingly turn to vectors. We eventually run into several other collection types, too.
Both buffers and vectors store elements in a specific order, each at its own index. The
most obvious differences between the types are these:
A buffer is a mutable collection. You can add elements to a
buffer, changing its size. You can also remove elements or replace
them with new ones.
A vector is an immutable collection. When you create a vector, you
specify any and all elements that will ever be in that vector. A
vector’s element is never replaced by another; a vector’s size never
changes.
You use a Vector much like you use a Buffer (shown above), except that you can’t
change what’s in an existing vector. You also don’t need to an import command;
Vectors are always available.
Strings are collections of elements. More on that in the next
section below.
Ranges are collections that represent ranges of numbers.
See below for examples.
An Array is a basic, numerically indexed data structure. Each
array has a fixed size (like a vector) but its elements can be
replaced by new ones (like a buffer’s). In Scala, using Arrays
is near-identical to using vectors and buffers (Chapter 12.1).
Lists are collections that work particularly well when the
elements are processed in order. See Chapter 10.3 for a brief
introduction.
LazyLists are similar to “regular” Lists. Their special
power is that a lazy-list’s elements are constructed and stored
in memory only when or if necessary. For more on lazy-lists, see
the separate section further down on this page
or Chapter 7.2.
A Set may only ever contain a single copy of each element
(Chapter 10.1). The elements of a set aren’t ordered in the same
sense as the other collections listed above.
Factors such as readability and efficiency influence the choice of collection type;
different collections are popular in different programming paradigms.
Collections may be nested: one collection may store references to other collections.
See Chapter 6.1 for a discussion.
Strings as collections
A string is a collection (Chapters 5.2 and 5.6). You can work on a string much like
you work on a vector. The elements of a String are Chars.
val myString = "llama"myString: String = llama
myString(3)res121: Char = m
myString.lift(3)res122: Option[Char] = Some(m)
Regular strings of type String are immutable. For instance, concatenating two strings
generates a new, combined string rather than changing either of the originals. (Mutable
representations of strings are possible, too; see Chapter 11.2).
Ranges of numbers
A Range object is an immutable collection that represents numbers within a specified
interval (Chapters 5.2 and 5.6).
val fourToTen = Range(4, 11)fourToTen: Range = Range 4 until 11
fourToTen(0)res123: Int = 4
fourToTen(2)res124: Int = 6
The first number is included in the range;
the range ends just before the second number,
which is not included.
You can also construct a Range by calling until or to on an Int (Chapter 5.2).
The latter method includes the given end point in the resulting Range. For example,
these two commands produce a seven-number range identical to the one above:
val anIndenticalRange = 4 until 11anIndenticalRange: Range = Range 4 until 11
val alsoIdentical = 4 to 10alsoIdentical: Range = Range 4 to 10
You don’t have to include every consecutive integer in the Range; you can skip some
systematically:
val everyOtherInt = 1 to 10 by 2everyOtherInt: Range = Range 1 to 10 by 2
val everyThirdInt = 1 to 10 by 3everyThirdInt: Range = Range 1 to 10 by 3
Common Methods on Collections
This section complements the above introduction to collections by listing various
general-purpose methods on Scala collections. All the methods listed here are
first-order methods; you’ll find more tools further down at
Processing Collections with Higher-Order Methods.
The examples in this section use strings and vectors to exemplify collections. However,
all the methods in the examples are similarly available on buffers, arrays, and various
other collection types. Some of them are also available on collections that don’t have
numerical indices, such as Maps.
Checking size: size, isEmpty, and nonEmpty
Methods for examining the number of elements in a collection (Chapter 4.2):
Methods for determining if a given element exists in a collection and, if so, where
(Chapter 4.2):
val containsElementM = "llama mmama".contains('m')containsElementM: Boolean = true
val containsElementZ = "llama mmama".contains('z')containsElementZ: Boolean = false
val indexOfFirstA = "llama mmama".indexOf('a')indexOfFirstA: Int = 2
val similarOperationOnVector = Vector(10, 100, 100, -20).indexOf(-20)similarOperationOnVector: Int = 3
val negativeMeansNotFound = "llama mmama".indexOf('z')negativeMeansNotFound: Int = -1
val searchFromGivenIndexOnward3 = "llama mmama".indexOf('a', 4)searchFromGivenIndexOnward3: Int = 8
val searchBackwards = "llama mmama".lastIndexOf('a')searchBackwards: Int = 10
Parts of a collection: head, tail, take, drop, slice, etc.
There are many ways to select one or more of the first elements in a collection
(Chapters 4.2 and 5.2):
val firstElem = "llama".headfirstElem: Char = l
val noFirstElementSoThisFails = "".headjava.util.NoSuchElementException: next on empty iterator...val firstWrapped = "llama".headOptionfirstWrapped: Option[Char] = Some(l)
val firstMissing = "".headOptionfirstMissing: Option[Char] = None
val firstThreeElems = "llama".take(3)firstThreeElems: String = lla
val tooMuchButNoProb = "llama".take(1000)tooMuchButNoProb: String = llama
val allButLast = "llama".initallButLast: String = llam
val allButLastThree = "llama".dropRight(3)allButLastThree: String = ll
val worksOnDifferentCollections = Vector(10, 100, 100, -20).dropRight(2)worksOnDifferentCollections: Vector[Int] = Vector(10, 100)
None of these methods modifies the original collection. They create new collections that
contain some of the elements of the originals. The same goes for the commands below, which
select elements from the rear end of a collection:
val allButFirst = "llama".tailallButFirst: String = lama
val allButFirstThree = "llama".drop(3)allButFirstThree: String = ma
val lastOnly = "llama".lastlastOnly: Char = a
val lastWrapped = "llama".lastOptionlastWrapped: Option[Char] = Some(a)
val lastThree = "llama".takeRight(3)lastThree: String = mma
Cutting a string in two with splitAt (Chapter 9.2):
val myText = "llama/mmama"myText: String = llama/mmama
val pairOfPieces = myText.splitAt(6)pairOfPieces: (String, String) = (llama,/mmama)
val sameButLonger = (myText.take(6), myText.drop(6))sameButLonger: (String, String) = (llama,/mmama)
Adding elements like this, by constructing new collections, is possible also when the
collection is immutable (as above). For examples of modifying an existing mutable
collection, see the earlier section Basic use of a buffer.
A mnemonic for collection operators (like +:)
At first I thought I was going out of my
mind, as I kept on getting errors. Then I
realised I was using the +: operator the
wrong way around 🤦🏼♀️.
Here’s a Scala mnemonic:
The COLon goes on the COLlection side.
That is, these are fine:
myVector:+newElem// appends an elementnewElem+:myVector// prepends an element
Copying elements in a new collection: to, toVector, toSet, etc.
You can switch between collection types by copying elements from one collection to a new
one (Chapter 4.2):
val myVector = "llama".toVectormyVector: Vector[Char] = Vector(l, l, a, m, a)
val myBuffer = myVector.toBuffermyBuffer: Buffer[Char] = ArrayBuffer(l, l, a, m, a)
val myArray = myBuffer.toArraymyArray: Array[Char] = Array(l, l, a, m, a)
val mySet = "happy llama".toSetmySet: Set[Char] = Set(y, a, m, , l, p, h)val anotherVector = myArray.to(Vector))anotherVector: Vector[Char] = Vector(l, l, a, m, a)
val myLazyList = myArray.to(LazyList)myLazyList: LazyList[Char] = LazyList(<not computed>)
There is a method like toVector or toBuffer for many
collection types (but not all).
The resulting collection obeys the rules of its type.
For instance, copying elements into a set eliminates any
duplicates. Moreover, a set doesn’t keep the elements in
their original order.
The general method to takes a parameter that specifies
the type of the target collection.
newBuilder and another way of initializing a collection
Sometimes it’s desirable to gather elements one or more at a time
and, once done, fix the construct a collection (e.g., a vector) from
the gathered elements. To gather the elements, it often helps to have
a temporary, mutable helper object that stores the elements that
have already been dealt with.
The Scala API provides objects called Builders that can be used
for just such a purpose. Many collection types come with a newBuilder
method that creates a suitable and efficient Builder object. Here’s
an example of constructing a Vector:
When calling twice, the first parameter must be a function that
takes in an integer and also returns an integer. The variable
operation will then store a reference to that function.
twice calls its parameter function, takes the return value, and
then calls the parameter again on that value.
Here are a couple of ordinary functions that work in combination with twice:
twice(number => number + 1, 1000)res140: Int = 1002
twice(n => 2 * n, 1000)res141: Int = 4000
This function literal defines an anonymous function that returns
a number slightly larger than the one it receives. We give twice
a reference to this anonymous function.
The function literal is marked by a right-pointing arrow. To the
left of the arrow is a parameter list (which here consists of just
one parameter) and to the right is the function body.
We could have written (number:Int)=>number+1, but the longer
form is unnecessary here, because the parameter’s type of Int can
be automatically inferred from the context.
Here’s another example of a higher-order function (from Chapters 6.1 and 6.2):
The last parameter gets its value from a function literal
that defines the sorting criterion.
The brackets are required when an anonymous function takes
multiple parameters.
Shorter function literals: anonymous parameters
Instead of naming the parameters in a function literal and using the rightward arrow,
you can often write a more compact literal by using an underscore to mark unnamed
parameters (Chapter 6.2). These two code fragments are equivalent:
The compact notation works only in cases that are sufficiently simple. One restriction
is that each anonymous parameter (underscore) can be used only once in the function body.
You may also need to use the longer notation if the function literal contains further
function calls. For more details, please see Chapter 6.2.
Processing Collections with Higher-Order Methods
Collections have many powerful higher-order methods that take in a function and apply it
to the collection’s elements (Chapters 6.3, 7.1, 10.1, and 10.2). This section
lists some of them. The examples use strings and vectors, but the same methods are
available on other collections as well.
Repeating an operation: foreach
The foreach method performs an effect on each element of the collection (Chapter 6.3):
Here we’ve defined the repeating operation with an anonymous
function.
Turning elements into something else: map, flatMap
The map method generates a collection whose elements are computed from those in the
original collection as per the given parameter function (Chapter 6.3):
val words = Vector("Witness", "Opener", "Candy")words: Vector[String] = Vector(Witness, Opener, Candy)
words.map( word => "i" + word )res142: Vector[String] = Vector(iWitness, iOpener, iCandy)
words.map( word => word.length )res143: Vector[Int] = Vector(7, 6, 5)
If map’s parameter function returns a collection, you get a nested structure:
val numbers = Vector(100, 200, 150)numbers: Vector[Int] = Vector(100, 200, 150)
numbers.map( number => Vector(number, number + 1) )res146: Vector[Vector[Int]] = Vector(Vector(100, 101), Vector(200, 201), Vector(150, 151))
flatMap does the same as map and flatten combined. It produces a “flatter”
collection than map does (Chapter 6.3):
numbers.flatMap( number => Vector(number, number + 1) )res147: Vector[Int] = Vector(100, 101, 200, 201, 150, 151)
The properties of collection elements: exists, forall, filter, takeWhile, etc.
exists finds out whether a given criterion is true for even a single element in the
collection (Chapter 6.3); forall similarly works out whether a criterion is true
for all the elements of the collection; count computes the number of elements that
meet a criterion:
find locates the first element that meets a given criterion (Chapter 6.3); indexWhere
does the same but returns an index rather than the element itself (Chapter 7.1):
filter returns all the elements that meet a criterion (Chapter 6.3); filterNot does
the inverse of that; partition splits the elements in those that meet the criterion and
those that don’t:
takeWhile keeps taking elements until it finds an element that meets the given criterion
(Chapter 6.3); dropWhile takes exactly the elements that takeWhile doesn’t; span does
both things at once:
The methods maxBy and minBy search for the collection’s largest or smallest element,
using a given criterion (Chapter 10.1); sortBy formes a fully sorted
version of the collection:
import scala.math.absval numbers = Vector(10, 5, 4, 5, -20)numbers: Vector[Int] = Vector(10, 5, 4, 5, -20)
val largestAbs = numbers.maxBy(abs)largestAbs: Int = -20
val smallestAbs = numbers.minBy(abs)smallestAbs: Int = 4
val sortedByAbs = numbers.sortBy(abs)sortedByAbs: Vector[Int] = Vector(4, 5, 5, 10, -20)
val words = Vector("the longest of them all", "short", "middling-sized", "shortish")words: Vector[String] = Vector(the longest of them all, short, middling-sized, shortish)
val longest = words.maxBy( _.length )longest: String = the longest of them all
val sortedByLength = words.sortBy( _.length )sortedByLength: Vector[String] = Vector(short, shortish, middling-sized, the longest of them all)
Looking for the maximal or minimal element fails in case there are no elements at
all. A convenient way to deal with that special case is to use the maxByOption or
minByOption:
The above methods have variants named max, min, sorted, maxOption, and minOption,
respectively. These By-less methods require that the elements have a natural ordering
and base their behavior on that (Chapter 10.1). Here are some examples of natural sorting:
val ascendingNumbers = numbers.sortedascendingNumbers: Vector[Int] = Vector(-20, 4, 5, 5, 10)
val sortedByUnicode = words.sortedsortedByUnicode: Vector[String] = Vector(middling-sized, short, shortish, the longest of them all)
val theSameThing = words.sortBy( sana => sana )theSameThing: Vector[String] = Vector(middling-sized, short, shortish, the longest of them all)
val alsoTheSame = words.sortBy(identity)alsoTheSame: Vector[String] = Vector(middling-sized, short, shortish, the longest of them all)
val sortedLetters = "Let's offroad!".sortedsortedLetters: String = " !'Ladeffoorst"
If the elements to be sorted or compared are Doubles, you need to spefify how to order
them. There are two standard ways of doing that: TotalOrdering and IeeeOrdering,
either of which works fine for most purposes. (For more details, see the API docs.)
Generic processing of elements: foldLeft and reduceLeft
The methods foldLeft and reduceLeft work at a slightly lower level of abstraction:
you define precisely how to process each element in turn in order to construct a return
value (Chapter 7.1). First, here’s foldLeft:
val numbers = Vector(10, 5, 4, 5, -20)numbers: Vector[Int] = Vector(10, 5, 4, 5, -20)
val sum = numbers.foldLeft(0)( (sumSoFar, next) => sumSoFar + next )sum: Int = 4
val sameThing = numbers.foldLeft(0)( _ + _ )sameThing: Int = 4
The method has two parameter lists: in the first, you put the
initial value that is also the end result if the collection is
empty; and...
... in the second, you put a function that combines each
intermediate result with the next element. In this example, we’ve
used a simple summing function.
reduceLeft is similar, but it uses the first element as the initial value and thus
needs only the function as a parameter:
import scala.math.minval numbers = Vector(10, 5, 4, 5, -20)numbers: Vector[Int] = Vector(10, 5, 4, 5, -20)
val sum = numbers.reduceLeft( _ + _ )sum: Int = 4
val smallest = numbers.reduceLeft(min)smallest: Int = -20
The return value of reduceLeft shares its type with the elements of the collection,
but foldLeft can generate a result of a different type:
val bigNumberExists = numbers.foldLeft(false)( (foundYet, next) => foundYet || next > 10000 )bigNumberExists: Boolean = false
Since reduceLeft assumes that the collection has at least one element, it crashes at
runtime is the assumption is not met:
Option is a kind of collection: every Option has either a single element (Some) or
zero elements (None). See Chapter 8.3 for a discussion. Below is a list of examples of
collection methods applied to Options.
The examples use these two variables:
val something: Option[Int] = Some(100)something: Option[Int] = Some(100)
val nothing: Option[Int] = Nonenothing: Option[Int] = None
size:
something.sizeres165: Int = 1
nothing.sizeres166: Int = 0
def myFunc(number: Int) = if number != 0 then Some(1000 / number) else NonemyFunc(number: Int): Option[Int]
something.flatMap(myFunc)res185: Option[Int] = Some(10)
Some(0).flatMap(myFunc)res186: Option[Int] = None
nothing.flatMap(myFunc)res187: Option[Int] = None
Creating elements with a function: tabulate
Scala’s collection types come with a method named tabulate that creates collections
by using a given “formula” to initialize each element (Chapters 6.1 and 6.2).
This method takes two parameter lists. The first indicates the number of elements —
the size of the collection to be created. The second supplies a function that is called on
each index to create the corresponding element:
Vector.tabulate(10)( index => index * 2 )res188: Vector[Int] = Vector(0, 2, 4, 6, 8, 10, 12, 14, 16, 18)
tabulate repeatedly calls the function it receives, passing
in each index in turn. Here, a doubling function has been called
on each of the numbers from 0 to 9.
A lazy-list is a collection whose elements are generated and stored only when needed,
lazily (Chapter 7.2). It’s designed for processing elements in order. You
can operate on a lazy-list’s elements one by one without storing them all in memory
simultaneously.
In many respects, a lazy-list is just like the other collection types described above. For
instance, it’s possible to create a lazy-list by typing in all its elements or by copying
the contents of an existing collection:
In the examples above, the lazy-lists were finite. However, unlike the other collections,
a lazy-list may also be infinite. One way to create an infinite lazy-list is to call
continually:
val myLazyStrings = LazyList.continually("Oliver")myLazyStrings: LazyList[String] = LazyList(<not computed>)
myLazyStrings.take(5).foreach(println)Oliver
Oliver
Oliver
Oliver
Oliver
The lazy-list has an endless supply of elements that it generates
by evaluating the expression "Oliver" (repeating that evaluation
whenever it must). Since, in this example, that expression is a
literal, all of this collection’s elements are identical.
The original lazy-list is infinite, but take returns a sublist
of a specified size.
An infinite lazy-list may also have elements that differ from each other:
This lazy-list consists of random numbers. It generates new
numbers only when it needs to.
We form a truncated version of the original lazy-list. It
ends where it happens to generate a sufficiently large number.
Calling the takeWhile method is still not enough to make
the lazy-list generate the random numbers; it just makes a
LazyList object that is capable of generating them up to
a point.
mkString uses all the elements of the list to construct
a string. This forces the LazyList object to evaluate the
number-generating expression repeatedly.
One way to structure an interactive program is to use a lazy-list. The following example
from Chapter 7.2 prompts the user for input until they say "please" and reports
the length of each input as shown in this example run:
Enter some text: hello
The input is 5 characters long.
Enter some text: stop
The input is 4 characters long.
Enter some text: please
@maindefsayPlease()=defreport(input:String)="The input is "+input.length+" characters long."definputs=LazyList.continually(readLine("Enter some text: "))inputs.takeWhile(_!="please").map(report).foreach(println)
The lazy-list “brings” inputs for the program to process.
This is an infinite list of strings that are generated by
asking the user to provide them. However, this command only
defines the lazy-list whose elements come from calling
readLine whenever a new element is needed.
takeWhile returns a partial lazy-list that has been cut at
the magic word "please".
map generates a lazy-list of reports whose each element is
formed (as needed) by calling readLine and applying report
to the resulting string. This command also doesn’t prompt the user
for the inputs yet, nor does it call report on them; it simply
prepares a lazy-list that does that if and when we later access
the elements.
foreach orders the lazy-list to print out the elements of the
report list. Before it can process an elemenrt, the lazy-list
object is forced to determine what that element is by prompting
the user for input and a applying report. In practice, what
we get is a program that repeatedly receives keyboard input and
reports its length.
LazyList.from is convenient for creating infinite lists of numbers:
val positiveNumbers = LazyList.from(1)positiveNumbers: LazyList[Int] = LazyList(<not computed>)
positiveNumbers.take(3).foreach(println)1
2
3
LazyList.from(0, 10).take(3).foreach(println)0
10
20
val firstBigSquare = LazyList.from(0).map( n => n * n ).dropWhile( _ <= 1234567 ).headfirstBigSquare: Int = 1236544
More ways to create a LazyList
The iterate method creates a lazy-list that generates each element
by re-applying a function to the previous element:
def alternating = LazyList.iterate(1)( x => -2 * x )alternating: LazyList[Int]
alternating.take(4).foreach(println)1
-2
4
-8
You can use a recursive definition to define any kind of
lazy-list. This simple example does the same as LazyList.from(1):
The operator #:: combines a single value and a lazy-list,
yielding another lazy-list. The value to the left of the
operator becomes the first element; it’s followed by the
elements of the lazy-list on the right-hand side.
The definition is recursive; it refers to itself. We form
a sequence of positive integers by starting at the given
integer and following it with a sequence of positive integers
that starts at the next integer.
Passing unevaluated parameters “by name”
Lazy-lists are based on the idea that a method may receive a parameter that holds an
unevaluated expression rather than the value of that expression. Such an unevaluated
parameter — a by-name parameter — is evaluated only when (or if) the
method reaches a point that actually uses that parameter.
Below is a small example of a by-name parameter.
def printAndReturn(number: Int) =println("I'll return my parameter " + number)numberprintAndReturn(number: Int): Int
def test(number: Int, numberGeneratingExpr: =>Int) = if number >= 0 then numberGeneratingExpr else -1test(number: Int, numberGeneratingExpr: => Int): Int
Our first function simply reports when it’s being called.
The second function’s second parameter is a by-name
parameter, as indicated by the arrow =>. This parameter
is evaluated only when or if it’s used during an invocation
of test.
The output demonstrates how the parameter works:
test(printAndReturn(10), printAndReturn(100))I'll return my parameter 10I'll return my parameter 100
res193: Int = 100
test(printAndReturn(-10), printAndReturn(100))I'll return my parameter -10
res194: Int = -1
There’s nothing unusual about the first parameter. The
corresponding expression is evaluated first no matter what;
then its value (10 or -10) is passed to test.
When the first parameter is positive, we end up in the
branch that evaluates the second parameter and thus calls
printAndReturn a second time.
When the first parameter is negative, we end up in the
branch that returns -1. The second parameter is never needed
and never evaluated.
Repeating Commands in a Loop
for–do loops
You can use a for–do loop to repeat one or more operations on each element in a
collection (Chapter 5.5):
val myBuffer = Buffer(100, 20, 5, 50)myBuffer: Buffer[Int] = Buffer(100, 20, 5, 50)
forelem<- myBufferdo println("Current element: " + elem) println("That plus one: " + (elem + 1))Current element: 100
That plus one: 101
Current element: 20
That plus one: 21
Current element: 5
That plus one: 6
Current element: 50
That plus one: 51
At the beginning of the loop, we define which elements to loop
over. Note the for and do keywords.
The left-pointing arrow <- is followed by an expression that
determines the source of the elements.
The name on the left defines a new variable, which the programmer
is free to name. This name is available within the loop body below,
where it refers to the element currently being processed (here: the
current number from the buffer).
The loop body is executed for each element in turn. Note the
significant indentations.
You’re free to use a combination of instructions in the loop body. You can put in an if,
for example:
for currentElem <- myBuffer do
  if currentElem > 10 then
    println("This element is greater than ten: " + currentElem)
  else
    println("Here we have a small number.")
end forThis element is greater than ten: 100
This element is greater than ten: 20
Here we have a small number.
This element is greater than ten: 50
The end marker is optional but sometimes clarifies things.
A for loop can iterate over other kinds of collections, too (Chapter 5.6). Here are
some examples, two with a Range and one with a String:
for number <- 10 to 15 do
  println(number)10
11
12
13
14
15
for index <- myBuffer.indices do
  println("Index " + index + " stores the number " + myBuffer(index))The index 0 stores the number 100
The index 1 stores the number 20
The index 2 stores the number 5
The index 3 stores the number 50
for letter <- "test" do
  println(letter)t
e
s
t
for (element, index) <- myBuffer.zipWithIndex do
  println("Index " + index + " stores the number " + element)Index 0 stores the number 100
Index 1 stores the number 20
Index 2 stores the number 5
Index 3 stores the number 50
You’ll find many more examples of for–do loops in Chapters 5.5 and 5.6.
for–yield and more about Scala’s for expressions
Scala’s for expression is capable of various things that aren’t
much discussed, or needed, in O1. You can, for instance, use for
to generate a new collection rather than performing effectful
operations. For that, you use the yield keyword instead of do:
val myVector = Vector(100, 0, 20, 5, 0, 50)myVector: Vector[Int] = Vector(100, 0, 20, 5, 0, 50)
for number <- myVector yield number + 100res195: Vector[Int] = Vector(200, 100, 120, 105, 100, 150)
for word <- Vector("llama", "alpaca", "vicuña") yield word.lengthres196: Vector[Int] = Vector(5, 6, 6)
You can also add a filter:
for number <- myVector if number != 0 yield 100 / numberres197: Vector[Int] = Vector(1, 5, 20, 2)
Sometimes such code is easier to read if broken onto multiple lines. Here’s
one way to do that:
for
  number <- myVector
  if number != 0
yield 100 / numberres198: Vector[Int] = Vector(1, 5, 20, 2)
In Scala, for loops are just a different notation for writing higher-order
method calls that invoke foreach, map, flatMap, and filter; see
Processing Collections with Higher-Order Methods, above.
Nested loops
A loop body can contain another loop. This means that the entire inner loop will run
every time the body of the outer loop is executed (Chapter 5.6).
Here’s one example:
val numbers = Vector(5, 3)numbers: Vector[Int] = Vector(5, 3)
val letters = "abcd"letters: String = abcd
for number <- numbers do
  println("Cycle of outer loop begins.")
  for letter <- letters do
    println(s"the number is $number and the letter is $letter")
  end for
  println("Cycle of outer loop is over.")
end forCycle of outer loop begins.
the number is 5 and the letter is a
the number is 5 and the letter is b
the number is 5 and the letter is c
the number is 5 and the letter is d
Cycle of outer loop is over.
Cycle of outer loop begins.
the number is 3 and the letter is a
the number is 3 and the letter is b
the number is 3 and the letter is c
the number is 3 and the letter is d
Cycle of outer loop is over.
Nesting and for
You can combine nested traversals in a single for. The three programs below
all do the same thing.
A while loop starts with the looping condition. That condition is checked at the start
of each loop cycle, rather than the end:
var number = 1number: Int = 1
whilenumber < 10doprintln(number)number += 4println(number)1
5
5
9
9
13
The first command initializes a variable that we’ll need later.
This initializer isn’t a part of the actual loop.
The words while and do appear at the top of the loop. There’s
a conditional expression between them.
The loop body follows, appropriately indented.
The conditional expression must be of type Boolean. It is
evaluated once every time the loop body is about to be executed.
If it evaluates to false, the loop terminates; if to true,
the loop body gets executed, followed by another check of the
same conditional expression.
In this example, there are three iterations through the loop.
The first ends with number storing 5, the second with 9, and
the third with 13. When the looping condition is then checked
once again, it is no longer met.
It’s possible that the loop runs zero times: the looping condition gets checked for the
first time before the body has been executed even once. In the example above, number
equals 1 so the looping condition number<10 is true when first checked. Below,
this is not the case:
var number = 20number: Int = 20
while number < 10 do
  println(number)
  number += 4
  println(number)
end while
Now that the looping condition doesn’t hold to begin with,
the loop does nothing.
Side note: You can end a while loop, too, with an explicit
end marker, as shown here for example’s sake. This marker,
like other end markers in Scala, is optional.
A map is a collection whose elements are key–value-pairs (Chapter 9.2). It doesn’t
rely on numerical indices; instead, it uses keys for looking up the corresponding values.
Key–value pairs are represented as ordinary tuples (see Pairs and Other Tuples).
The same value may appear multiple times in a map, but the keys must be unique.
You can also access a value as shown below, but then you’ll cause a runtime error if
there is no matching key in the map:
finnishToEnglish("kissa")res203: String = cat
finnishToEnglish("Mikki-Hiiri")java.util.NoSuchElementException: key not found: Mikki-Hiiri...
Modifying a Map
Scala’s standard API comes with two different Map classes, one for mutable maps and one
for immutable ones; immutable Maps are always available without an import. The examples
on this page use immutable Maps unless otherwise specified, but here are a few examples
of effects on a mutable Map.
The return type of getOrElse is String, whereas for get it
was Option[String].
If the Map is mutable, you can also use getOrElseUpdate. When this method fails to
find the given key, it adds the given value to the Map, which means that the lookup will
always succeed in the end:
We use withDefaultValue to let the Map know
what it should default to on a failed lookup.
When we then look for a nonexistent key, we don’t
get an error but the default value.
withDefault
The previous example used a fixed default value. If you want to customize the
default values, you can use withDefault to set a “default function” instead:
def report(missingKey: String) = "you looked up " + missingKey + " but to no avail"report(missingKey: String): String
val finToEng = Map("kissa" -> "cat", "tapiiri" -> "tapir", "koira" -> "dog").withDefault(report)finToEng: Map[String,String] = Map(koira -> dog, tapiiri -> tapir, kissa -> cat)
finToEng("kissa")res213: String = cat
finToEng("Mikki-Hiiri")res214: String = you looked up Mikki-Hiiri but to no avail
Making a Map from an existing collection: toMap, groupBy
You can call toMap to form a Map from any collection of pairs (Chapter 10.1):
In this example, we first create a couple of distinct collections
and zip them together to produce a vector that contains pairs.
toMap takes such a collection of pairs and generates a Map.
The groupBy method constructs a Map that contains the elements of an existing
collection grouped on the basis of what a given function returns on each of those
elements:
All shapes have an isBiggerThan method that compares the areas
of two shapes.
All shapes also have an area method for computing the size of
the shape. This method is abstract: it has no body and you can’t
invoke it as such. We’ll define the algorithms for computing areas
differently for the different subtypes that inherit Shape (see
below).
isBiggerThan takes a reference to any Shape object. All such
objects will have some kind of implementation for area, so
we can call that method on the parameter.
Inheriting a trait
The two classes below inherit the Shape trait (Chapter 7.3). They define
subtypes of the more general Shape supertype:
The keyword extends marks that Circle inherits Shape;
it’s Shape’s subtype. This implies that all objects of type
Circle are not only circles but shapes, too. They inherit,
for instance, the isBiggerThan method defined on Shape.
An inheriting class may implement the abstract methods of a
trait. For instance, here we define that a circle is a shape
whose area comes from the formula π * r2 and a rectangle
is a shape whose area is the product of its two sides.
A class may inherit from multiple traits. The extends keyword should appear only
once though; use with for the other supertypes:
classXextendsA,B,C,D,Etc
A trait may inherit from another trait (or several):
The variable myShape has the static type Shape. It may refer
to any object of type Shape, which might be a Circle or a
Rectangle or an instance of some other subtype of Shape.
The static type of a variable or expression can always be
determined from the program code.
In this example, the variable myShape is first assigned a value
whose dynamic type is Circle. That value is then replaced with
another whose dynamic type is Rectangle. The value’s dynamic
type is required to be compatible with the variable’s static type.
All Scala objects have the isInstanceOf method, which examines the dynamic type of an
object. The code below determines that myShape currently stores a reference to an object
that is both a Rectangle and a Shape:
The variable’s static type is inferred as Circle, so the
variable can only store references to Circle objects, no
other shapes.
Static types restrict what we can do with a value (Chapter 7.3):
var test: Shape = Circle(10)test: o1.shapes.Shape = o1.shapes.Circle@9c8b50
test.radius-- Error:
  |test.radius
  |^^^^^^^^^^^
  |value radius is not a member of o1.shapes.Shape
The static type of test is Shape. An arbitrary Shape object
doesn’t have a radius even though circles do.
You can use match to make a decision based on a value’s dynamic type:
test match
  case actualCircle: Circle =>
    println("It's a circle, and its radius is " + actualCircle.radius)
  case _ =>
    println("It's not a circle")It's a circle, and its radius is 10.0
Constructor parameters on traits
A trait may take constructor parameters. For example, here we state that PersonAtAalto
takes a name and an occupation as parameters:
When a regular class or singleton object inherits the trait, you
need to pass in those parameters. Examples:
objectPresidentextendsPersonAtAalto("Ilkka","preside over the university")classEmployee(name:String,job:String)extendsPersonAtAalto(name,job)classLocalStudent(name:String,valid:String,valadmissionYear:Int)extendsPersonAtAalto(name,"study for a degree")classExchangeStudent(name:String,valaaltoID:String,valhomeUniversity:String,valhomeID:String)extendsPersonAtAalto(name,"study temporarily")
A singleton object can pass parameters to a trait. Here,
President passes a couple of strings to be stored in the
name and occupation variables defined in the trait.
When you extend a trait, you similarly pass in parameters.
Often (but not always) you pass on some of the same values
that the extending class itself received as parameters.
Note that what we have here are regular classes/singletons.
(Cf. the next example below.)
Let’s say that we’d additionally like to have a Student trait that represents students in
general — local ones and exchange students. This version does not work:
traitStudent(name:String,valid:String)extendsPersonAtAalto(name,"study for a degree")
We’re trying, from a trait, to pass constructor parameters to
the supertype PersonAtAalto. The attempt results in a compile-time
error: traits aren’t allowed to pass parameters like this.
The following, however, does work:
traitStudent(valid:String)extendsPersonAtAalto
No parameters are passed to PersonAtAalto here. That’s no
problem, though; we’ll be able to pass those parameters elsewhere
(see below). Here, we just state that students are people at Aalto,
who have a student ID (in addition to what PeopleAtAalto defines).
classLocalStudent(name:String,id:String,valadmissionYear:Int)extendsPersonAtAalto(name,"study for a degree"),Student(id)classExchangeStudent(name:String,aaltoID:String,valhomeUniversity:String,valhomeID:String)extendsPersonAtAalto(name,"study temporarily"),Student(aaltoID)
We pass parameters to both PersonAtAalto and Student
from these regular classes that inherit those traits.
Reimplementing a method with override
A subtype can override a method defined in a supertype (Chapters 2.4 and 7.3).
The toString method is overridden particularly often, but here’s a different example:
val experiment = Sub()experiment: Sub = Sub@1bd9da5
experiment.one()subtype: oneexperiment.two()subtype: twosupertype: two
We have chosen to override both of the two methods in the
supertype.
The one method of a Sub object works independently of
anything that Super does: this implementation replaces
the one in the supertype.
As a part of the subtype’s two method, we’ve chosen to
call the supertype’s version of the same method, so...
... a Sub object first generates the output specified in
the subtype, then does whatever the supertype’s method does.
The super keyword (note the lower case) refers to the supertype’s definition. It’s
available not just in overridden methods but throughout the body of any subtype.
Class-Based Inheritance
A class may inherit (not only a trait) but also another (regular) class.
In this example from Chapter 7.5, we have a Square class that inherits from
Rectangle:
The keyword open marks Rectangle as an open class, which means
that it may be freely inherited. Without open, the class would be
sealed by default.
We follow extends with the superclass’s name: the subclass
Square inherits from Rectangle. This gives all Square objects
the additional type of Rectangle (and Shape, since Rectangle
inherits the Shape trait).
Square takes a constructor parameter that determines the length
of each side.
To create an instance of a subclass, any initialization steps
that the superclass demands must also be performed; the subclass may
also pass constructor parameters its superclass. In this example,
we state that whenever a Square object is created, we initialize
a Rectangle so that each of its two constructor parameters (each
side length) gets the value of the new Square’s single constructor
parameter.
In a concrete class, all methods have an implementation. You may also define an abstract
class that, like a trait, may have abstract methods. Here’s an example:
The abstract keyword turns the class into an abstract class.
This class can’t be directly instantiated.
The totalPrice method is abstract. Any concrete subclasses need
to have an implementation for this method so that all Product
objects can actually run this method.
This table from Chapter 7.5 juxtaposes traits, abstract classes, and ordinary superclasses:
Trait
Abstract
superclass
Concrete
superclass
Can it have abstract methods?
Yes.
Yes.
No.
Can it be directly instantiated?
No.
No.
Yes.
Can it pass constructor parameters to its supertype(s)?
No.
Yes.
Yes.
Can you inherit several of them (listed after extends)?
Yes.
No.
No.
You can combine the techniques. For instance, a class may inherit from a superclass and
from a number of traits. Or you can have a regular class inherit a trait.
Scala’s class hierarchy
All Scala objects are of type Any. Any has the direct subclassesAnyVal and AnyRef:
AnyVal is a superclass of the common data types Int, Double,
Boolean, Char, Unit, and a few others. It’s relatively
uncommon to extend AnyVal in an application. (The JVM does
not use references to process AnyVals. AnyVals must be
immutable and conform to other strict conditions as well. When
used in the right places, AnyVals can improve efficiency.)
AnyRef, also known as Object, is a superclass for the classes
and singleton objects that don’t derive from AnyVal, such as
String and Vector. Any classes that you define inherit AnyRef
automatically unless you specify otherwise. (The JVM processes
AnyRefs via references.)
There’s also a Matchable trait that serves as a supertype for all the types that are
compatible with the match command. Both AnyRef and AnyVal extend Matchable, so
the trait covers nearly all Scala types, with some very rare exceptions.
The word sealed at the top of a trait or class means that the only place where you are
allowed to directly extend that trait is that very file (Chapter 7.4). For instance, the
API class Option is defined like this:
sealedabstractclassOption/* Etc. */
Nothing can inherit from Option except the singleton None and the subclass Some,
which are defined in the same file. This guarantees that every last Option object is
either None or a Some.
Regular, concrete classes are by default “almost sealed”, unless otherwise specified with
open. “Almost sealed” in the sense that the Scala compiler will issue a warning if you
extend such a class in a different file — but won’t quite prevent you from doing that.
If you mark a class as open, it can be freely extended anywhere (Chapter 7.5).
The word final (Chapter 7.5) is stricter than sealed: it prevents inheritance altogether.
You may also write final in a method definition (before def); this prevents subtypes
from overriding the method.
Enumerated types: enum
If you have type whose instances you can list in advance, you can define it as an
enumerated type. Such a type is like a regular class but cannot be instantiated as
usual; all its instances are listed within the type’s definition. Two examples from
Chapter 7.4:
We write a list with every instance of the type. If those
instances are identical to each other (apart from their names),
as is the case here, it’s enough to write case once, followed
by a comma-separated list.
With those definitions in place, we can use them like this:
val today = Weekday.Mondaytoday: Weekday = Monday
val cruelest = Month.Aprilcruelest: Month = April
import Weekday.*val deadlineDay = WednesdaydeadlineDay: Weekday = Wednesday
Enumerations come with a few other handy tools as well, such as the fromOrdinal and
values methods:
Month.fromOrdinal(0)res225: Month = January
Month.fromOrdinal(11)res226: Month = December
Weekday.valuesres227: Array[Weekday] = 2«Array(Monday, Tuesday, Wednesday, Thursday, Friday, Saturday, Sunday)»
Just like a regular class may have instance variables, constructor parameters, and
methods, so can an enumerated type. Here’s a quick example simplified from Chapter 7.4:
The singleton object Random has methods that generate (pseudo)random numbers:
import scala.util.RandomRandom.nextInt(10)res228: Int = 8
Random.nextInt(10)res229: Int = 6
Random.nextInt(10)res230: Int = 2
The integers we generate here fall between zero and nine.
That is, they are smaller than the parameter value 10 that we
pass in.
The singleton Random accesses the computer’s clock to obtain a random seed for its
algorithm. Alternatively, you can create a Random object that uses a custom seed:
val myGenerator1 = Random(74534161)myGenerator1: Random = scala.util.Random@75fbc2df
val myGenerator2 = Random(74534161)myGenerator2: Random = scala.util.Random@3f92984e
We create two random-number generators. Each one uses an arbitrary
integer as its seed.
myGenerator1.nextInt(100)res231: Int = 53myGenerator1.nextInt(100)res232: Int = 38myGenerator1.nextInt(100)res233: Int = 97myGenerator2.nextInt(100)res234: Int = 53myGenerator2.nextInt(100)res235: Int = 38myGenerator2.nextInt(100)res236: Int = 97
The generators rely on the same algorithm. When the seed numbers
are identical and we call nextInt the same way on both generators,
we get two identical sequences of “random” numbers.
Random objects have other randomizing methods beyond nextInt. One worth mentioning
here is shuffle (Chapter 8.1):
fromFile takes in a file path and returns an object of type
Source that is capable of accessing the file. The path may
be relative (as shown here) or absolute.
We use a loop to iterate over each of the lines, which we access
through the getLines method. (There are alternative ways to
iterate over the contents of a file; see Chapter 12.2.)
The try–finally construct ensures that the file-closing
code in the finally block will be executed even if the attempt
to read the data from the file fails for some reason.
The example program below writes text into a file:
importjava.io.PrintWriterimportscala.util.Random@maindefwritingExample()=valfileName="examplefolder/random.txt"valfile=PrintWriter(fileName)tryforn<-1to10000dofile.println(Random.nextInt(100))println("Created a file "+fileName+" that contains pseudorandom numbers.")println("In case the file already existed, its old contents were replaced with new numbers.")finallyfile.close()endwritingExample
You can create a PrintWriter object as shown. Pass in the
name of the file you intend to create or rewrite.
The println method writes a single line of text into the file.
Closing the file connection is particularly important when writing.
This ensures that all the data scheduled for writing actually finds
its way into the file on disk.
Graphical User Interfaces
Programmers use different libraries for writing graphical user interfaces. O1’s ebook
features two libraries: the GUI tools in O1Library and Scala’s more generic GUI library,
Swing.
O1Library’s GUI tools
The key component of O1’s GUI toolkit is the class o1.View. Below is an example that summarizes
some of its main features.
The basic idea is this: a View is a window that graphically displays an object that serves as
an application’s domain model (Chapter 2.7). In the example below, the model is an instance
of this toy class:
// Each "Thing" is a mutable object. It has a location and a color.classThing(varcolor:Color):varlocation=Pos(10,10)defmove()=this.location=this.location.add(1,1)defreturnToStart()=this.location=Pos(10,10)endThing
Let’s write a GUI that looks like this and displays a Thing as a circle against a two-color
background:
In this example app, the “thing” keeps moving rightwards and downwards as
the clock ticks. It returns back to its starting location near the top-left
corner when the user double-clicks the mouse. It changes color depending on
the position of the mouse cursor.
Our GUI is a singleton object that is a special case of the generic
View class.
We set the title of the View window. There are also some optional
parameters that we may pass in; in this example, we specify that the
tick rate of the app’s clock should be 10.
Any View object needs a makePic method that determines which
image to display onscreen. Here, we form the image by placing a
small circle against a rectangular background image.
Event-handler methods (Chapter 3.1) react to the passing of time
and the user’s actions in the GUI. A few examples are shown here:
the “thing” moves on each clock time, changes color when the mouse
cursor enters a different region, and returns to the top-left
corner on a double click.
We capture the MouseClicked object that describes the event
and ask it to provide the number of consecutive clicks (Chapter 3.6).
The isDone method defines when the GUI should stop responding
to events. In this app, that happens if the “thing” reaches a
location far enough on the right.
Creating a View object isn’t enough to display the window and
start the clock. You do that by calling start.
For more information, see Chapters 3.1, 3.6, and the Scaladocs.
The Swing GUI library
Chapter 12.4 is an introduction to the GUI library Swing. This example from that chapter
demonstrates several of the library’s key features:
importscala.swing.*importscala.swing.event.*objectEventTestAppextendsSimpleSwingApplication:valfirstButton=Button("Press me, please")(())valsecondButton=Button("No, press ME!")(())valprompt=Label("Press one of the buttons.")valallPartsTogether=BoxPanel(Orientation.Vertical)allPartsTogether.contents++=Vector(prompt,firstButton,secondButton)valbuttonWindow=MainFrame()buttonWindow.contents=allPartsTogetherbuttonWindow.title="Swing Test App"this.listenTo(firstButton,secondButton)this.reactions+={caseclickEvent:ButtonClicked=>valclickedButton=clickEvent.sourcevalmessage="You pressed the button that says: "+clickedButton.textDialog.showMessage(allPartsTogether,message,"Info")clickedButton.text=clickedButton.text+"!"}deftop=this.buttonWindowendEventTestApp
The app object inherits a class that represents Swing-based
applications.
We create some objects that represent GUI elements.
We set the panel as the contents of the window and adjust
additional window properties.
We register an object (here: the app object itself) as an
event listener for the buttons.
We define how to react to the events that the listening object
is informed of.
When an event occurs, we run some code that displays an
auxiliary window (a dialog). This code has access to the variable
clickEvent, which stores a ButtonClicked object that
represents the GUI event that occurred.
A SimpleSwingApplication needs a top window that gets
displayed as soon as the application is launched.
The above approach for handling exceptions is more generic, but for simple use cases with
buttons, it is enough provide some code to the newly created Button object:
valmyButton=Button("Text on button")(codeToRunWhenButtonPressed())
The following are reserved words in Scala and therefore cannot be used as identifiers:
abstract case catch class def do else enum export extends
false final finally for given if implicit import lazy match
new null object override package private protected return sealed super
then throw this trait true try type val var while
with yield
: = <- => <: >: # @ =>> ?=>
Furthermore, the following names are “soft keywords”: they’re not banned as identifiers
but have special meanings in certain contexts.
as derives end extension infix inline opaque open transparent using
| * + -
Feedback
Credits
Thousands of students have given feedback and so contributed to this ebook’s design.
Thank you!
The ebook’s chapters, programming assignments, and weekly bulletins have been written in
Finnish and translated into English by Juha Sorva.
The appendices (glossary, Scala reference,
FAQ, etc.) are by Juha Sorva unless otherwise specified on the page.
The automatic assessment of the assignments has been developed by: (in alphabetical order)
Riku Autio, Nikolas Drosdek, Kaisa Ek, Joonatan Honkamaa, Antti Immonen, Jaakko Kantojärvi,
Onni Komulainen, Niklas Kröger, Kalle Laitinen, Teemu Lehtinen, Mikael Lenander, Ilona Ma,
Jaakko Nakaza, Strasdosky Otewa, Timi Seppälä, Teemu Sirkiä, Joel Toppinen, Anna Valldeoriola Cardó,
and Aleksi Vartiainen.
The illustrations at the top of each chapter, and the similar drawings elsewhere in the
ebook, are the work of Christina Lassheikki.
The animations that detail the execution Scala programs have been designed by Juha
Sorva and Teemu Sirkiä. Teemu Sirkiä and Riku Autio did the technical implementation,
relying on Teemu’s Jsvee and Kelmu toolkits.
The other diagrams and interactive presentations in the ebook are by Juha Sorva.
The O1Library software
has been developed by Aleksi Lukkarinen, Juha Sorva, and Jaakko Nakaza. Several of its
key components are built upon Aleksi’s SMCL
library.
The pedagogy of using O1Library for simple graphical programming (such as Pic) is
inspired by the textbooks How to Design Programs by Flatt, Felleisen, Findler, and
Krishnamurthi and Picturing Programs by Stephen Bloch.
The course platform A+ was originally created at Aalto’s LeTech
research group as a student project. The open-source project
is now shepherded by the Computer Science department’s edu-tech team and hosted by the department’s IT
services;
dozens of Aalto students and others
have also contributed.
The A+ Courses plugin,
which supports A+ and O1 in IntelliJ IDEA, is another open-source project. It has been designed and
implemented by various students
in collaboration with O1’s teachers.
For O1’s current teaching staff, please see Chapter 1.1.
Additional credits appear at the ends of some chapters.
Posting submission...
Identical submission
This submission is identical to the previous submission . Are you sure you want to submit it?
An error occurred while sending the submission for grading. Make sure you're connected to the internet. If a submission was consumed, the submission will be automatically graded after the service is available again.
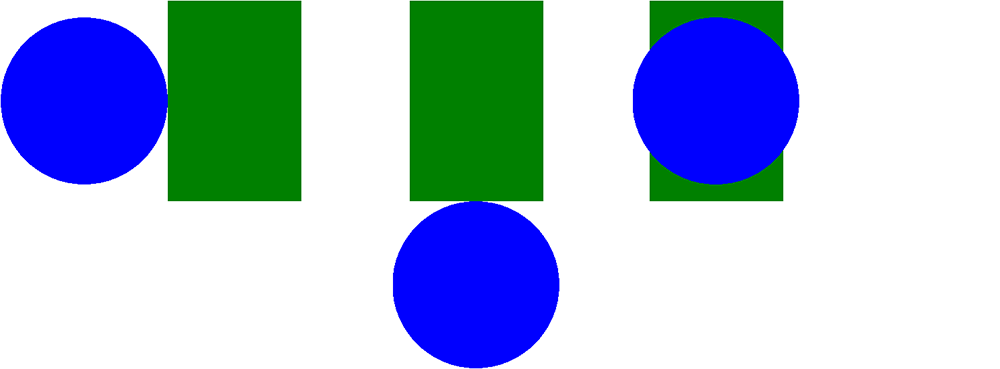
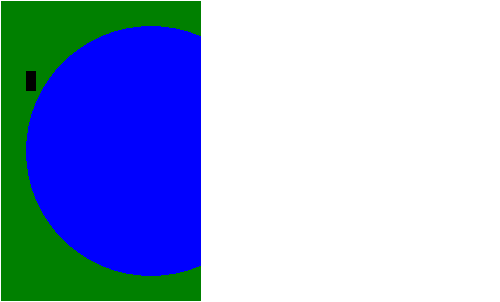
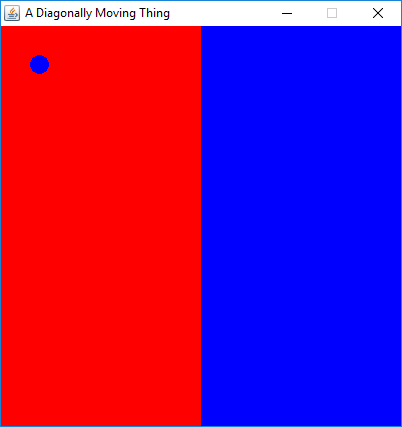
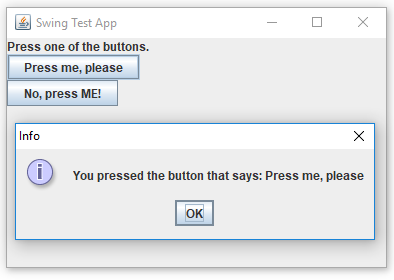

Comments
Program code may contain comments, which don’t affect the program’s behavior (Chapter 1.2).
An initial
/**marks a documentation comment (Chapter 3.2):The Scaladoc tool extracts such comments from Scala code and uses them in the documents that it creates.