Setting up a course on production servers
Outdated page
This page is very outdated. It will be updated or removed in the future.
This section discusses how to set up a course on a production server. Some information here might be specific to Aalto University, Gitlab or other software, not particularly A+ and mooc-grader.
Installing the course in the mooc-grader
The course (git repository) must be first installed in the mooc-grader server.
When the gitmanager component is enabled in the mooc-grader, new courses are
installed there by entering the address of the course git repository.
The address for installing new courses is https://GRADERDOMAIN/gitmanager/new/,
for example, https://grader.cs.hut.fi/gitmanager/new/. (The Aalto server is only
accessible inside the Aalto network.) The form is filled as follows:
- Key
The course key that is used in the mooc-grader filesystem as the name of the course directory. The key is also used in the course URLs for importing it to the A+ platform and in the webhook for updating the course via git. It is recommended to use a key that consists of the course code and the year of the course instance, e.g.,
cs-a1111_2019. The keys used in the server must be unique, that is, no two installed courses may use the same key.- Git origin
The Git URL for cloning the repository. You should use the Git SSH URL. If the repository is publicly accessible without authentication, the HTTPS URL of the repository should work as well. (At Aalto, course git repositories should be hosted in the Aalto Version GitLab service https://version.aalto.fi.)
- Git branch
The name of the git branch that should be cloned to the server.
- Update hook
Leave this empty.
When the course repository is cloned with the SSH URL, note that the grader server needs SSH keys that are accepted by the Git server. The server administrators have presumably set up the keys and course repositories only need to enable them (in GitLab if the repositories are hosted there).
If the gitmanager component is disabled in the mooc-grader, the course directory could be manually copied to the server. In production, it is much more sensible to use the gitmanager, though. It is easier to update the course materials via git.
GitLab webhook to mooc-grader
When the course repository is hosted in a GitLab server, it is possible to create a GitLab webhook so that you may update the course in production directly with git: when you push the course material to the branch set up in the mooc-grader server, GitLab notifies the mooc-grader automatically and the mooc-grader pulls the new version from git and compiles the course. Git support in the mooc-grader requires that the gitmanager component is enabled in the mooc-grader.
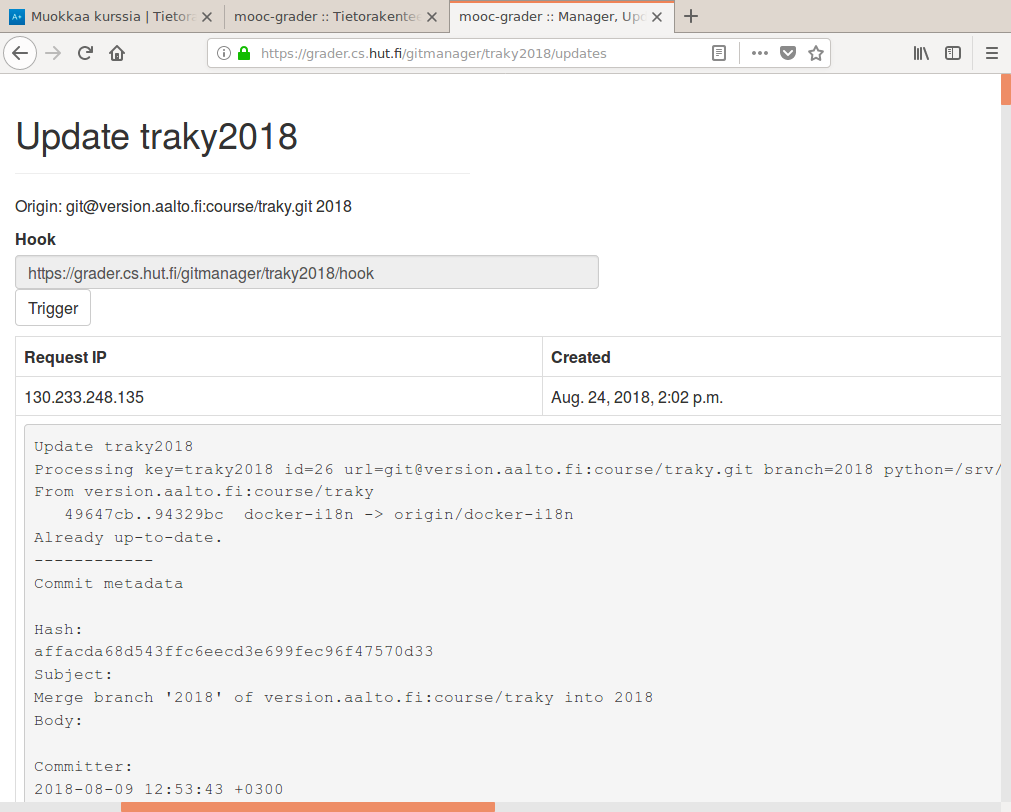
The web interface of the gitmanager shows the update and compilation log of the
course. The page also shows the git hook URL that should be installed in the
GitLab server. The URL of the page is https://GRADERDOMAIN/gitmanager/KEY/updates
where GRADERDOMAIN is the full domain name of the server running mooc-grader,
and KEY is the course key used to install the course in the mooc-grader server.
If the compilation is successful, the course should be visible on the server
with url https://GRADERDOMAIN/KEY/.
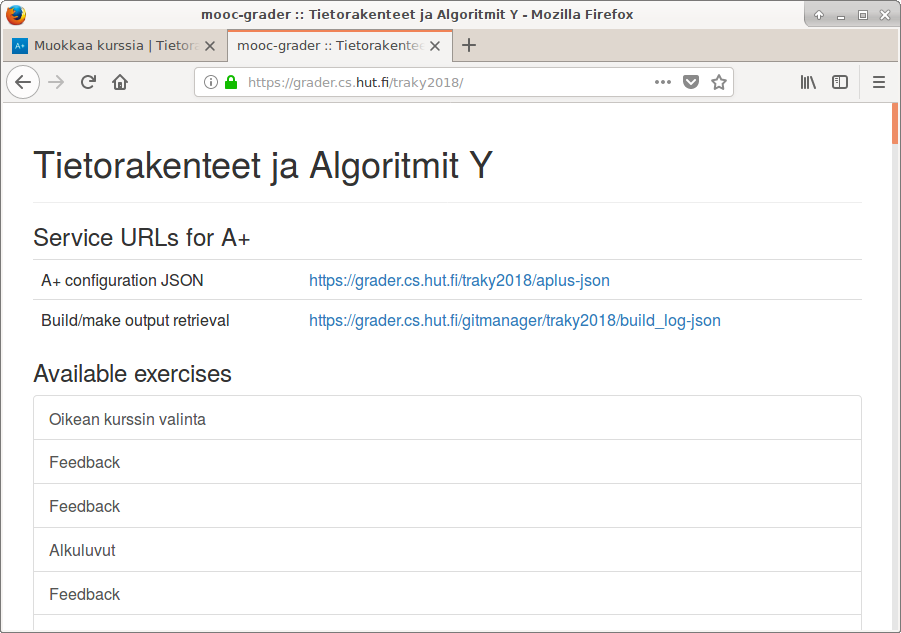
There you will see all the exercises on the course. You can also find the
course configuration URL which is needed for A+. It is typically
https://GRADERDOMAIN/KEY/aplus-json.
Setting up the git webhook in GitLab
The course git hook URL in the mooc-grader follows the pattern
https://GRADERDOMAIN/gitmanager/KEY/hook. It is added to the GitLab repository
in the web interface of the project. In the project home page, go to
Settings -> Integrations in the left-side menu.
Fill in the form:
Enter the mooc-grader course hook URL in the "URL" field.
Leave the "secret token" empty.
Select trigger for "push events", enter the branch name in the field (the same branch that is installed in the mooc-grader) and select "enable SSL verification".
Click the "add webhook" button.
Setting up the course on A+
Next you have to create the course on A+. If there are no previous course instances yet, maybe your A+ system administrator will help with it.
If there is an old course instance, go to the course teacher's view.
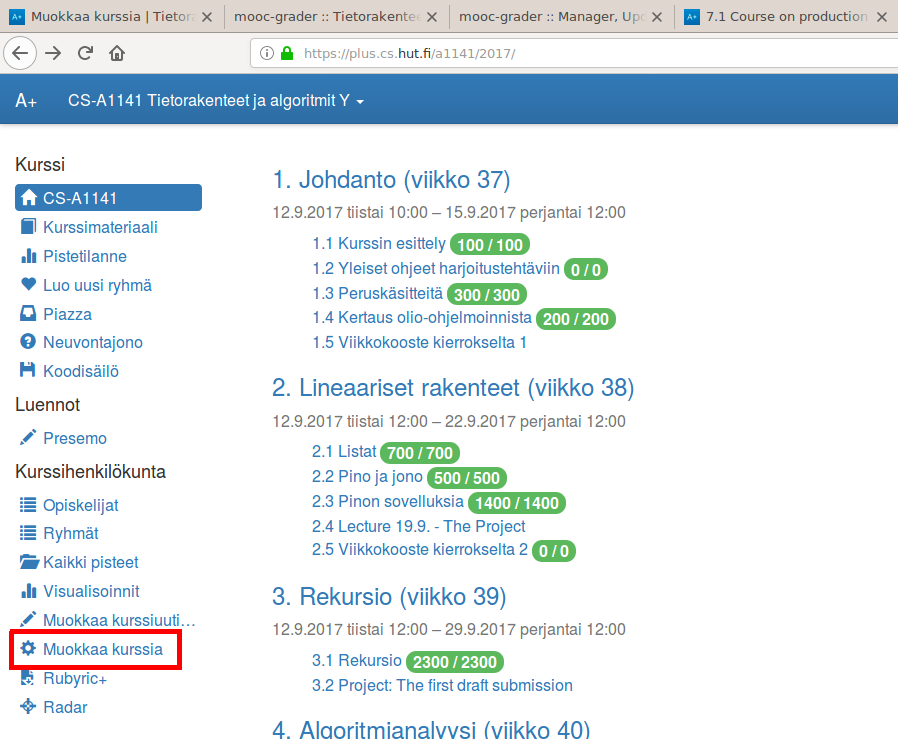
If you have an old instance of the course, go there first. In the left-side menu, you
should have a link "Muokkaa kurssia" (Edit course). It leads to
https://APLUSDOMAIN/COURSENAME/INST/teachers/, where APLUSDOMAIN
is the full domain name for the server running A+, COURSENAME is the short name
of the course and INST is the name of the most recent instance of the
course. This leads to the following view:
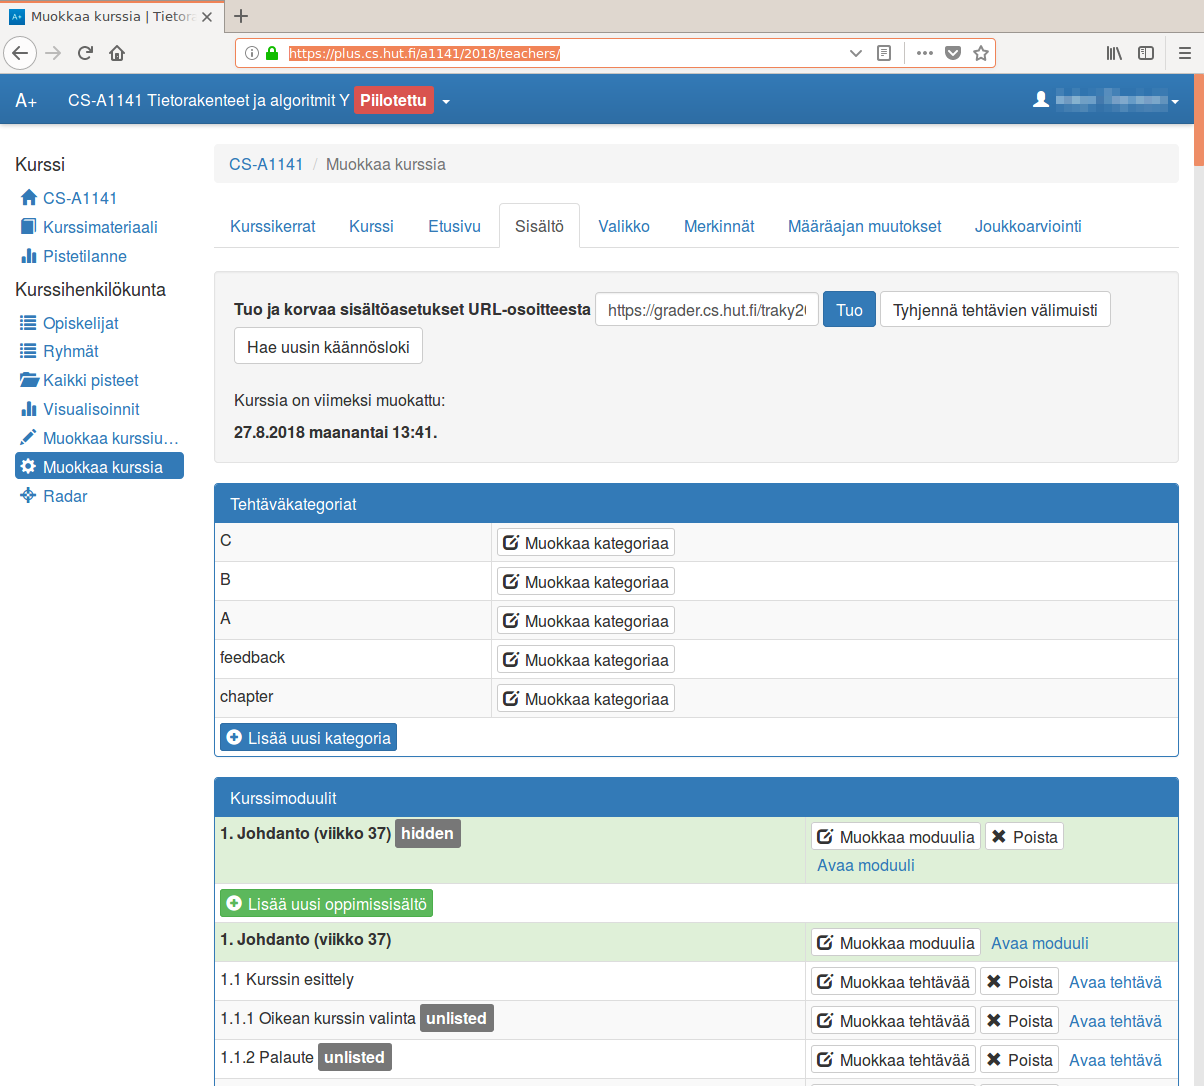
Unfortunately, the user interface is currently in Finnish only. Here are the essential translations:
Kurssikerrat: course instances
Kurssi: edit current instance of the course
Etusivu: edit the front page of the course
Sisältö: contents of the course
Valikko: edit the course menu on the left
Merkinnät: student tags
Määräajan muutokset: personal deadline deviations
Joukkoarviointi: batch assessment
Go to the tab "Kurssikerrat" (course instances).
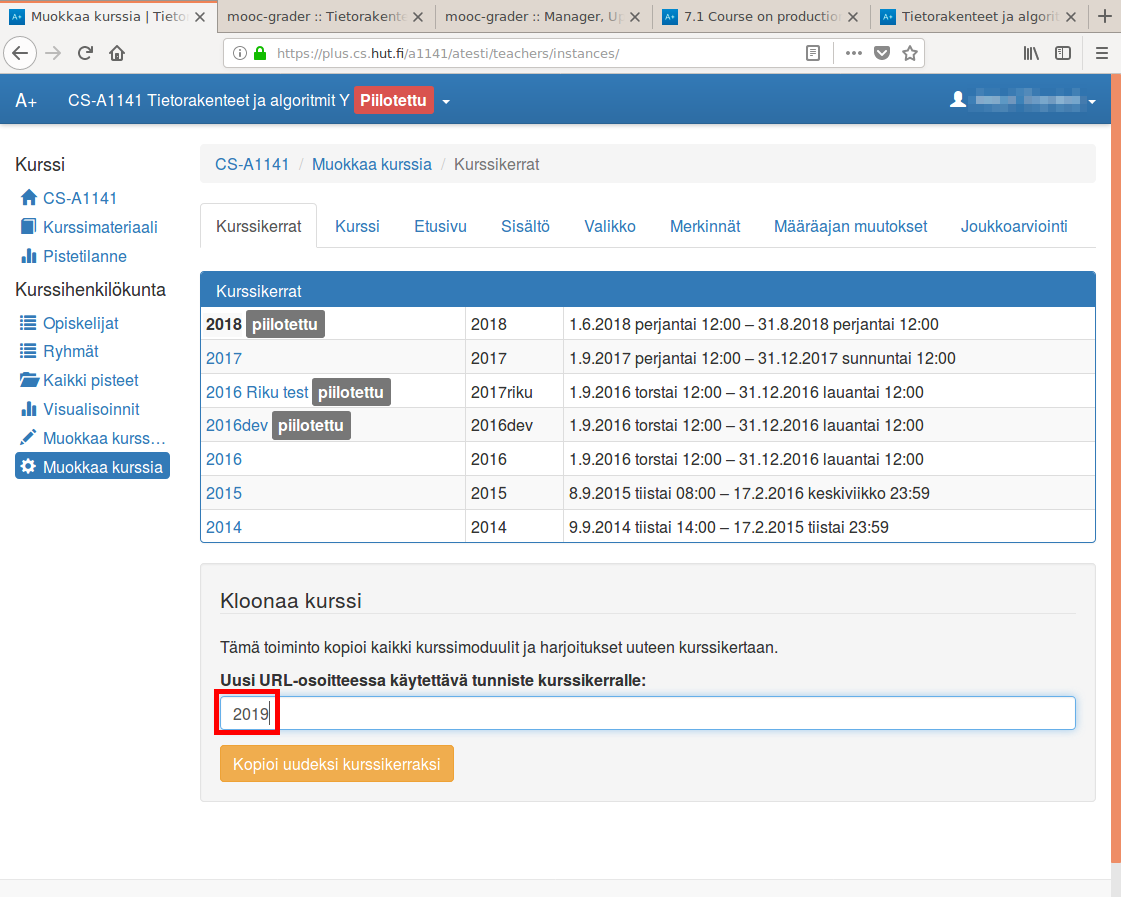
This page shows all instances of the course: The name of the instance, the instance identifier in the course URL, and the opening and closing time of the course. In the picture above, the instance named "2018" is chosen. We want to clone all course modules and exercises to a new course instance. Write the new course URL identifier, like "2019", to the field "Uusi URL-osoitteessa käytettävä tunniste kurssikerralle:" and click the orange "Kopioi uudeksi kurssikerraksi" button (copy as a new course instance).
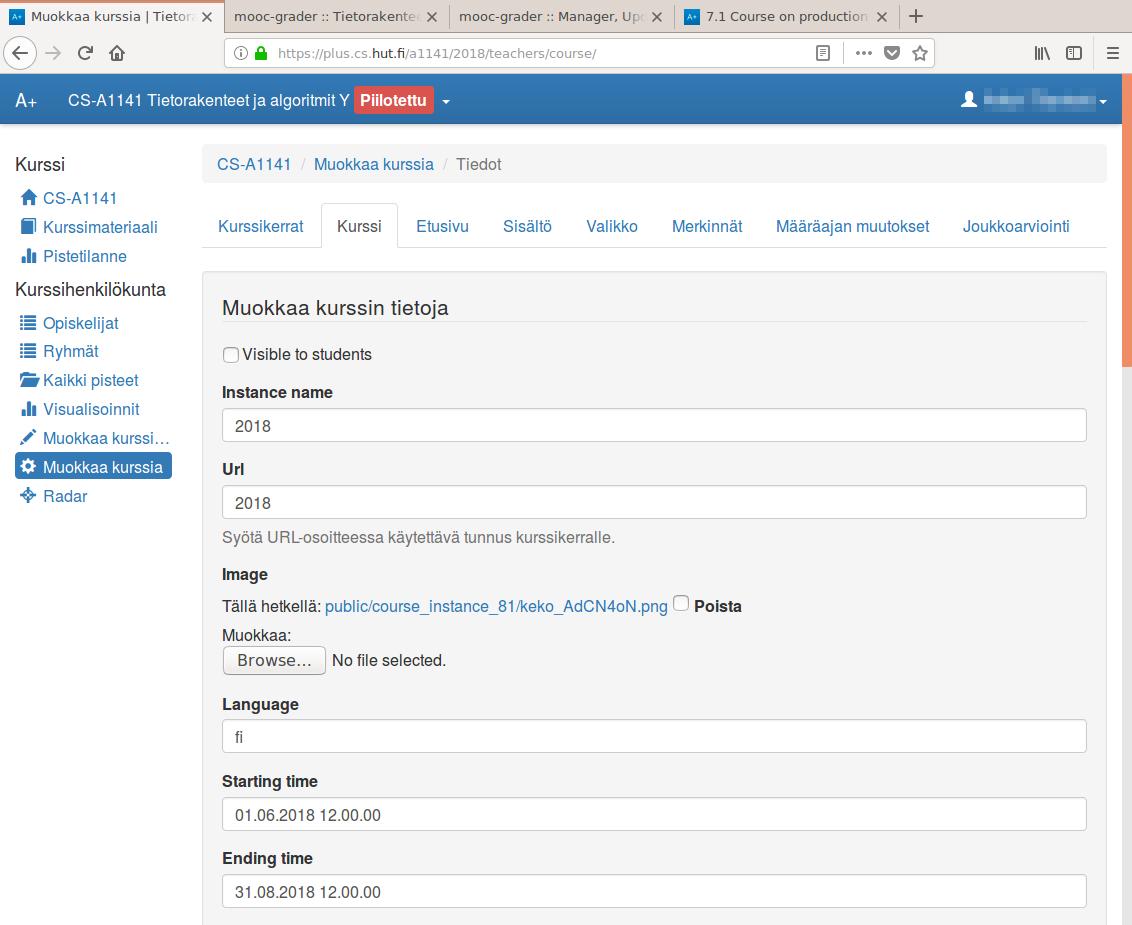
The course data is now copied and you will be directed to the "edit current instance" tab of the new instance.
This part is documented in the next chapter, Course settings.
Updating the course instance
Sometimes you need to alter the course material when the teaching has already begun. This means modifying the RST documents, or the exercise descriptions or unit tests for grading. Normally, you can just push the course material to the git branch you have set. Only the mooc-grader will know about it in this case.
However, if you add a new exercise to the course or alter the settings, such as
the opening and closing dates of the exercises, you have to update the course
in A+ as well. This is done on the "Sisältö" (contents) tab on the teacher's
view in A+. The field "Tuo ja korvaa sisältöasetukset URL-osoitteesta" has the course
configuration URL from the mooc-grader, the one of the format
https://GRADERDOMAIN/KEY/aplus-json. Next to it, there is the button
"Tuo" (import). Click on it and the course configuration will be updated from
mooc-grader.