Luet oppimateriaalin englanninkielistä versiota. Mainitsit kuitenkin taustakyselyssä osaavasi suomea. Siksi suosittelemme, että käytät suomenkielistä versiota, joka on testatumpi ja hieman laajempi ja muutenkin mukava.
Suomenkielinen materiaali kyllä esittelee englanninkielisetkin termit.
Kieli vaihtuu A+:n sivujen yläreunan painikkeesta. Tai tästä: Vaihda suomeksi.
Installing IntelliJ
As explained in Chapter 1.2, O1’s official programming environment is IntelliJ IDEA (just IntelliJ for short) and its plugin A+ Courses. These tools are installed on Aalto IT’s Linux workstations.
If you want to use IntelliJ on your personal computer, you’ll need to install it as described on this page. IntelliJ is available for Windows, macOS, and Linux, at no cost. The newer your operating system, the less likely it is that you’ll run into trouble while installing.
(Another option is to use IntelliJ and A+ Courses through Aalto’s Open OnDemand service, which enables you to run IntelliJ in your web browser, without installation. For more information, see the gray box in Chapter 1.2.)
To use IntelliJ IDEA (just IntelliJ for short) for programming on your personal computer, you’ll need to install it as described on this page. It is available for Windows, macOS, and Linux, at no cost. The newer your operating system, the less likely it is that you’ll run into trouble while installing.
These links take you to the appropriate installation instructions below on this page:
Version numbers matter!
Any tools that you use in O1 should be compatible with version 3.7 of the Scala programming language.
We use the IntelliJ version called Community Edition 2025.2.
We use a plugin for IntelliJ named A+ Courses, specifically its version 4.4.
You’ll also need a Java toolkit (JDK); the recommended version is 17.
The instructions on this page will help you find the appropriate versions.
Windows
Step 1 of 7: Install IntelliJ
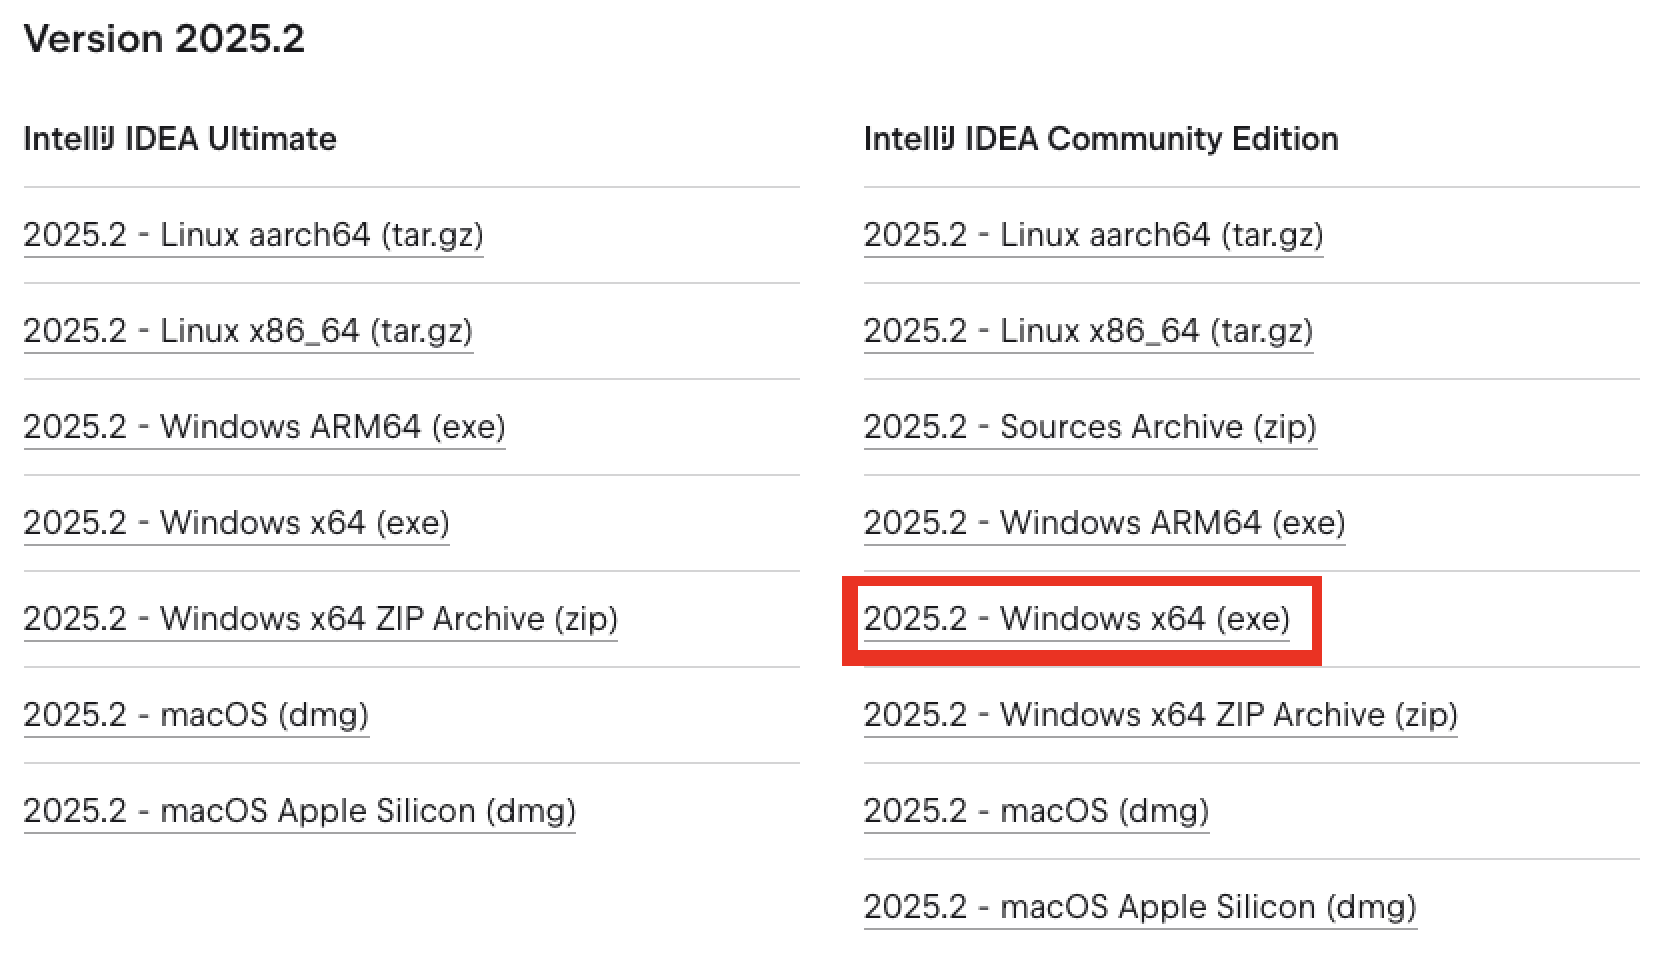
Download IntelliJ IDEA Community, version 2025.2. Make sure to pick the Community edition, not the commercial Ultimate edition. Choose the Windows (exe) installer.
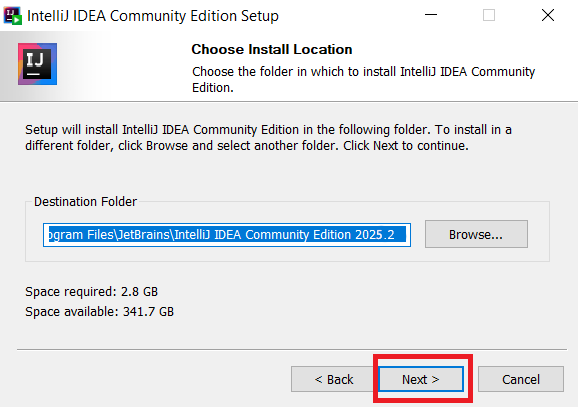
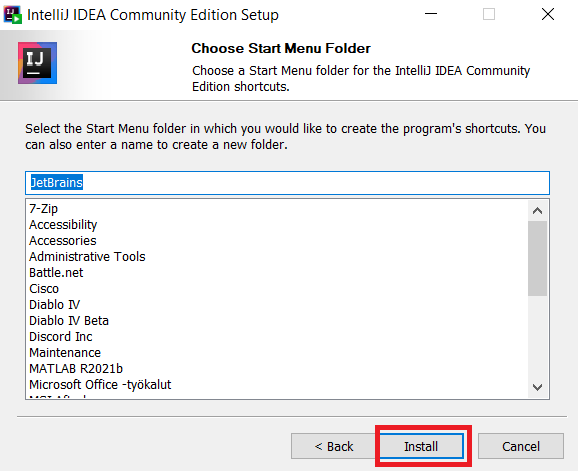
With the installer downloaded, double-click to run it.
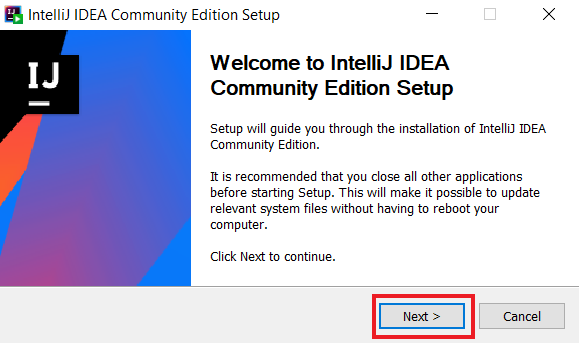
Unless you have a particular reason to do otherwise, the default responses to the installer’s questions will do.

If you’re going to continue to the next step right away, you may as well check the Run IntelliJ box in the last screen.

Step 2 of 7: Launch IntelliJ
If you didn’t already start IntelliJ at the end of the previous step, do it now. You can
do that via the Start menu, for example (or via the file idea64.exe that is under
the folder where you installed IntelliJ, in the bin subfolder).
On first launch, IntelliJ may ask you about sharing usage data and importing old settings. If so, pick Do not import settings and click OK.
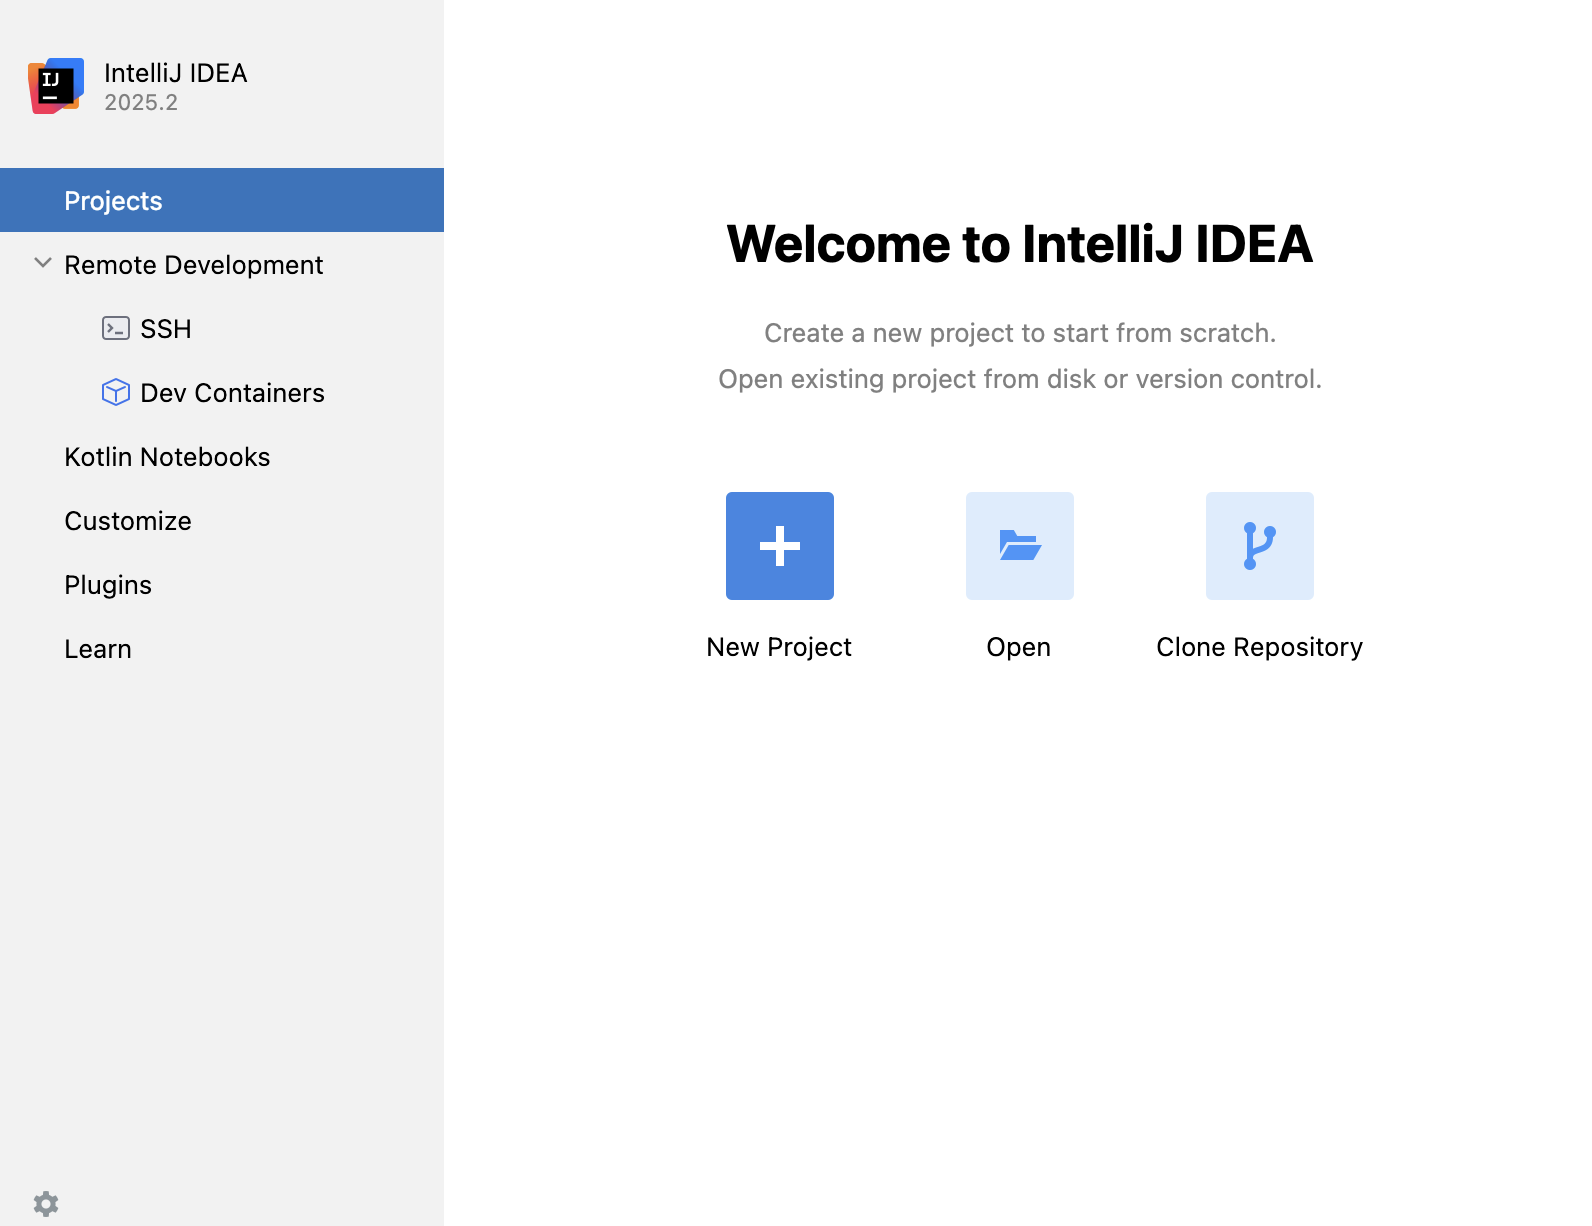
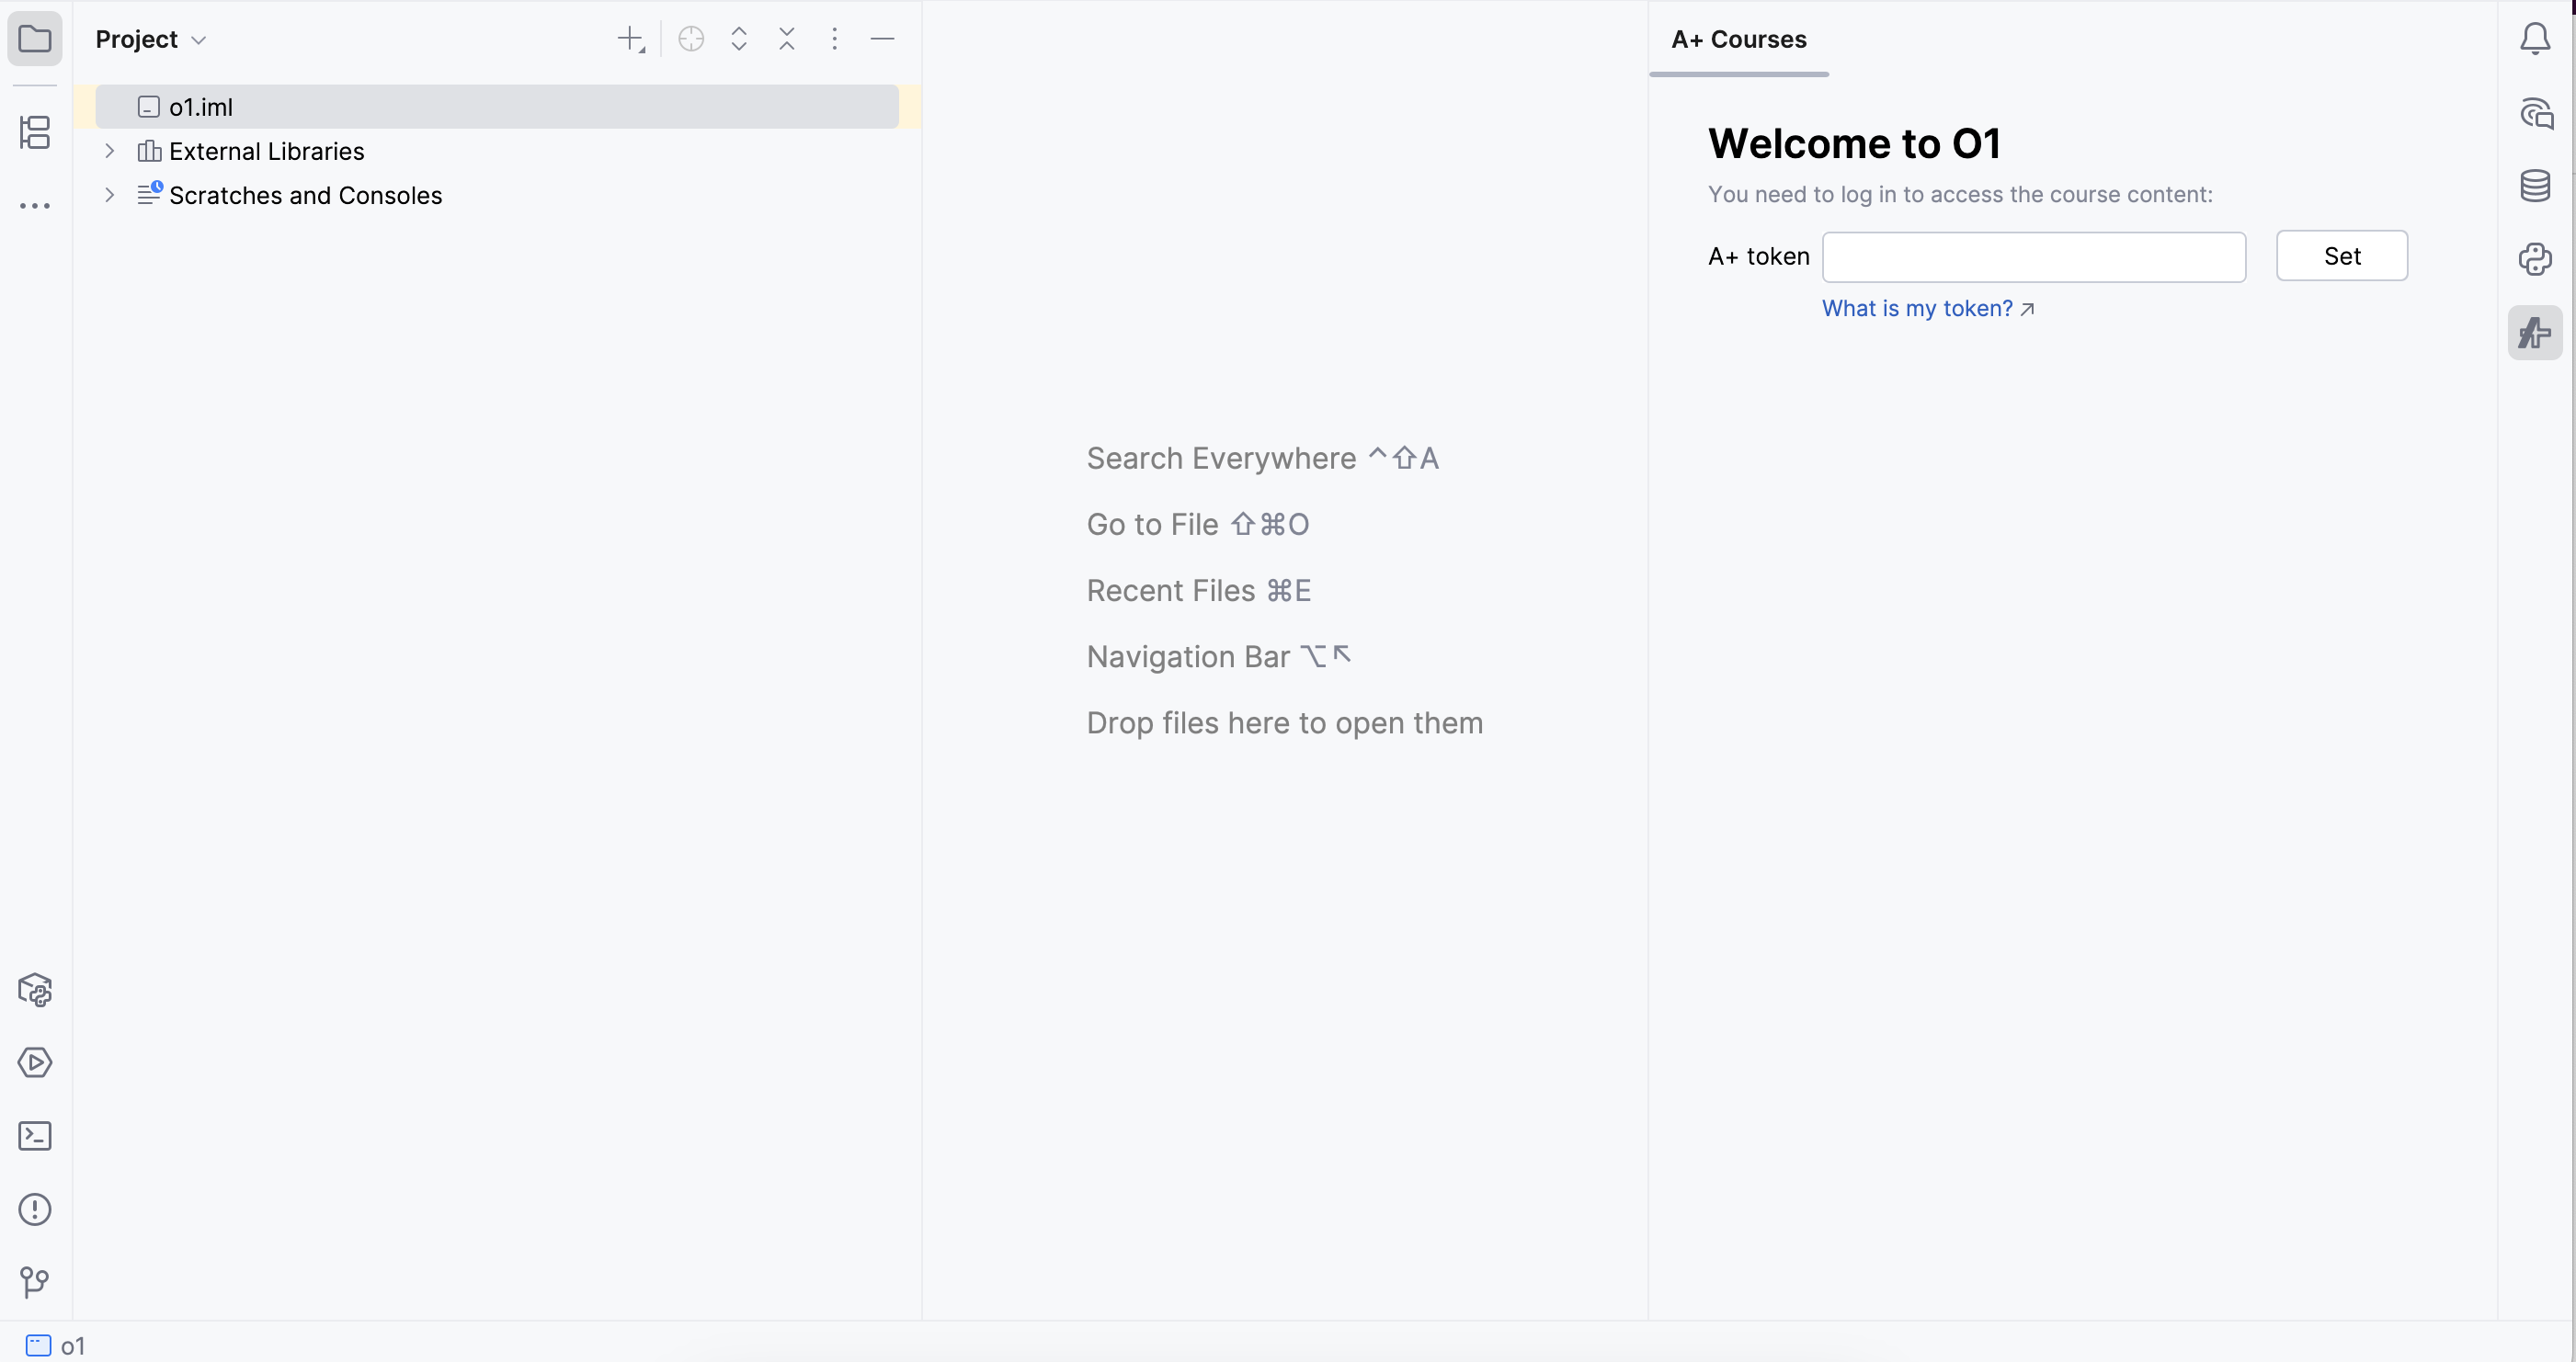
IntelliJ welcomes you with view that looks like this:
Step 3 of 7: Install the A+ Courses plugin
A plugin named A+ Courses supports your coursework in IntelliJ. The plugin makes it simple to fetch course materials and to submit your programs for automatic grading directly from IntelliJ.
Using the A+ Courses plugin is strongly recommended. Our ebook assumes that you do. (You could choose not to use the plugin, but it’s not convenient for you. See the alternative instructions at the bottom of this page.)
Here’s how to install the plugin:
In IntelliJ’s welcome screen, select Plugins from the list on the left.
A list of available plugins appears. Type A+ Courses in the search field at the top, and the plugin of that name shows up in the list. Click Install.

IntelliJ notifies you about installing a third-party plugin. Click Accept.
Click Restart IDE to finish up the installation.
If that button fails to show up, close IntelliJ yourself and relaunch it.
When restarting, you may see a message about “indexing” not being finished. Don’t worry about it.
Step 4 of 7: Create a course project
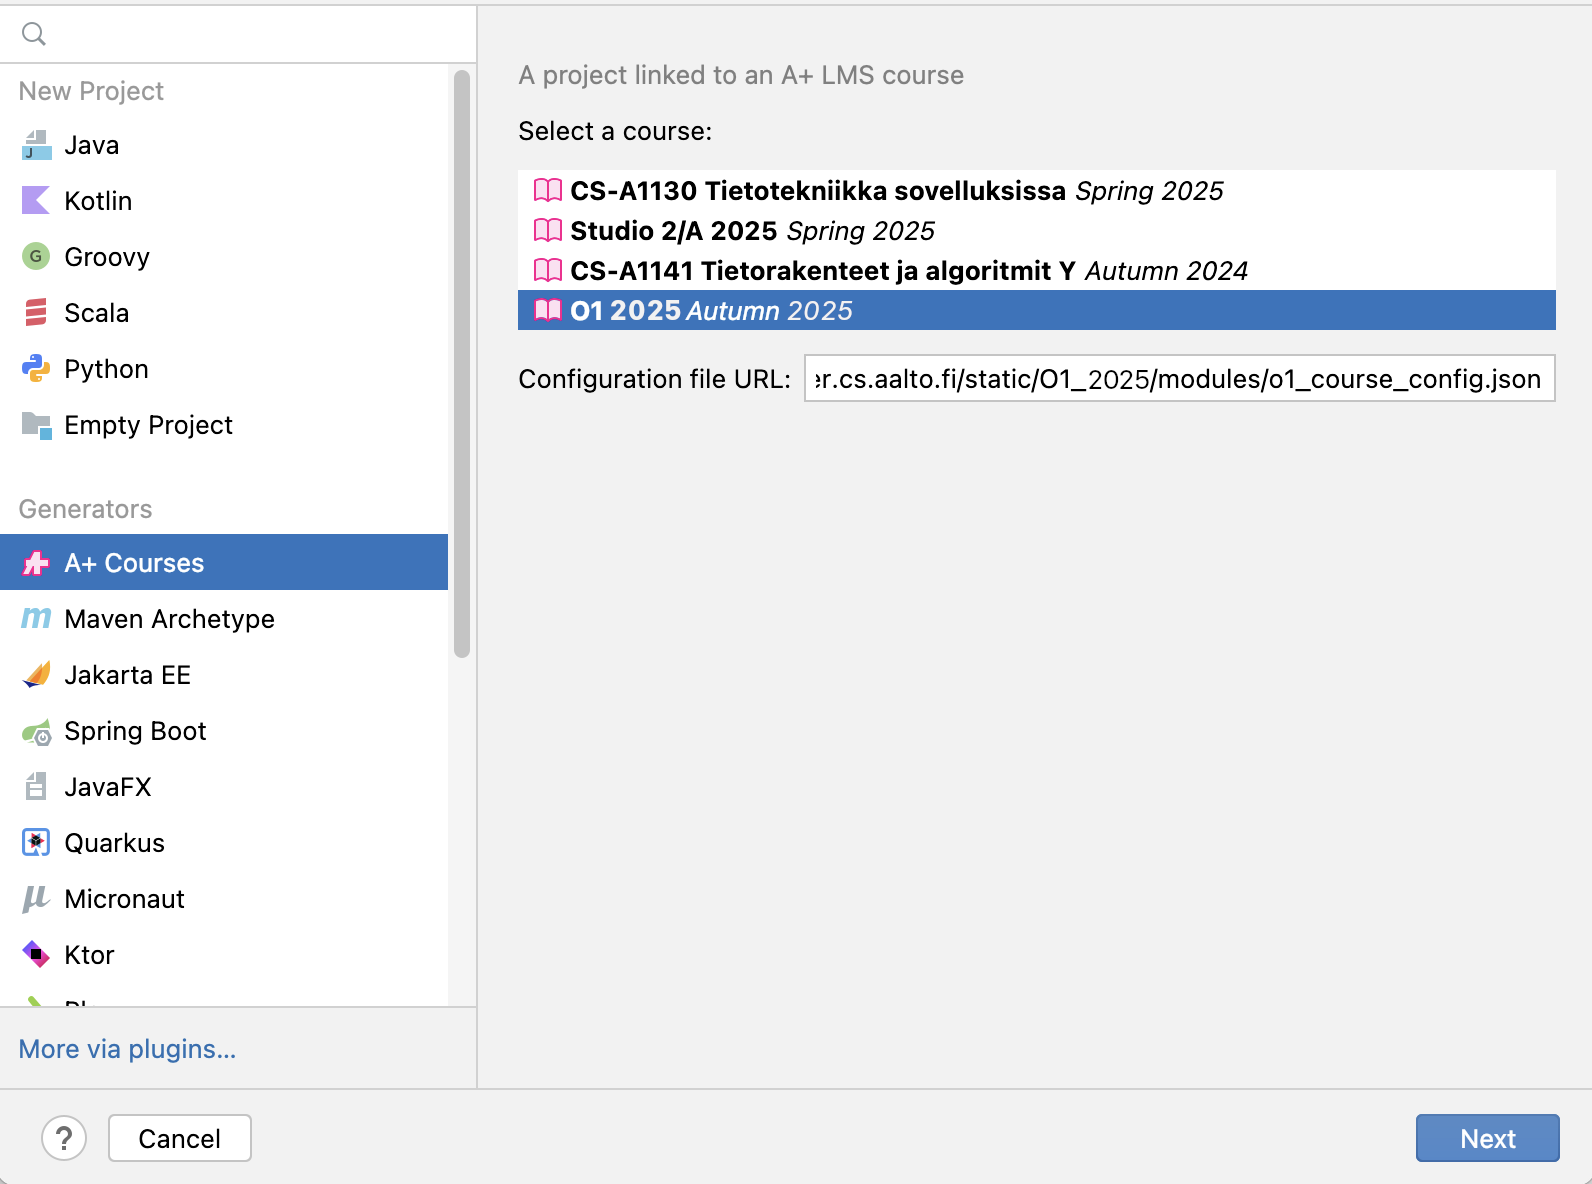
IntelliJ suggests that you create or select a project to store your work. Select New Project.
A New Project window pops up, with a list of project types on the left. Let’s set it up as an A+ Courses project. Pick that on the left, then choose O1 2025 from the list of available courses. Click Next.

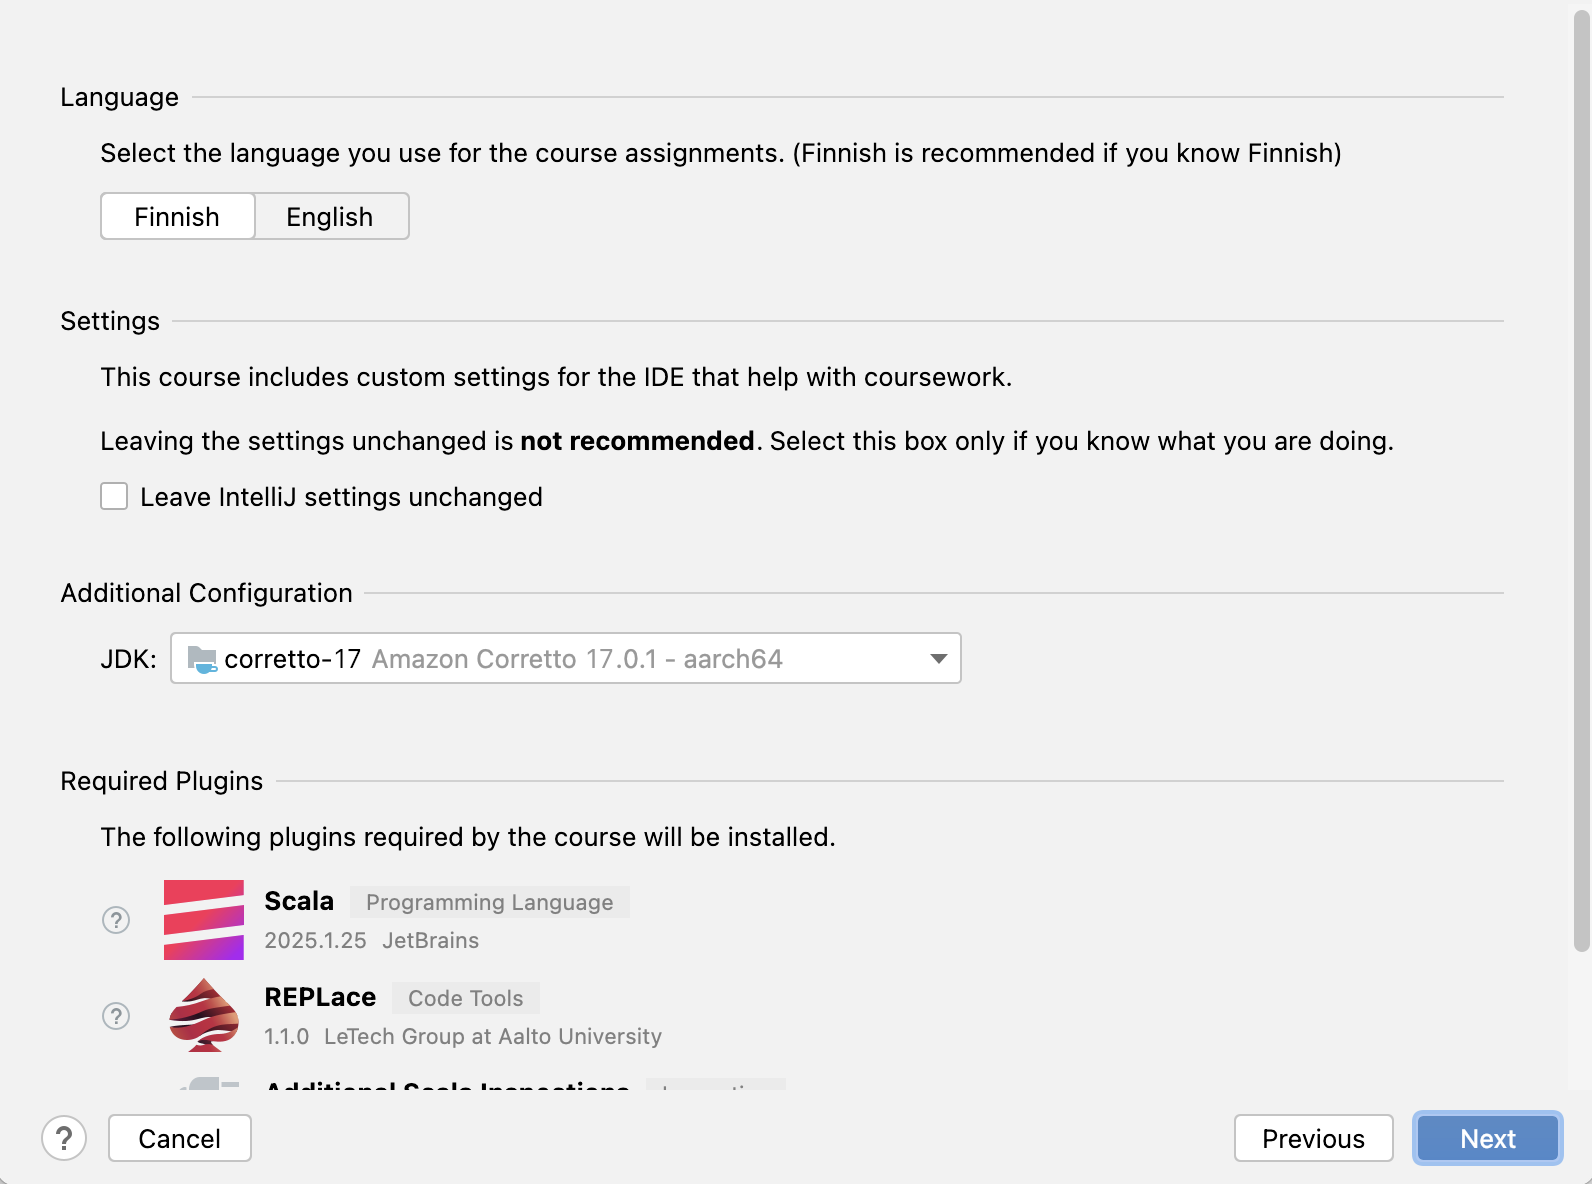
Step 5 of 7: Language options and the JDK toolkit
You should now see a view where you can select the language you use in O1 and install a toolkit known as the JDK, which you’ll need for programming:
At the top, select a language to use in O1. If you don’t know Finnish, pick English.
In the same view, you’ll see a drop-down menu labeled JDK. In that menu, is there an option with the version number 17?
If it happens that yes, there is, pick that option.
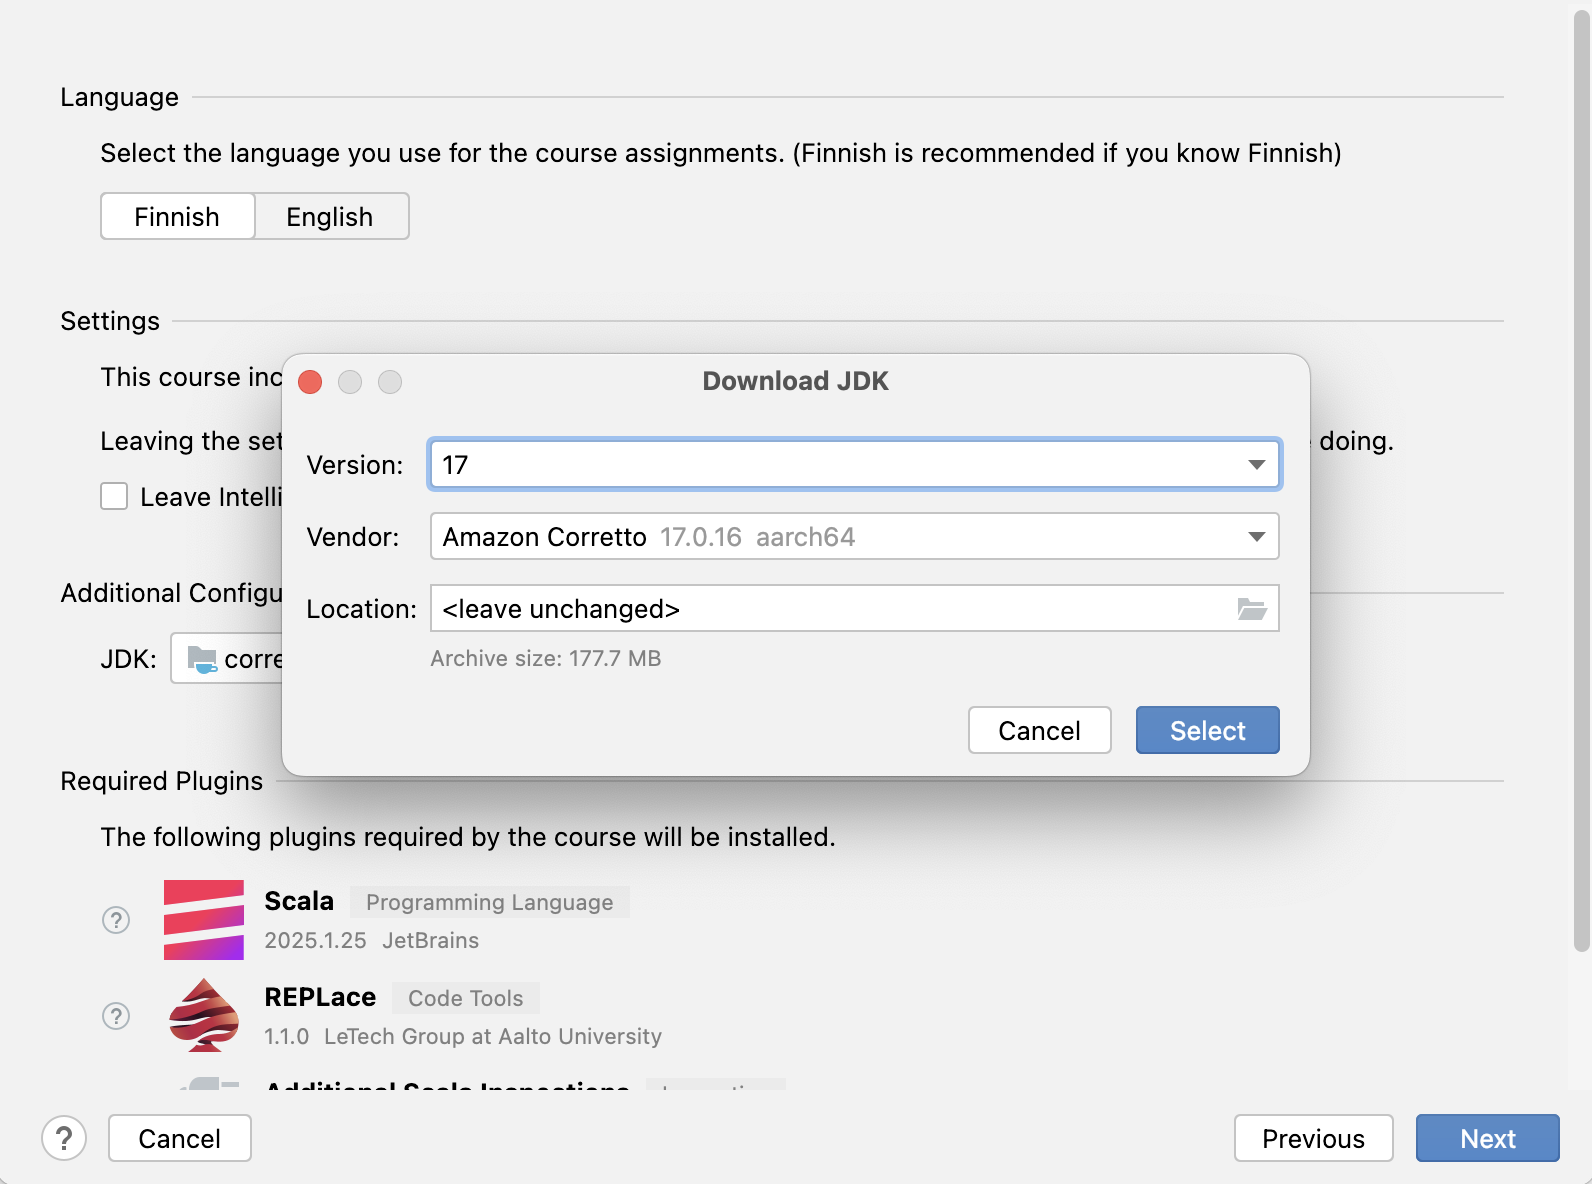
If not, do as illustrated in the two pictures below: Choose in the drop-down menu. For Version, pick 17, and for Vendor pick Amazon Corretto (for example). You’re free to choose where to download the JDK; the default folder should do fine. Finally, click Select, and IntelliJ will fetch the toolkit.
Click Next to continue.


Step 6 of 7: Select a location for the project
At the final screen, under Project Name, enter a suitable name for your course project,
such as o1 or o1assignments. Under Location, you can pick which
folder you’d like IntelliJ to store your files in; the suggested default is fine, unless
you want to change it. Finally, click Create.

Step 7 of 7: Enable assignment submissions
Before you can submit assignments to A+ from IntelliJ, you’ll need to give IntelliJ permission to act in your name in A+. You do that by giving IntelliJ a “passcode” (technically known as an API Access Token):
Open up your profile page in A+.
There’s a long string of characters under API Access Token. Copy the entire string to the clipboard. That’s your personal code, similar to a password. Do not share it with other people.
Now return to IntelliJ and do the following:
On the right-hand side, in the A+ Courses tab, you’ll see a field labeled A+ Token. Paste the token there.

Click Set.
You’ll see tabs appear next to the A+ Courses tab: Assignments, Modules, and News. You’ll be accessing them throughout the course.
macOS
Step 1 of 7: Install IntelliJ
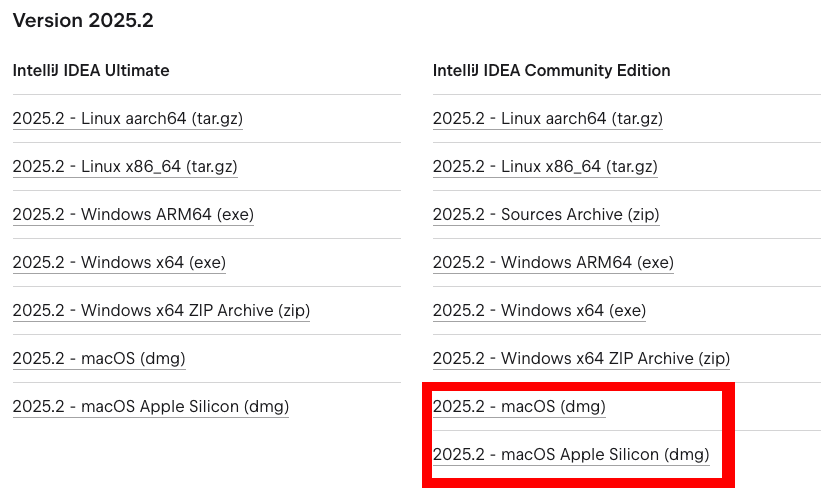
Download IntelliJ IDEA Community, version 2025.2. Make sure to pick the Community edition, not the commercial Ultimate edition. If you own an Apple computer with an M chip, select the macOS Apple Silicon version. Otherwise, select macOS.
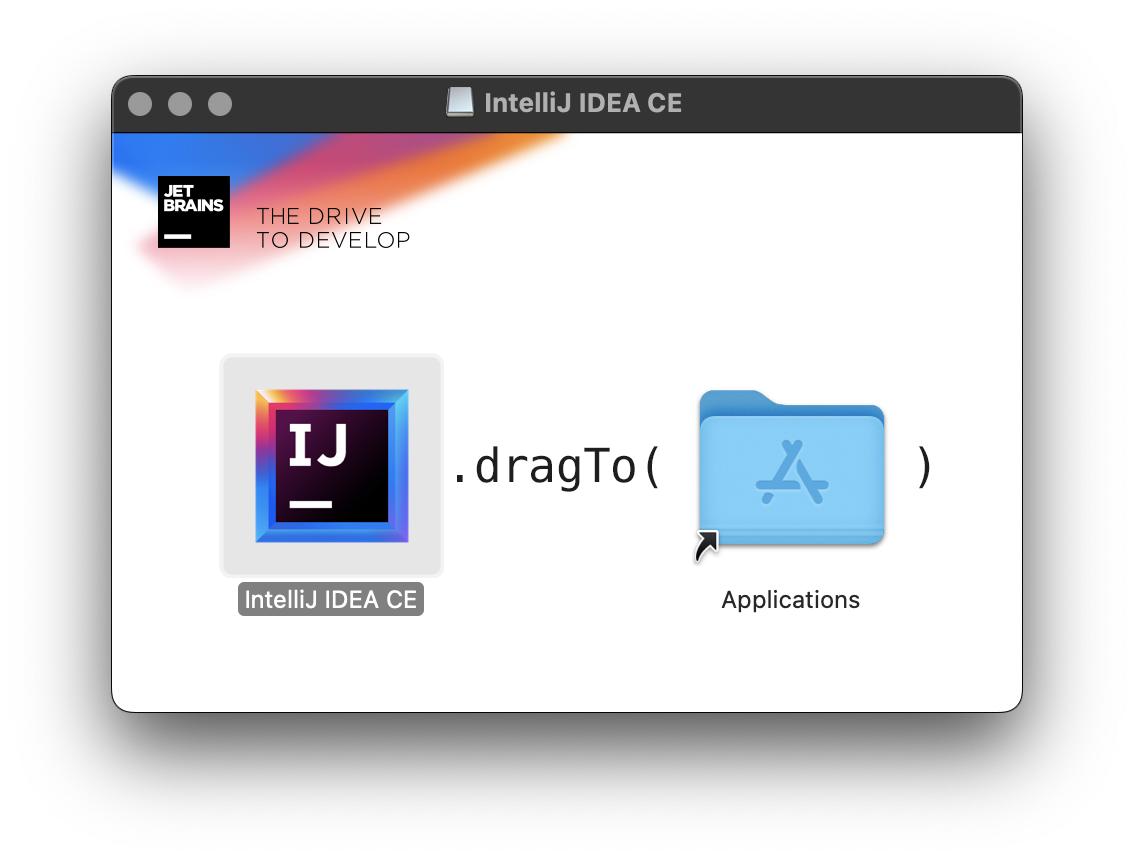
Install the program by extracting the files from the downloaded package: click
the file to open it and drag the IntelliJ_IDEA_CE file from the package into
your Applications folder.
Step 2 of 7: Launch IntelliJ
Launch IntelliJ from the file IntellJ_IDEA_CE.
On first launch, IntelliJ may ask you about sharing usage data and importing old settings. If so, pick Do not import settings and click OK.
IntelliJ welcomes you with view that looks like this:

Step 3 of 7: Install the A+ Courses plugin
A plugin named A+ Courses supports your coursework in IntelliJ. The plugin makes it simple to fetch course materials and to submit your programs for automatic grading directly from IntelliJ.
Using the A+ Courses plugin is strongly recommended. Our ebook assumes that you do. (You could choose not to use the plugin, but it’s not convenient for you. See the alternative instructions at the bottom of this page.)
Here’s how to install the plugin:
In IntelliJ’s welcome screen, select Plugins from the list on the left.
A list of available plugins appears. Type A+ Courses in the search field at the top, and the plugin of that name shows up in the list. Click Install.

IntelliJ notifies you about installing a third-party plugin. Click Accept.
Click Restart IDE to finish up the installation.
If that button fails to show up, close IntelliJ yourself and relaunch it.
When restarting, you may see a message about “indexing” not being finished. Don’t worry about it.
Step 4 of 7: Create a course project
IntelliJ suggests that you create or select a project to store your work. Select New Project.
A New Project window pops up, with a list of project types on the left. Let’s set it up as an A+ Courses project. Pick that on the left, then choose O1 2025 from the list of available courses. Click Next.

Step 5 of 7: Language options and the JDK toolkit
You should now see a view where you can select the language you use in O1 and install a toolkit known as the JDK, which you’ll need for programming:
At the top, select a language to use in O1. If you don’t know Finnish, pick English.
In the same view, you’ll see a drop-down menu labeled JDK. In that menu, is there an option with the version number 17?
If it happens that yes, there is, pick that option.
If not, do as illustrated in the two pictures below: Choose in the drop-down menu. For Version, pick 17, and for Vendor pick Amazon Corretto (for example). You’re free to choose where to download the JDK; the default folder should do fine. Finally, click Select, and IntelliJ will fetch the toolkit.
Click Next to continue.


Step 6 of 7: Select a location for the project
At the final screen, under Project Name, enter a suitable name for your course project,
such as o1 or o1assignments. Under Location, you can pick which
folder you’d like IntelliJ to store your files in; the suggested default is fine, unless
you want to change it. Finally, click Create.

Finally, you can make it easier to launch IntelliJ later by attaching it to the macOS Dock. Right-click the IntelliJ icon in the Dock and select . Now you’ll be able to find IntelliJ in the Dock.
Step 7 of 7: Enable assignment submissions
Before you can submit assignments to A+ from IntelliJ, you’ll need to give IntelliJ permission to act in your name in A+. You do that by giving IntelliJ a “passcode” (technically known as an API Access Token):
Open up your profile page in A+.
There’s a long string of characters under API Access Token. Copy the entire string to the clipboard. That’s your personal code, similar to a password. Do not share it with other people.
Now return to IntelliJ and do the following:
On the right-hand side, in the A+ Courses tab, you’ll see a field labeled A+ Token. Paste the token there.

Click Set.
You’ll see tabs appear next to the A+ Courses tab: Assignments, Modules, and News. You’ll be accessing them throughout the course.
Linux (Ubuntu)
Step 1 of 7: Install IntelliJ
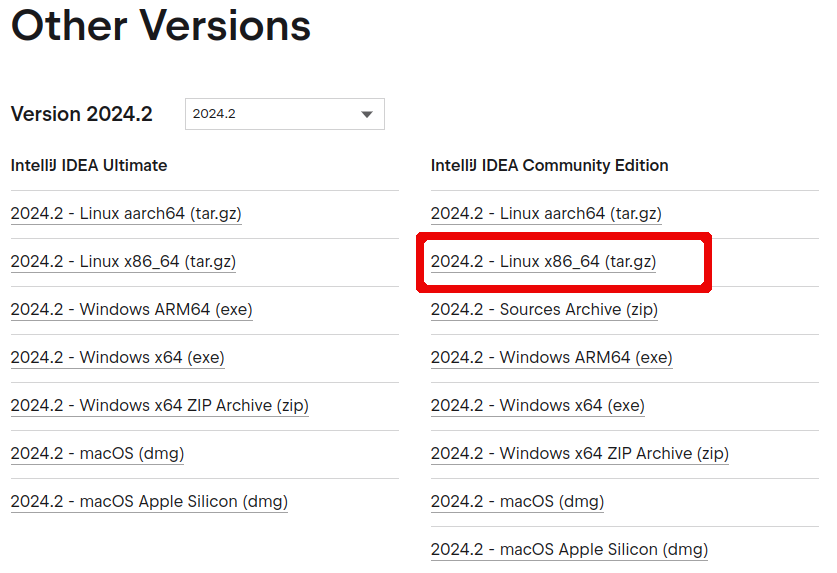
Download IntelliJ IDEA Community, version 2025.2. Make sure to pick the Community edition, not the commercial Ultimate edition.
Install the program by extracting the files from the downloaded package: Click the file to open it. Extract its contents in a folder of your choosing.

Step 2 of 7: Launch IntelliJ
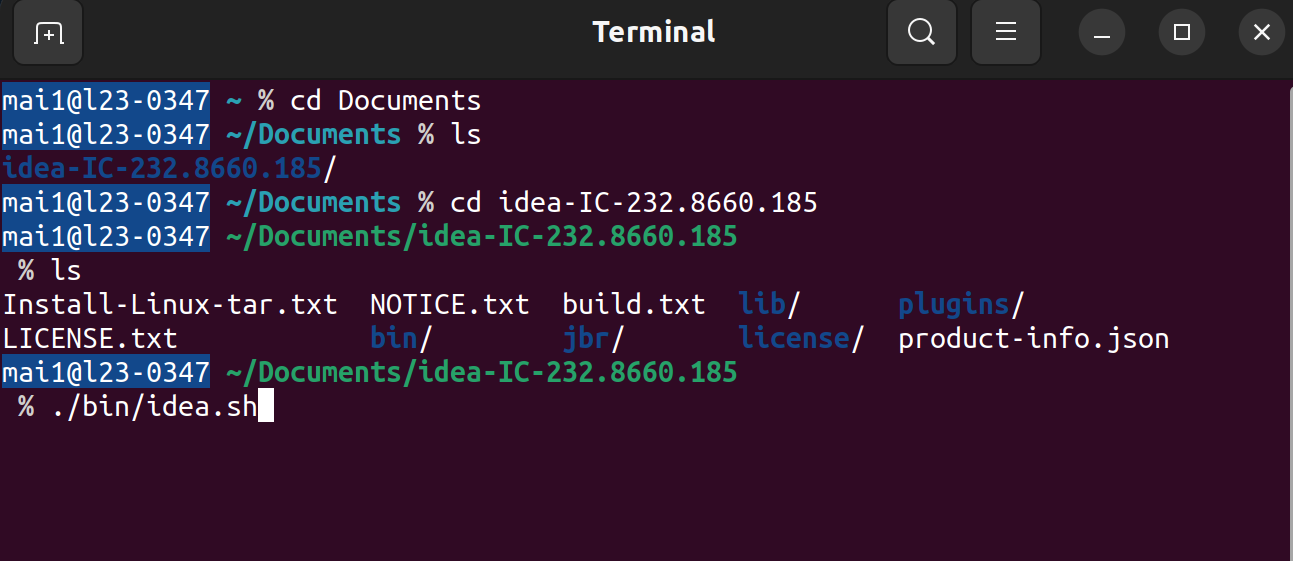
Launch IntelliJ from the file idea.sh:
In the Linux Terminal, go to the folder where you extracted the files.
Enter the ./bin/idea.sh to start the program.
On first launch, IntelliJ may ask you about sharing usage data and importing old settings. If so, pick Do not import settings and click OK.
IntelliJ welcomes you with view that looks like this:

Step 3 of 7: Install the A+ Courses plugin
A plugin named A+ Courses supports your coursework in IntelliJ. The plugin makes it simple to fetch course materials and to submit your programs for automatic grading directly from IntelliJ.
Using the A+ Courses plugin is strongly recommended. Our ebook assumes that you do. (You could choose not to use the plugin, but it’s not convenient for you. See the alternative instructions at the bottom of this page.)
Here’s how to install the plugin:
In IntelliJ’s welcome screen, select Plugins from the list on the left.
A list of available plugins appears. Type A+ Courses in the search field at the top, and the plugin of that name shows up in the list. Click Install.

IntelliJ notifies you about installing a third-party plugin. Click Accept.
Click Restart IDE to finish up the installation.
If that button fails to show up, close IntelliJ yourself and relaunch it.
When restarting, you may see a message about “indexing” not being finished. Don’t worry about it.
Step 4 of 7: Create a course project
IntelliJ suggests that you create or select a project to store your work. Select New Project.
A New Project window pops up, with a list of project types on the left. Let’s set it up as an A+ Courses project. Pick that on the left, then choose O1 2025 from the list of available courses. Click Next.
Step 5 of 7: Language options and the JDK toolkit
You should now see a view where you can select the language you use in O1 and install a toolkit known as the JDK, which you’ll need for programming:
At the top, select a language to use in O1. If you don’t know Finnish, pick English.
In the same view, you’ll see a drop-down menu labeled JDK. In that menu, is there an option with the version number 17?
If it happens that yes, there is, pick that option.
If not, do as illustrated in the two pictures below: Choose in the drop-down menu. For Version, pick 17, and for Vendor pick Amazon Corretto (for example). You’re free to choose where to download the JDK; the default folder should do fine. Finally, click Select, and IntelliJ will fetch the toolkit.
Click Next to continue.
Step 6 of 7: Select a location for the project
At the final screen, under Project Name, enter a suitable name for your course project,
such as o1 or o1assignments. Under Location, you can pick which
folder you’d like IntelliJ to store your files in; the suggested default is fine, unless
you want to change it. Finally, click Create.

Step 7 of 7: Enable assignment submissions
Before you can submit assignments to A+ from IntelliJ, you’ll need to give IntelliJ permission to act in your name in A+. You do that by giving IntelliJ a “passcode” (technically known as an API Access Token):
Open up your profile page in A+.
There’s a long string of characters under API Access Token. Copy the entire string to the clipboard. That’s your personal code, similar to a password. Do not share it with other people.
Now return to IntelliJ and do the following:
On the right-hand side, in the A+ Courses tab, you’ll see a field labeled A+ Token. Paste the token there.
Click Set.
You’ll see tabs appear next to the A+ Courses tab: Assignments, Modules, and News. You’ll be accessing them throughout the course.
Additional Materials for Unusual Circumstances
Why do I keep needing to enter the A+ access token again (on Aalto’s Linuxes)?
IntelliJ stores your A+ access token. However, this storage fails in certain circumstances, causing IntelliJ to prompt you for the token once every session, which is a bit inconvenient.
If this happens to you on Aalto’s Linuxes, the probable cause is that you’ve changed your Aalto password. IntelliJ uses Linux’s built-in password store, but that storage fails after a password change.
You’ll find three alternative solutions below. After you apply one of them, you’ll still need to enter the A+ token once more, but it should then remain in storage even if you close IntelliJ or log off.
Solution 1: Change the storage’s password
If you still remember your first Aalto password, you can change the password storage’s main password to correspond to your current Aalto password:
Open the applications menu and find Passwords and Keys.
Right-click Login and select .
Enter your old password and click Continue.
Enter your current Aalto password (twice) and finish with Continue.
Solution 2: Re-initialize the password storage
If you don’t remember your earlier password, you can create
a new login.keyring file to replace the old password storage.
In Linux’s Terminal, enter these commands to remove the old file:
cd ~/.local/share/keyrings/
cp login.keyring login.keyring.BACKUP
rm login.keyring
Create a new login.keyring with your current Aalto password:
In the applications menu, find Passwords and Keys.
Select and click Continue.
Enter
loginas the file name. When prompted enter your Aalto password and click Continue.
Solution 3: Store the access token differently
You can make IntelliJ store the token differently:
In IntelliJ’s menu, select . Then select Appearance & Behaviour → System Settings → Passwords.
Under Save passwords, pick In KeePass.
The default location that IntelliJ suggests should be OK. Click Apply and OK.
What if A+ Courses does not work on my computer or I don’t want to use it?
If you don’t use the A+ Courses plugin, you’ll have to go to more trouble fetching, configuring, and submitting O1’s programming assignments and when using IntelliJ’s REPL, which we’ll be using a lot.
We strongly recommend that you use the plugin. However, if you don’t, the instructions below may be of use.
Initializing the O1 project (without the A+ Courses plugin)
Install IntelliJ as instructed above, but when you launch it for the first time, do a few things differently.
Before creating a new project, in the Welcome to IntelliJ IDEA screen, install the Scala plugin:
Select Configure –> Plugins.
If Scala does not immediately show up in the list, enter Scala in the search field. Select the Scala plugin and click Install.
After installing Scala, IntelliJ needs to restart. Click Restart IDE.
Now select New Project. In the list of project types on
the left, pick . In the list that shows up,
select . In the following screen, under
Project name type a descriptive name for the project
(e.g., o1). IntelliJ suggests a folder for the project,
which you may edit if you wish.
Next, you’ll have to install appropriate toolkits (a JDK and a Scala SDK):
Click the JDK drop-down menu and select Download JDK.
Under Vendor, pick AdoptOpen JDK (HotSpot). Under Version, pick 17. You’re free to select a download folder. Then click Download and IntelliJ will fetch the selected JDK.
Next to the Scala SDK drop-down menu, click Create. Then choose Download and pick version 3.7. Click OK.
Click Finish. Your new project opens in IntelliJ. IntelliJ shows a tip-of-the-day, which you can Close.
Select . Click the little plus icon + and select scala-sdk-3.7.2.
IntelliJ informs you that the selected toolkit will be associated with your project. Confirm with OK, then Yes.
Importing course settings to IntelliJ (without the A+ Courses plugin)
First, import O1’s project-specific settings:
Exit IntelliJ.
Download the settings file o1_2025_project_settings.zip and save it in a folder of your choosing.
Open the
zipfile. Extract the.ideafolder into your project folder so that its contents (partially) replace the contents of the project folder’s.ideasubfolder.That is, don’t nest the two
.ideafolders and don’t start by deleting the old.ideafolder.)It is possible that your operating system is configured not to show hidden files and folders (whose names begin with a period like
.idea) in folder listings. In that case, you’ll want to adjust that setting.
When extracting the files, you’ll be asked if you want to replace the identically named files already there. Do replace them.
Restart IntelliJ.
Second, you should import O1’s generic IntelliJ settings:
Download the settings file and save it in a folder of your choosing. The file that you need depends on your operating system:
Windows or Linux: o1_2025_ij_settings.zip
MacOS: o1_2025_ij_mac_settings.zip
In IntelliJ, select .
When prompted for a file, choose the settings file that you just downloaded.
Make sure that all the boxes are checked and click OK.
Confirm another Restart.
Fetching O1’s modules into IntelliJ (without the A+ Courses plugin)
At the top of each ebook chapter, you’ll find links to the related course modules (i.e., example programs and base code for programming assignments). With A+ Courses, you don’t need those links, because IntelliJ will download and install the modules in a snap, but you can do the same manually.
Follow the module link and download the corresponding zip file onto your
computer. Extract its contents in your project folder. Once you do that,
the files will show up in IntelliJ’s Project view on the left,
but you still need to mark them as submodules of the overall O1 project.
Open the new module’s folder in IntelliJ. Right-click the file with an
.iml name suffix. Select .
Submitting assignments (without the A+ Courses plugin)
The A+ Courses submits your work directly from IntelliJ. As an alternative, you can use the web forms that you find in the ebook chapters.
Many web browsers let you drag and drop the file straight from IntelliJ into the field below. If it doesn’t work for you, click in the web form and locate the file within your project folder.
Launching the Scala REPL in a specific module (without the A+ Courses plugin)
Without the A+ Courses plugin, IntelliJ does not know how to set launch the REPL so that the code you write is accessible from within the REPL.
If you don’t use the plugin, you’ll need to create a new run configuration when you start working with a new module:
Select .
Click the little plus icon + at the top left.
In the list, select Scala REPL.
In the Name field at the top, enter a descriptive name such as “REPL [Module Name Here]”.
Under Use classpath and SDK of module:, select the appropriate module.
Click Apply and OK.
You can now launch that run configuration to start the REPL. One way to do that is to find it the drop-down menu in IntelliJ’s top right-hand corner and click the play button
 .
.
Apart from taking care of run configurations for the REPL, the A+ Courses
plugin saves your fingers by automatically importing certain relevant
packages of Scala code (such as package o1) after you’ve started the
REPL. Without the plugin, you’ll need to every package that you need
whenever you use the REPL. For example:
import o1.*import o1.goodstuff.*
Chapter 1.6 says more about packages and Scala’s import command.
Feedback
Credits
Thousands of students have given feedback and so contributed to this ebook’s design. Thank you!
The ebook’s chapters, programming assignments, and weekly bulletins have been written in Finnish and translated into English by Juha Sorva.
The appendices (glossary, Scala reference, FAQ, etc.) are by Juha Sorva unless otherwise specified on the page.
The auto-grading of the assignments has been developed by the following Aalto students (in alphabetical order): Riku Autio, Kai Bukharenko, Nikolas Drosdek, Kaisa Ek, Rasmus Fyhrqvist, Joonatan Honkamaa, Antti Immonen, Jaakko Kantojärvi, Onni Komulainen, Niklas Kröger, Kalle Laitinen, Teemu Lehtinen, Mikael Lenander, Ilona Ma, Jaakko Nakaza, Strasdosky Otewa, Kaappo Raivio, Timi Seppälä, Teemu Sirkiä, Onni Tammi, Joel Toppinen, Anna Valldeoriola Cardó, and Aleksi Vartiainen.
The illustrations at the top of each chapter and the similar drawings elsewhere in the ebook are the work of Christina Lassheikki.
The animations that detail the execution Scala programs have been designed by Juha Sorva and Teemu Sirkiä. Teemu Sirkiä and Riku Autio did the technical implementation, relying on Teemu’s Jsvee and Kelmu toolkits.
The other diagrams and interactive presentations in the ebook are by Juha Sorva.
The O1Library software has been developed by Aleksi Lukkarinen, Juha Sorva, and Jaakko Nakaza. Several of its key components are built upon Aleksi’s SMCL library.
The pedagogy of using O1Library for simple graphical programming (such as Pic) is
inspired by the textbooks How to Design Programs by Flatt, Felleisen, Findler, and
Krishnamurthi and Picturing Programs by Stephen Bloch.
The course platform A+ was originally created at Aalto’s LeTech research group as a student project. The open-source project is now shepherded by the Computer Science department’s IT services; the project has received contributions from dozens of Aalto students and others.
The A+ Courses plugin, which supports A+ and O1 in IntelliJ IDEA, is another open-source project. It has been designed and implemented by various students in collaboration with O1’s teachers.
For O1’s current teaching staff, see Chapter 1.1.
Additional credits for this page
This page was written by Niklas Kröger and Juha Sorva. It has since been updated by Antti Immonen, Kaappo Raivio, Joel Toppinen, and others.
