Luet oppimateriaalin englanninkielistä versiota. Mainitsit kuitenkin taustakyselyssä osaavasi suomea. Siksi suosittelemme, että käytät suomenkielistä versiota, joka on testatumpi ja hieman laajempi ja muutenkin mukava.
Suomenkielinen materiaali kyllä esittelee englanninkielisetkin termit.
Kieli vaihtuu A+:n sivujen yläreunan painikkeesta. Tai tästä: Vaihda suomeksi.
Chapter 3.1: Interactive Graphics

Introduction
In this chapter, we’ll get the ladybug moving and do other nice things. But let’s start with a simpler example.
A counter class
Some of the programs in this chapter make use of a simple counter. Such a counter can keep track of any quantity that increases by one at a time, such as how many times a user has clicked the mouse in an application.
The REPL session below creates a counter that starts at zero and increases by one every
time its effectful method advance is invoked:
val firstCounter = Counter(0)firstCounter: Counter = value 0
firstCounter.valueres0: Int = 0
firstCounter.advance()firstCounter.valueres1: Int = 1
firstCounter.advance()firstCounter.advance()firstCounter.valueres2: Int = 3
The initial value doesn’t need to be zero:
val secondCounter = Counter(100)secondCounter: Counter = value 100
secondCounter.advance()secondCounter.advance()secondCounter.advance()secondCounter.valueres3: Int = 103
Given what we know from earlier chapters, we can implement class Counter like this:
class Counter(var value: Int):

  def advance() =
    this.value = this.value + 1

  override def toString = "value " + this.value

end Counter
A new role: the stepper
The “path” of a stepper is predetermined.
The variable value in class Counter has a role that’s a bit different from any of the
other variables we’ve used so far. (Cf. the roles of variables from Chapter 2.6.) Starting
from a given number, it always increases by one. With the same initial value, the sequence
is invariably the same; e.g., 0, 1, 2, 3, etc.
A stepper (askeltaja) is a variable whose value advances along a preordained sequence. Assuming we know the initial state, we also know what the rest of the sequence is. A typical stepper follows a sequence of increasing or descreasing integers, but other kinds of steppers exist, too.
Steppers are common. Our counter class shows an archetypal use case for a stepper: tracking an increasing quantity. Later in O1, you’ll see another frequent use: tracking ordinal numbers.
Just like the value of a gatherer (Chapter 2.6), a stepper’s new value depends on its previous value. But unlike a gatherer, a stepper doesn’t depend on external factors (such as inputs). It’s value always follows its preset path.
My Program Notices When I Click
As an experiment, let’s write a program that counts the user’s mouse clicks and makes visible changes to the GUI display as the clicks accumulate.
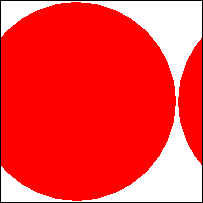
A single Counter object will do as our domain model. Let’s make our GUI draw a circle
that grows in size with each click.
We can get started by defining a GUI view and a main function as taught in Chapter 2.7:
val clickCounter = Counter(5)

val blueBackground = rectangle(500, 500, Blue)

object clickView extends View("Click Test"):
  def makePic = blueBackground.place(circle(clickCounter.value, White), Pos(100, 100))
end clickView

@main def runClickProgram() =
  clickView.start()
makePic constructs an image by placing a white circle against
a blue background. The circle’s diameter equals the counter’s
current value (initially five).
To make our GUI react to mouse clicks, we need to define an event handler (tapahtumankäsittelijä) for it. An event handler is a piece of code that runs whenever a new event (tapahtuma) occurs; events include mouse clicks and movements, key presses, and so forth.
Let’s add an event-handler method to our clickView object:
object clickView extends View("Click Test"):

  def makePic = blueBackground.place(circle(clickCounter.value, White), Pos(100, 100))

  override def onClick(locationOfClick: Pos) =
    clickCounter.advance()
    println("Click detected at " + locationOfClick + "; " + clickCounter)

end clickView
Our event handler is a method called onClick. Any View object
is capable of detecting events in the GUI; the object calls this
method whenever a click event occurs. We’ll take a closer look at
this method in just a moment.
This program is in package o1.counter in the IntroApps module. Run the program, click
about with the mouse, and observe what happens. Keep an eye on both the graphical window
and the text console.
Now that you’ve tried the program, let’s inspect the event handler:
override def onClick(locationOfClick: Pos) =
  clickCounter.advance()
  println("Click detected at " + locationOfClick + "; " + clickCounter)
To react to mouse clicks, we must give the method exactly
this name. The Pos parameter is important, too. Now the GUI
library recognizes our method as the one to call when a click
event occurs and passes the event’s coordinates as a parameter.
The method’s body defines what we want this application to do when a click happens. Here, we command our counter to record the click and also report the event in the text console.
Many event handlers receive additional information about the event as a parameter. In this case, the parameter indicates the coordinates where the mouse was clicked. This application does nothing with this information apart from printing it out.
We’re free to name the event handler’s parameter variable as we please, just like we’re free to name any other local variables.
Just like with toString methods (Chapter 2.5), we must prefix
the method with override. This is because the View class already
defines a number of default event handlers, including onClick.
These default handlers simply ignore all events, because there is
no generic way to react to an event; the desired reaction depends
entirely on the application. So what we do here is override the
default implementation with our own application-specific method.
We didn’t need to call onClick explicitly. The method is invoked automatically whenever
the user clicks. This automatic behavior is provided by the View class. Each View
object knows how to function as its own event listener (tapahtumankuuntelija):
it is notified of relevant events and calls handlers such as onClick.
My Program Notices When I Press a Key
An event handler for the keyboard
We can handle a key press much like we handled a mouse click. We just need a slightly different event handler:
override def onKeyDown(pressedKey: Key) =
  println("Pressed down: " + pressedKey)
This event handler must be named onKeyDown. It takes a
parameter of type Key. Different Key objects correspond
to the different keys on a keyboard.
This example handler just prints out a report of which key was pressed.
FlappyBug, Part 5 of 17: The Bug Moves
Open up the version of FlappyBug’s GUI that you wrote earlier (Chapter 2.7). As things
stand, the program has a flappyView object that knows how to produce a picture of the
game world — but nothing else.
On that
flappyViewobject, add theonKeyDownevent handler from the previous section. Run the program and observe what appears in the text console on every key press.Remove the print command from the event handler. Instead call the
activateBugmethod of theGameobject. Now pressing any key on the keyboard should activate the bug that’s linked to theGame.Run the modified program. Witness:
The bug moves!
The bug flies off-screen after just a few key presses.
The bug doesn’t fall. The obstacle doesn’t move. Time stands still in the game world. You haven’t yet called the
timePassesmethod of theGameobject. (We’ll get to that momentarily.)
Submit your code.
A+ presents the exercise submission form here.
My Program is Ticking
Not all events are triggered by the user. The passing of a moment is an event of sorts, too.
A ticking app
The package o1.counter in IntroApps contains a “Ticking App” that counts clock ticks
rather than mouse clicks. Run the program, then read on to see how it works.
val tickCounter = Counter(0)
val blackBackground = rectangle(500, 500, Black)

object tickView extends View("An app that ticks"):

  def makePic =
    blackBackground.place(circle(tickCounter.value, White), Pos(250, 250))

  override def onTick() =
    tickCounter.advance()

end tickView


@main def runTickProgram() =
  tickView.start()
This program doesn’t have an onClick handler; it has onTick
instead. This method takes no parameters.
The View object uses a timer that fires a clock tick approximately 24 times per second.
Every time this happens, the view calls its own onTick handler, which makes our counter
advance.
Assignment: ticking and rotating
Edit the program’s makePic method so that:
The shape that “approaches” the user is no longer a circle but a square whose edge length equals the counter’s current value.
The square not only grows in size but also rotates one degree clockwise on each clock tick. Use the
clockwisemethod introduced in Chapter 2.3 to rotate the square, and pass in the counter’s value as a parameter.
Test the edited program. Then try changing the clock speed: pass the number 50 as
a second constructor parameter to the View object. Now onTick gets called about
fifty times per second, making the shape to gyrate and grow faster.
A+ presents the exercise submission form here.
More things to try
Try different clock speeds. Larger numbers speed up the ticking, smaller numbers slow it down. A value between zero and one means the application’s clock ticks at a rate slower than once per second.
Try a different picture in place of the square. For example,
scaling a rotating face.png to an increasingly large size makes
for a rather disturbing animation. To adjust an image’s size, you
can use either the scaleBy method from Chapter 2.3 or scaleTo,
which expects the desired width and height as parameters (in pixels).
Who calls makePic, and when?
I guess View updates itself, since the
pictures move in the window even though I
haven’t called makePic...
Does a View call makePic whenever any of
the onSomeEvent methods has been called,
like onClick or onTick?
A View object is responsible for updating the visible graphics
whenever one of its event-handler methods is called.
After each event, the View calls its own makePic method and
displays the image that makePic returns. This happens automatically
on clock ticks and on user-generated GUI events once you’ve started
the view. You must define a makePic method on Views.
Any onTick method that you define gets called multiple times per
second (unless otherwise specified). It triggers a makePic call
each time.
Even though you don’t need to call a View’s event-handling
methods and makePic directly, they are methods just like any
other. (For example, the tester code in A+ doesn’t actually start
your GUIs and display them onscreen; instead, it calls makePic,
onTick and the rest directly.)
FlappyBug, Part 6 of 17: Time Passes
Implement an onTick method on the flappyView object. The method should just call
the timePasses method of the app’s game object. (Since this is the onTick method,
the view object will automatically call it on every tick of the clock.)
Try it.
Submit it.
A+ presents the exercise submission form here.
FlappyBug, Part 7 of 17: At the World’s Edge
Task description
FlappyBug is starting to look like a game, but there’s much to be done still. In this assignment, you’ll improve the app as follows:
Prevent the bug from rising higher than the top edge of the visible game world. The bug’s center must not have a negative y coordinate.
Prevent the bug from burrowing into the ground. The bug’s center must not have a y coordinate in excess of 350.
Follow the steps below to accomplish that.
Phase 1: an auxiliary method
Add an effectful method move in class Bug:
It takes a
Doubleparameter that indicates how much should be added to the bug’s y coordinate.It places the bug at new coordinates, which it computes from the old ones by adding to the y coordinate as indicated. A positive parameter value sends the bug downwards, a negative value upwards.
Phase 2: refactoring
Reimplement the methods flap and fall so that each method calls move, passing in
the appropriate number. These methods should continue to do exactly the same as before,
even though their implementation is different. You can implement each method just by
calling move in the method body. (Do not make other changes to flap or fall. The
flap method must still take one parameter.)
In fancy terms, what you do here is refactor (refaktoroida) your program. Refactoring means improving a program’s quality without changing its functionality. A common reason to refactor code is to make it easier to extend or modify later.
After refactoring, it’s wise to check that it still works; this is known as regression testing (regressiotestaus). For now, we’ll accept a trial run as sufficient testing. Run your program; it should work as before.
Phase 3: get to know clampY
Every Pos object has a clampY method. It takes two numbers as parameters: a lower and
an upper bound for the y coordinate:
val testPos = Pos(10, 50)testPos: Pos = (10.0,50.0)
testPos.clampY(5, 30)res4: Pos = (10.0,30.0)
testPos.clampY(100, 200)res5: Pos = (10.0,100.0)
testPos.clampY(0, 100)res6: Pos = (10.0,50.0)
clampY returns a new position whose x coordinate is the same as
that of the original Pos but whose y coordinate has been squeezed
into the given bounds. In our example, the bounds are 5 and 30, so
the original’s excessive y coordinate gets replaced by 30.
The same principle applies if the original coordinate is smaller than the lower bound.
If the coordinate is already within bounds, the result is equal
to the original Pos.
clampX
There is also a clampX method, but you won’t need it now.
testPos.clampX(100, 200)res7: Pos = (100.0,50.0)
Phase 4: the actual solution
With the groundwork done, the actual solution is but a few characters long.
Our goal is to prevent the y coordinate from getting too large or too small. You can address both sides of the problem at once by clamping the bug’s y coordinate to the desired interval (0–350).
Make that small change in the move method.
What about flap and fall? Assuming you did as suggested in Phase 2 above, those
methods now also abide by the rules, since their implementation is based on move,
whose code now governs all the bug’s movements.
An optional hint
Make sure to assign the right value to the variable that stores the bug’s location. The new location should be affected by both the bug’s movement and the clamping.
As you specify that sequence of operations, keep in mind that
Pos objects are immutable (Chapter 2.5). Be sure to apply
the latter operation to the result of the former.
A+ presents the exercise submission form here.
FlappyBug, Part 8 of 17: The Thrill of Speed
Just hopping up and down isn’t fit for a bug.
One way to introduce forward motion into our game would be to move the bug sideways along
the x-axis. But let’s try something different. Instead, we’ll make the background slide
from right to left. The Pic class has a method that’ll serve us nicely:
Groundwork: shiftLeft
val testPic = circle(200, Red)testPic: Pic = circle-shape
val shifted = testPic.shiftLeft(25)shifted: Pic = circle-shape (transformed)
show(shifted)
The illustration on the right shows the new image returned by shiftLeft, in which the
original image’s contents have been moved leftwards by the given amount. The part that
would have moved off the left edge now appears on the right.
You can probably guess what’s coming: we’ll take the familiar picture of sky, ground, and tree, and shift it to the left as the clock ticks, yielding new versions of the background.
A shifting background
Make three changes to FlappyBug’s GUI.
Add a variable to the
flappyViewobject. Call itbackground. Initialize it with the value ofscenery:var background = scenery
This is a
var. You’ll use this variable to keep track of which image is currently used as the game’s background. When the game starts, the background is the familiar image with the tree right in the middle.Reminder: to make
backgrounda variable on theflappyViewobject, put it insideflappyView’s definition. But don’t put it withinmakePicor the other method definitions — that would make it a local variable that only exists while the method is running.In
onTick, add a command that updates the game’s background. Specifically, every time the clock ticks (i.e., wheneveronTickis called), the background should shift left by exactly two pixels.I’m stuck. What command should I use?
The following expression forms the new, shifted background:
this.background.shiftLeft(2). So you need to assign that to bebackground’s new value. Like so:this.background = this.background.shiftLeft(2)
If you wish, you can also define a constant and use it instead of the magic number two.
The above commands do create new versions of the background image and adjust the
backgroundvariable, just as intended. However, if you run your program now, you won’t see any visible change. This is becausemakePicstill uses the originalsceneryto construct the image that it shows to the user. Substitutebackgroundforscenery, and voilà!
A+ presents the exercise submission form here.
FlappyBug, Part 9 of 17: The Bug Accelerates
The plan
Our bug falls at a steady, slow, unnatural pace. Let’s make it accelerate towards the ground between flaps. Here’s the basic idea:
The bug will have a velocity: how many pixels it moves vertically on each clock tick. A positive velocity means downward motion; a negative velocity means the bug moves upwards.
On each tick, we add two to the bug’s speed, pulling it downwards ever faster.
When the bug flaps its wings, it gets an upward velocity. That is, the bug doesn’t immediately change location on a wing flap; instead, calling
flapcauses the bug’s velocity to change.
See below for more specific instructions.
Add a variable for velocity
In class Bug, add an instance variable that keeps track of the bug’s current vertical
velocity: how many pixels per tick does the bug fall or rise per tick?
Set the variable to an initial value of 0.0. Give it the name yVelocity.
Revise the fall method
Modify the fall method so that it does the following.
First increases the value of
yVelocity. The new value should be two more than the old. (For example, ifyVelocityis currently 0.0,fallshould change it to 2.0. Or if it’s 8.0, it should become 10.0.)Then moves the bug vertically by an amount that is equal to
yVelocity’s new value. (For example, ifyVelocityis 6.0, the bug’s y coordinate should increase by six.) Since you wrote amovemethod in this class in an earlier assignment, just calling that method will do the trick.
Those commands should replace the old implementation, which dragged the bug downwards at a constant speed.
Reimplement the flap method
Edit the flap method so that it no longer moves the bug fifteen pixels upwards or
indeed anywhere else.
In the existing version of the program, flap’s parameter indicates how much the bug
moves right away. Modify the method so that the parameter instead gives the bug an
upward (i.e., negative) velocity. For instance, if you pass 15 as a parameter to flap,
the method should not immediately move the bug at all; instead, the bug should get a
velocity of -15. Assign that value to yVelocity.
The new version of flap should completely ignore the bug’s earlier location and
velocity. (Compare: the old version of flap computed a new location for the bug;
that new location was affected by both the parameter value and the bug’s earlier
location.)
Try the game! You’ll notice a substantial change in how the bug behaves.
Um, I didn’t quite get what I’m supposed to do to flap...
The body of the revised flap method should consist of just
a single assignment command that sets the value of yVelocity.
The new value for yVelocity should be the opposite of what
flap receives as a parameter. (Since flap receives positive
numbers as parameters, the new velocity will be negative.)
It does not matter what yVelocity’s earlier value was; it
should get replaced by the new velocity.
This method must no longer affect the bug’s location (pos).
Remove the old code that changed the location.
Do not edit the activateBug method in class Game. That
method should still call the bug’s flap method and pass in
the number fifteen, just like before. The difference is what
flap does with its parameter.
A side note about move
It turns out that the helper method move is no longer quite
as useful in this version of FlappyBug as it was in the earlier
one. Such things happen as programs evolve. Even so, it’s okay
to leave move in and call it from fall. Leave it there.
A+ presents the exercise submission form here.
We’ll return to FlappyBug in Chapter 3.2.
My Program Notices the Mouse (and Other Stuff)
The optional activities below will teach you, among other things, how to make your application respond to mouse movements. That isn’t necessary for O1, but you’ll probably want to try your hand at some of these assignments anyway.
Optional assignment: something’s stuck to my mouse
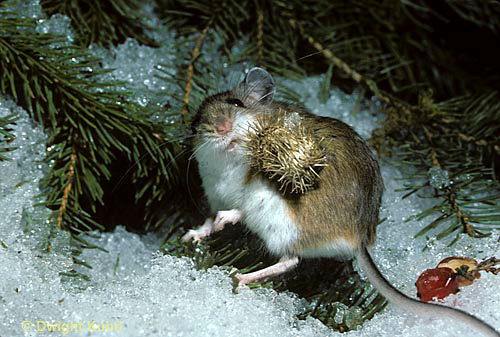
photo: Dwight Kuhn
In this toy example, we’ll use a simple class to model an object that we’ll call a burr:
class Burr:
  var location = Pos(0, 0)    // most-recent holder
A burr object’s only attribute is its location, which is mutable:
val testBurr = Burr()testBurr: Burr = o1.burr.Burr@34ece05e
testBurr.locationres8: Pos = (0.0,0.0)
testBurr.location = Pos(10, 50)testBurr.locationres9: Pos = (10.0,50.0)
Look in the IntroApps module. The above class is there, as well as a file
named BurrApp1.scala. Build on that starter code to produce an application
with the following behavior:
The title string of the
Viewwindow is"Burr App".The GUI is a
Viewthat draws a green circle (burrPic) on a white background (background) at the burr’s location.The view’s
makePicmethod must return an image where the burr pic is correctly positioned against the background.Please make sure to use the name
windowfor your specializedViewobject. (This helps us with the automatic assessment.)
The view has the following event handler method:
It’s called
onMouseMoveand receives, as its only parameter, aPosobject that indicates the mouse cursor’s current position (just likeonClickdid above).It assigns the mouse location to the burr’s location attribute. The burr will thus follow the mouse.
If you want, you can also add a
printlninonMouseMoveto print the parameter value. This helps you observe how often this event handler is called as you move the mouse around.
To clarify:
onMouseMovedoes no image manipulation at all. It’smakePic’s job to form each new image, using the latest coordinates thatonMouseMovehas given the burr.
A+ presents the exercise submission form here.
Crosshairs
Instead of the green circle, let’s draw two lines that meet at the mouse cursor.
You can draw lines with the line function from package o1. This function
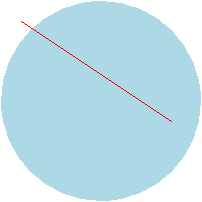
works much like circle, rectangle, and the rest. Here’s an example:
val myLine = line(Pos(0, 0), Pos(150, 100), Red)myLine: Pic = line-shape
val backdrop = circle(200, LightBlue)backdrop: Pic = circle-shape
val myPic = backdrop.place(myLine, Pos(20, 20))myPic: Pic = combined pic
The outcome should look like this. The lines move with the mouse cursor.
Open BurrApp2.scala in the o1.burr.crosshairs package and copy the
previous assignment’s solution there. Then edit makePic to draw not
burrPic but two black (Black) lines:
One line should start at the top edge exactly above the mouse cursor and reach all the way straight down to the bottom of the view.
The other line should begin at the edge to the left of the cursor and reach all the way to the right-hand edge.
Instructions and hints:
Use
placeto position the lines. As you do so, note that the method places the starting point of the line — not its middle — at the given coordinates.There’s no need to make any changes to
onMouseMove.
A+ presents the exercise submission form here.
Arithmetic on Pos objects
In BurrApp3.scala from package o1.burr.pointer, write an application that
resembles the previous two but doesn’t draw a burr or crosshairs. Instead, it
draws a single black line from the view’s center towards the mouse cursor —
but only until the halfway point between the center and the cursor. That is,
the line “points towards” the cursor but doesn’t reach it.
This assignment calls for a bit of arithmetic on coordinates. We recommend that
you use the methods add, multiply, and/or divide from class Pos. You
can first experiment with them in the REPL:
Try calling
addso that you pass a reference to anotherPosobject as parameter:pos1.add(pos2).Try multiplying or dividing each of the coordinates by a number:
pos1.multiply(number)orpos1.divide(number).
A+ presents the exercise submission form here.
A slow burr
In BurrApp4.scala from package o1.burr.slow, write an application
where a green circle follows the mouse cursor, much as in BurrApp1.
However, instead of instantly appearing where the mouse currently is,
the burr will now gradually slide towards the cursor.
Again, take the code of BurrApp1 as your starting point. Make
these changes:
Give the
windowobject an additional variable that keeps track of the mouse cursor’s most recent observedPos. You can initially set it to (0,0). Call the variablelatestCursorPos, for example.Edit
onMouseMoveso that it does nothing more than assign its parameter value (i.e., the cursor’s current position) to thelatestCursorPosvariable. In other words: This app doesn’t actually move the burr whenever the mouse moves. At that point of time, it just records the latest movement of the mouse.Add an
onTickmethod that moves the burr. The burr’s new location is the point that is ten percent of the way from its old location towards the latest cursor position.For instance, if the burr is now at (10,20) and
latestCursorPosis (100,100), the burr moves to (19,28).Here, too, you can use the
Posmethods mentioned in the previous assignment.
A+ presents the exercise submission form here.
Optional assignment: a painting app
Take a look at the following pseudocode class that represents “art projects”. An art project, here, is an image that evolves incrementally as little dabs of color are added to it. The pseudocode already contains quite a bit of actual Scala, too.
class ArtProject(canvas: Pic):

  var image = canvas              // gatherer
  var brush = circle(10, Black)   // most-recent holder

  def paint(where: Pos) =
    Form a new picture by taking the current image and positioning the brush pic
    onto it at the given coordinates. This new picture becomes the new image.

end ArtProject
The variable image is a gatherer: it
initially holds just the original canvas,
but small images (“brush strokes”) are
gradually placed on it. The image stored
in the variable is a combination of the
canvas and all the brush strokes that
have accumulated so far. (At least, this is
what the variable should do, but we haven’t
yet implemented the method that actually
adds the brush strokes.)
The “brush” is a picture. A new copy of the
brush is positioned onto the current image
whenever the paint method is invoked. The
default brush is small, round, and black.
The algorithm for adding paint to the canvas
has been given as pseudocode here. You’ll
need to implement it yourself in the o1.art
package, which you’ll find in the IntroApps
module.
You’ll also find a GUI in PaintingApp.scala. It creates a View of an
ArtProject object that serves as the domain model. The given code is a
good start, but it lacks an event handler.
To summarize, here is what you need to do:
Implement the
paintmethod of classArtProject.Add an
onMouseMovehandler to the GUI. It should just call thepaintmethod of the art project that is displayed in theView, so that a brush stroke appears at the mouse cursor.Test your program.
A+ presents the exercise submission form here.
Changing colors
Modify the painting app so that the user can change the drawing color with a mouse click.
First edit class ArtProject so that it tracks the currently active color and
cycles to the next color on request. More specifically:
Add these two instance variables at the top:
var colorIndex = 0
val palette = Buffer(Black, Red, Green, Blue)
The
palettevariable holds a reference to a buffer that stores all the colors available to the app’s user.At any given time, a single color from the palette is active; the variable
colorIndexstores the index of the active color. In this assignment, we’ll usecolorIndexas a stepper that advances through the palette in order and wraps back to the beginning: 0, 1, 2, 3, 0, 1, 2, 3, 0, 1, and so on.Add an effect-free method named
drawingColorthat takes no parameters and returns the currently active color. That is, the method returns theColorindicated bycolorIndex(initially black).Implement an effectful method
changeColor. This method:Advances
colorIndexto the next integer. (Use the modulo operator to wrap the number back to zero.)Updates the value of
brushto a differently colored circle of the same size. (CalldrawingColorto get the new color.)Takes no parameters (but as an effectful method, requires an empty parameter list; Chapter 2.6).
Finally, add an onClick event handler to the GUI. This method
should (ignore its Pos parameter and) just call changeColor
on the art project. See clickView at the beginning of this
chapter for guidance.
A+ presents the exercise submission form here.
GUI events in more detail
Modify the program from the previous assignment. In the new version, the user still clicks to change the brush color. However, the new color isn’t the next one in the palette. Instead, the color is determined by the number of successive clicks: a single click selects the first color in the palette, a double click the second, a triple click the third, and so forth.
First, edit class ArtProject: add an Int parameter to changeColor
and modify the method’s body so that it doesn’t cycle to the next color
but instead sets colorIndex to match the parameter value.
Then replace the onClick method in painterView with this one:
override def onClick(clickEvent: MouseClicked) =
  artwork.changeColor(clickEvent.clicks)
Until now, our onClick methods have received just the click’s
location as a parameter. In many cases, that’s all the information
about a mouse click that we need. But sometimes we want to take a
more detailed look at a GUI event — for instance, to see the
number of successive clicks:
We can define an event handler that receives a reference
to an object that represents the entire event, as the
MouseClicked object does here.
A MouseClicked object provides access to various
attributes of the event. Here, the attribute we need is
clicks, which is the number of successive clicks as an
Int.
Test your program. Try clicking a lot of times in quick succession.
Did you take this possibility into account when you rewrote changeColor?
If not, do something about it now; if yes, you may wish to try and
see what would have happened if you had failed to consider high
click counts.
A+ presents the exercise submission form here.
If you wish, you can continue exploring event handlers and event
objects on your own. For example, the documentation
of class View lists a number of event-handler methods (whose
names start with on).
Summary of Key Points
When a user interacts with a graphical user interface, a GUI event is fired. A GUI event can be a key press or a mouse movement, for example. The ticks of an application’s internal clock are events, too.
An event handler is a subprogram that responds to events by determining how the program should react.
An event handler may receive parameters such as the precise location of an event.
You can define event handlers on the
Viewobjects that we use in O1.
Writing graphical programs is fun.
Links to the glossary: model, user interface; graphical user interface (GUI); GUI event, event handler, event listener; refactoring; stepper.
Create stuff!
The tools you’ve just learned give you the power to do a lot more than what was required or suggested. Go forth and create! Edit one of the example programs or invent something entirely of your own making.
Feedback
Please note that this section must be completed individually. Even if you worked on this chapter with a pair, each of you should submit the form separately.
Credits
Thousands of students have given feedback and so contributed to this ebook’s design. Thank you!
The ebook’s chapters, programming assignments, and weekly bulletins have been written in Finnish and translated into English by Juha Sorva.
The appendices (glossary, Scala reference, FAQ, etc.) are by Juha Sorva unless otherwise specified on the page.
The auto-grading of the assignments has been developed by the following Aalto students (in alphabetical order): Riku Autio, Kai Bukharenko, Nikolas Drosdek, Kaisa Ek, Rasmus Fyhrqvist, Joonatan Honkamaa, Antti Immonen, Jaakko Kantojärvi, Onni Komulainen, Niklas Kröger, Kalle Laitinen, Teemu Lehtinen, Mikael Lenander, Ilona Ma, Jaakko Nakaza, Strasdosky Otewa, Kaappo Raivio, Timi Seppälä, Teemu Sirkiä, Onni Tammi, Joel Toppinen, Anna Valldeoriola Cardó, and Aleksi Vartiainen.
The illustrations at the top of each chapter and the similar drawings elsewhere in the ebook are the work of Christina Lassheikki.
The animations that detail the execution Scala programs have been designed by Juha Sorva and Teemu Sirkiä. Teemu Sirkiä and Riku Autio did the technical implementation, relying on Teemu’s Jsvee and Kelmu toolkits.
The other diagrams and interactive presentations in the ebook are by Juha Sorva.
The O1Library software has been developed by Aleksi Lukkarinen, Juha Sorva, and Jaakko Nakaza. Several of its key components are built upon Aleksi’s SMCL library.
The pedagogy of using O1Library for simple graphical programming (such as Pic) is
inspired by the textbooks How to Design Programs by Flatt, Felleisen, Findler, and
Krishnamurthi and Picturing Programs by Stephen Bloch.
The course platform A+ was originally created at Aalto’s LeTech research group as a student project. The open-source project is now shepherded by the Computer Science department’s IT services; the project has received contributions from dozens of Aalto students and others.
The A+ Courses plugin, which supports A+ and O1 in IntelliJ IDEA, is another open-source project. It has been designed and implemented by various students in collaboration with O1’s teachers.
For O1’s current teaching staff, see Chapter 1.1.
Additional credits for this page
The FlappyBug game is inspired by the work of Dong Nguyen.
The optional assignment where you draw a line from the center towards the cursor is a Scala variant of a programming exercise by Daniel Shiffman.

Our domain model is a
Counterobject whose value starts at, say, five.