First steps
- Main questions:
How to run a template course and how to install the required software in your computer?
- Topics:
In this section, we will present the following topics:
- Material:
In this chapter, we do not provide additional material.
- Requirements:
You need basic computational skills to install some software in the Linux OS, and some knowledge on git.
- Estimated working time:
From 30 min to 1 hour.
The first step to start authoring your own course is to download the Aplus course template from GitHub. This course template will be used as a blueprint to build your own course and subsequently publish it in the A+ e-learning system.
It is important to know that the course content is created with the help of a markup language called RST. RST is simpler in its syntax than HTML, and is also highly customizable, which is a tremendous opportunity for creating well-tailored exercises and course material. A more extensive description of the RST markup language will be presented in later chapters of this manual.
If you are already running this course template on your computer, and seeing the content in the web browser http://localhost:8000/def/current, congratulations! You can skip the rest of this page.
Knowledge prerequisites
This manual assumes you have some basic UNIX operating system skills. It also assumes that you can use GNU/Linux (Ubuntu, Debian) or modern Mac OS, and assumes that you know some basic Unix terminal commands. You also need to know how to install software in your computer.
In this chapter, we will teach you how to install and how to use the software.
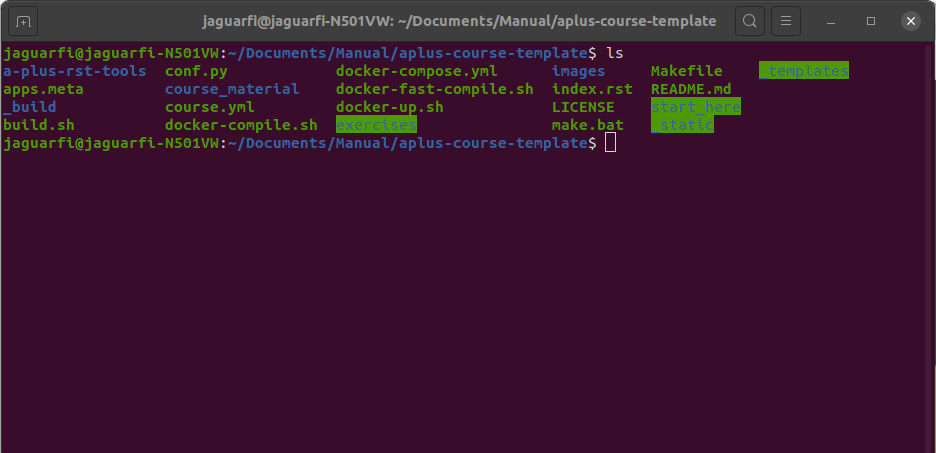
The above image list the content of the Aplus course template directory, in a terminal window.
Important: UNIX Shell, Terminal emulator
The terminal is used for moving and copying files, starting software
and examining their error messages. To be precise, there is the terminal
emulator window and inside it another program, shell, which reads
user commands and acts according to them. If you are new to this, read the
"Learning the shell" LinuxCommand.org
tutorial parts 1-6.
Software prerequisites
The first step to start authoring a course is to install some required software on your computer. The first two software you need to install are git. You can install git by running the following command in your computer.
sudo apt-get update
sudo apt-get install git
git --version
You can also consult the official documentation for installing git
Warning
If you are using an Aalto's computer, you can install some of the required software by running the
aptdcon --install command. It works with packages available in the default repositories. Therefore, docker cannot
be installed that way. You will need administrator rights to install it. More information at scicomp.aalto.fi.
All other software runs inside Docker containers. Therefore, you must install Docker for Mac/Windows or docker-ce & docker-compose for Linux.
You also need to install a Text editor (VS Code is recommended). You can find more information about the most convenient text editor to create RST documents at the end of this module.
Cloning this codebase with git
A good way to start is to clone the Aplus course template with git and begin to work on it.
To clone the course template using a SSH key, execute the following command:
git clone git@github.com:apluslms/course-templates.git
cd course-templates
You can also clone the public GitHub repository by executing the following command
git clone https://github.com/apluslms/course-templates.git
cd course-templates
Read more about how to clone GitHub repositories
Next step, you need to get a-plus-rst-tools.
git submodule init
git submodule update
Now all the course material is in RST format. Every time the RST part changes, you need to recompile it. You must do it also the first time. Open your terminal, go to the course directory and type the following command.
./docker-compile.sh
This command runs Sphinx inside a Docker container. Sphinx reads all RST files. It produces compilation results into new directory _build. The _build directory contains three subdirectories:
doctrees has intermediate results of the compilation.
html has the HTML versions of the RST files.
yaml contains configuration files in YAML format. These configuration files are used to set up the different services that are used in the course with A+, e.g., MOOC-Grader, Acos and Rubyric.
For now, you can test the result by running A+ on your own computer:
./docker-up.sh
Now A+ runs at http://localhost:8000. Open that address with your web browser. You must login with any of the existing accounts used for the development of the courses:
username |
password |
privileges |
|---|---|---|
root |
root |
admin |
teacher |
teacher |
teacher |
assistant |
assistant |
course assistant |
student |
student |
student |
Workflow
The usual workflow for creating/editing a course is the following:
Open your text editor, a terminal and a web browser.
Edit some RST files in your text editor.
Give command
./docker-compile.shin the terminal.Give command
./docker-up.shin the terminal.Go to
http://localhost:8000/in the web browser to view A+ running on your machine.Examine the changes you made in A+.
Press Q or Ctrl
+C in the terminal to quit and remove data or S or ESC to quit and keep data.Go to step 2 if you wish to continue editing.
Give command
git add -uin the terminal to mark all changed files to be added into your local git repository.Give command
git commit -m "message"in terminal. Replacemessagewith a short description (preferably less than 60 characters) on what you have done.Create a repository in version.aalto.fi
Add the remote branch
Push the changes to version.aalto.fi by running the
git pushcommand.